One of the best ways to help improve traffic to your website is through a blog. In this tutorial we’ll show you how you can easily add your own blog posts.
Step 1: The Dashboard
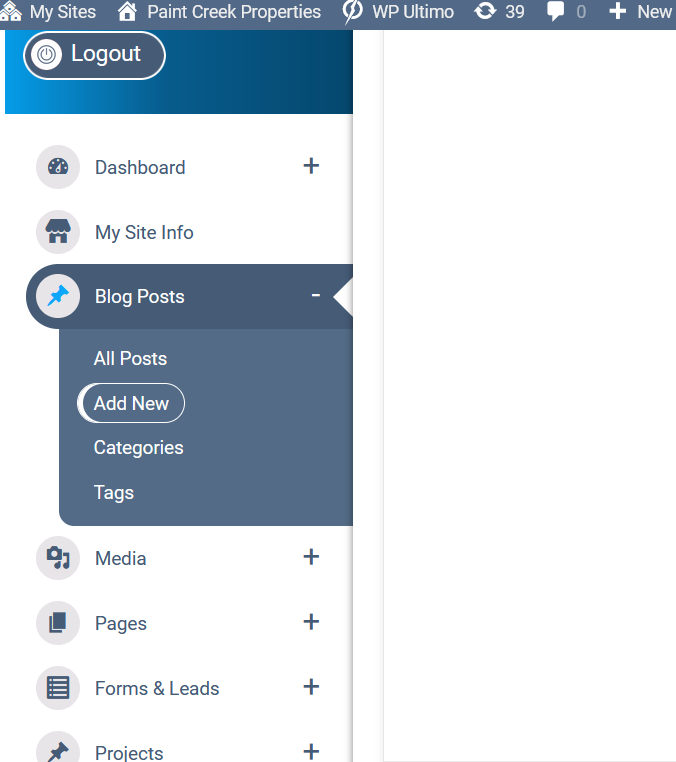
In your dashboard, there’s a menu item in the left menu called ‘Blog Post’. Hover over that and click ‘Add New’
Step 2: Chose How To Build Your Post
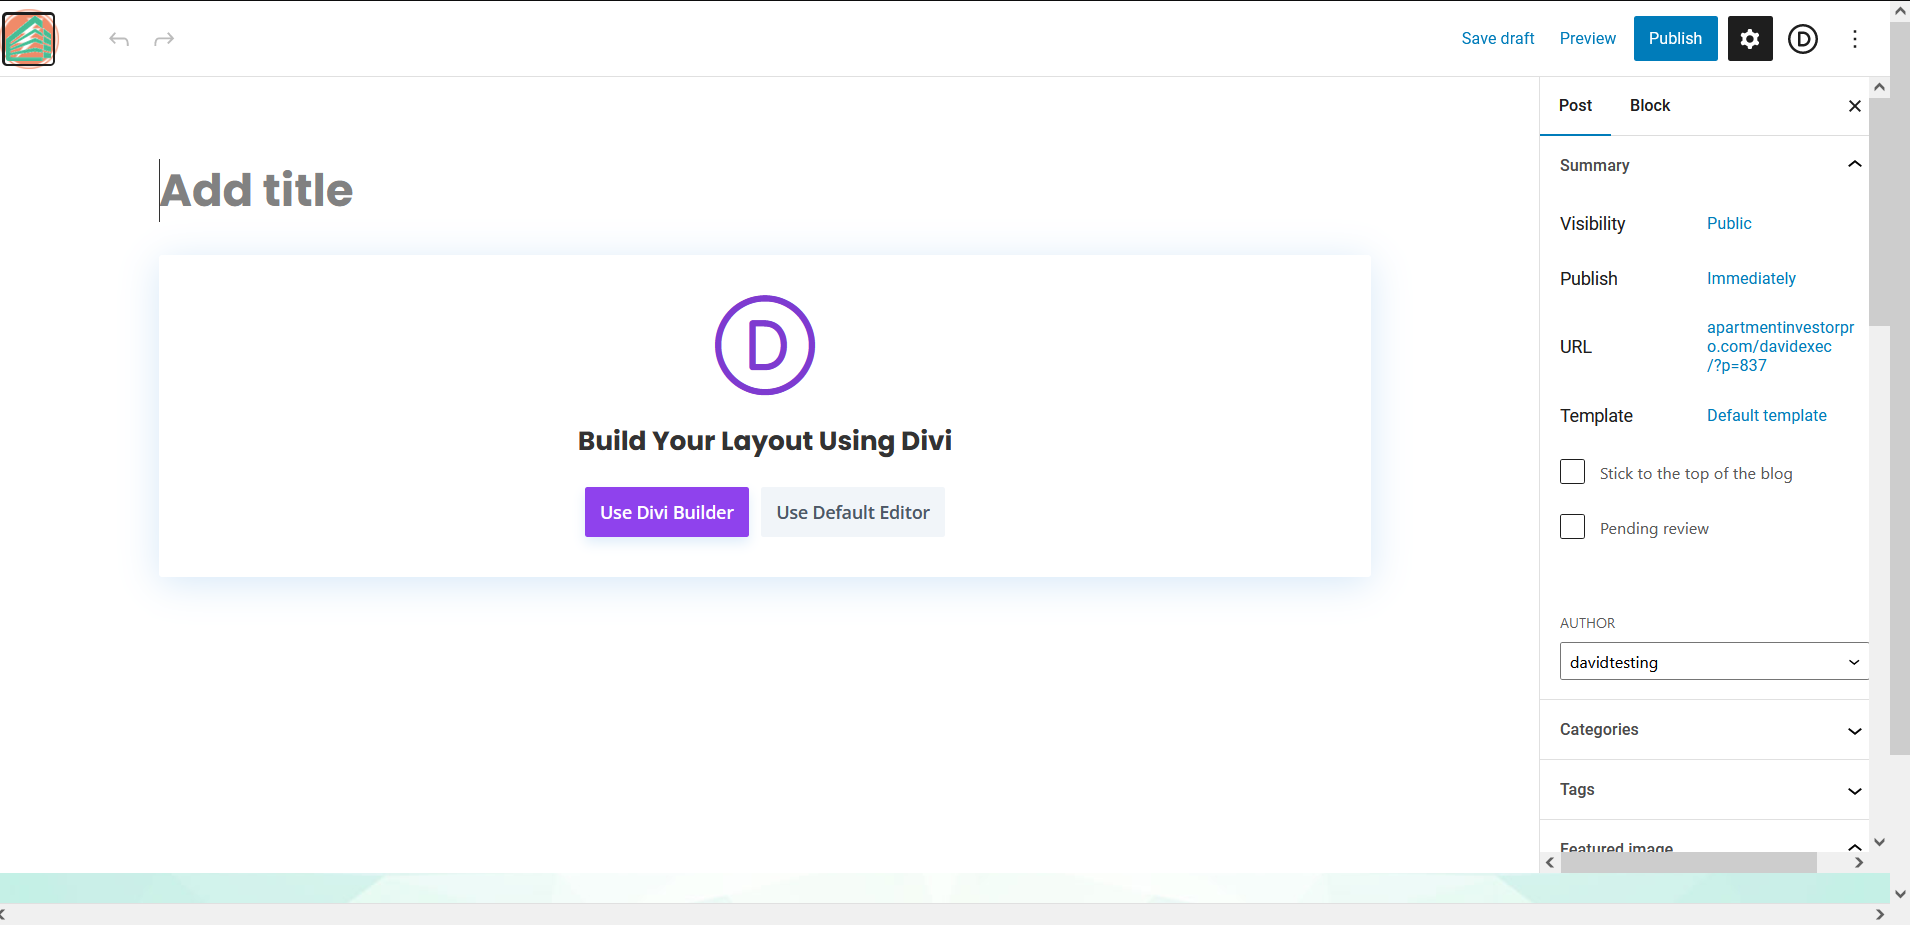
You’ll be redirected to a blank page with 2 options on how to build your post. This is the best time to add the Title to your post by typing in the ‘Add title’ box. You will probably want to use the Divi Editor to make the post.
Step 3: Adding Content
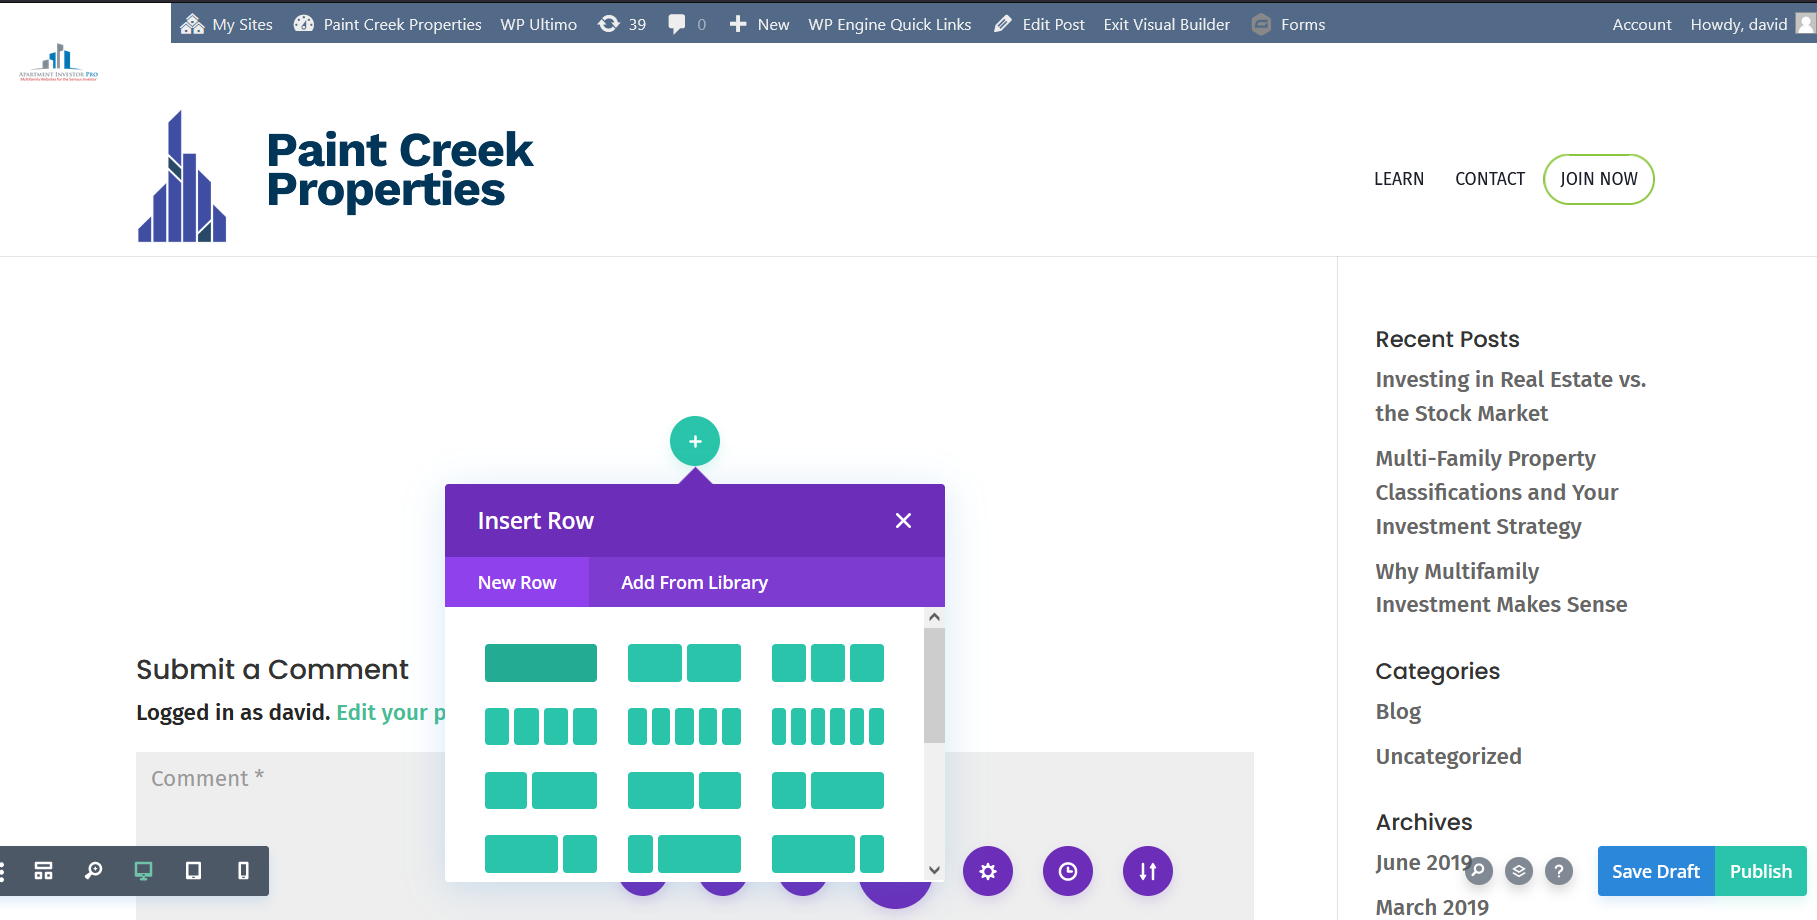
When writing you post, you’re given many options on what you can insert into you post. You will likely want a text module, and perhaps image modules. You’ll first have to add a row, then choose a module to go into it.
Step 4: Adding an Image
You can add images using the image module, if you had a featured image to the post, you can have that appear at the top of the post.
Step 5: Adding Categories, Tags & Featured Image
You can add tags and categories easily from the dashboard list of blogs, by clicking ‘Quick edit’.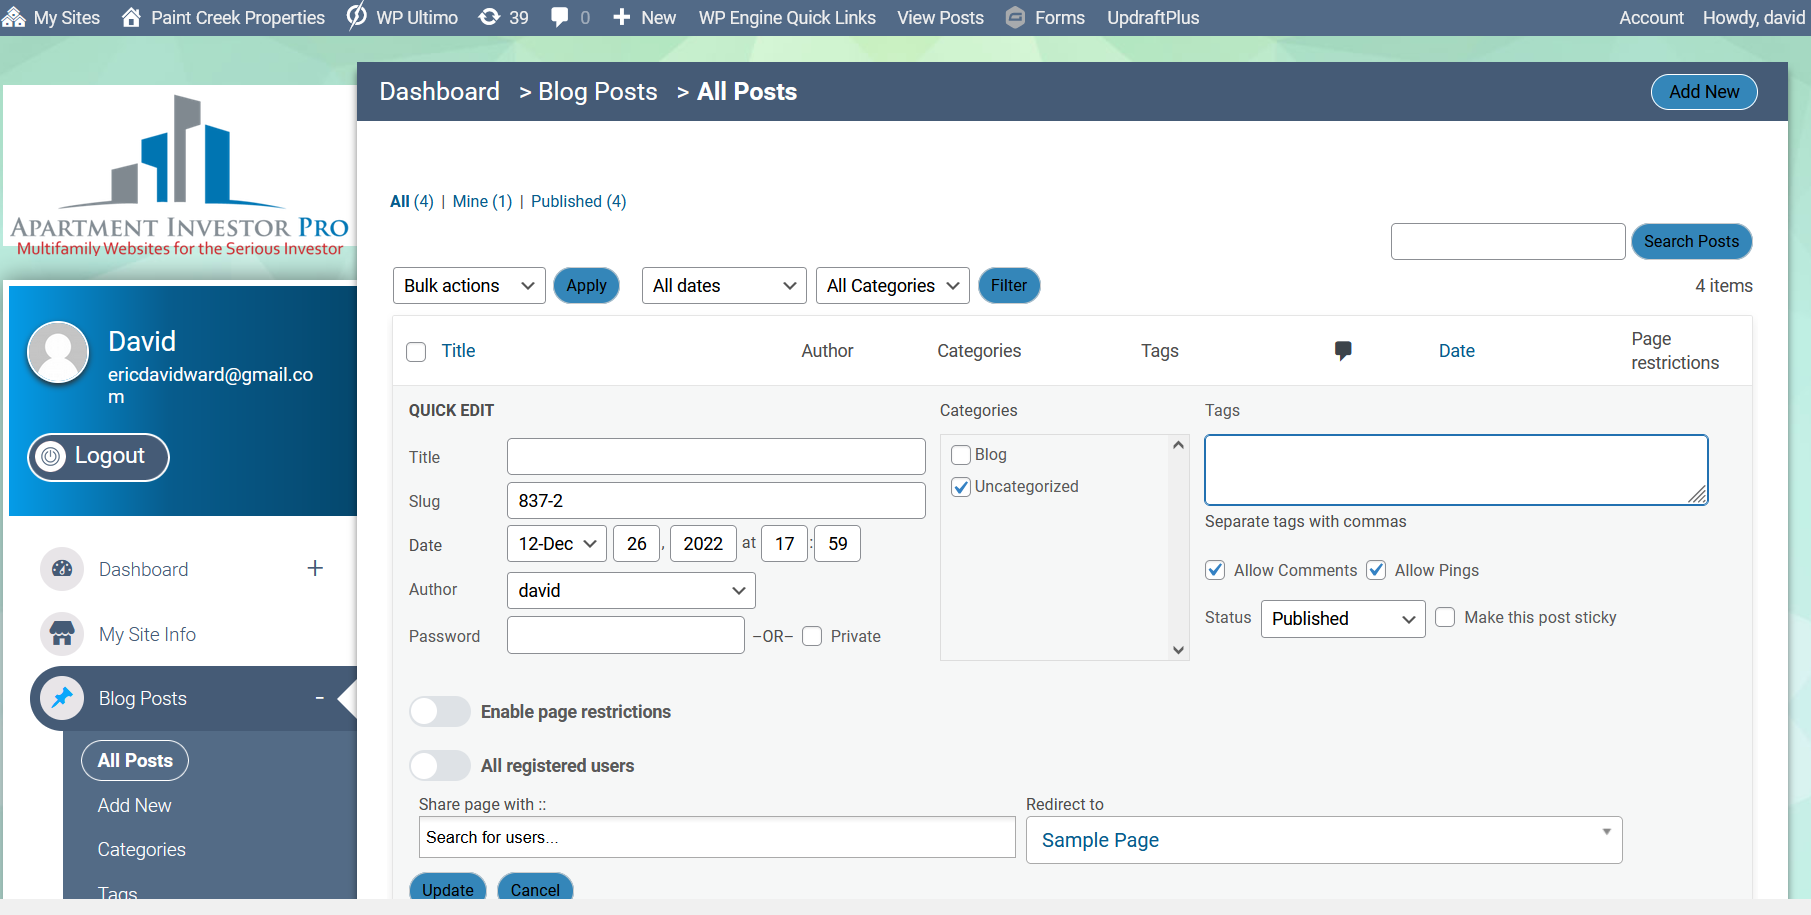
You can also change your post status between ‘Published’ and ‘Draft’.
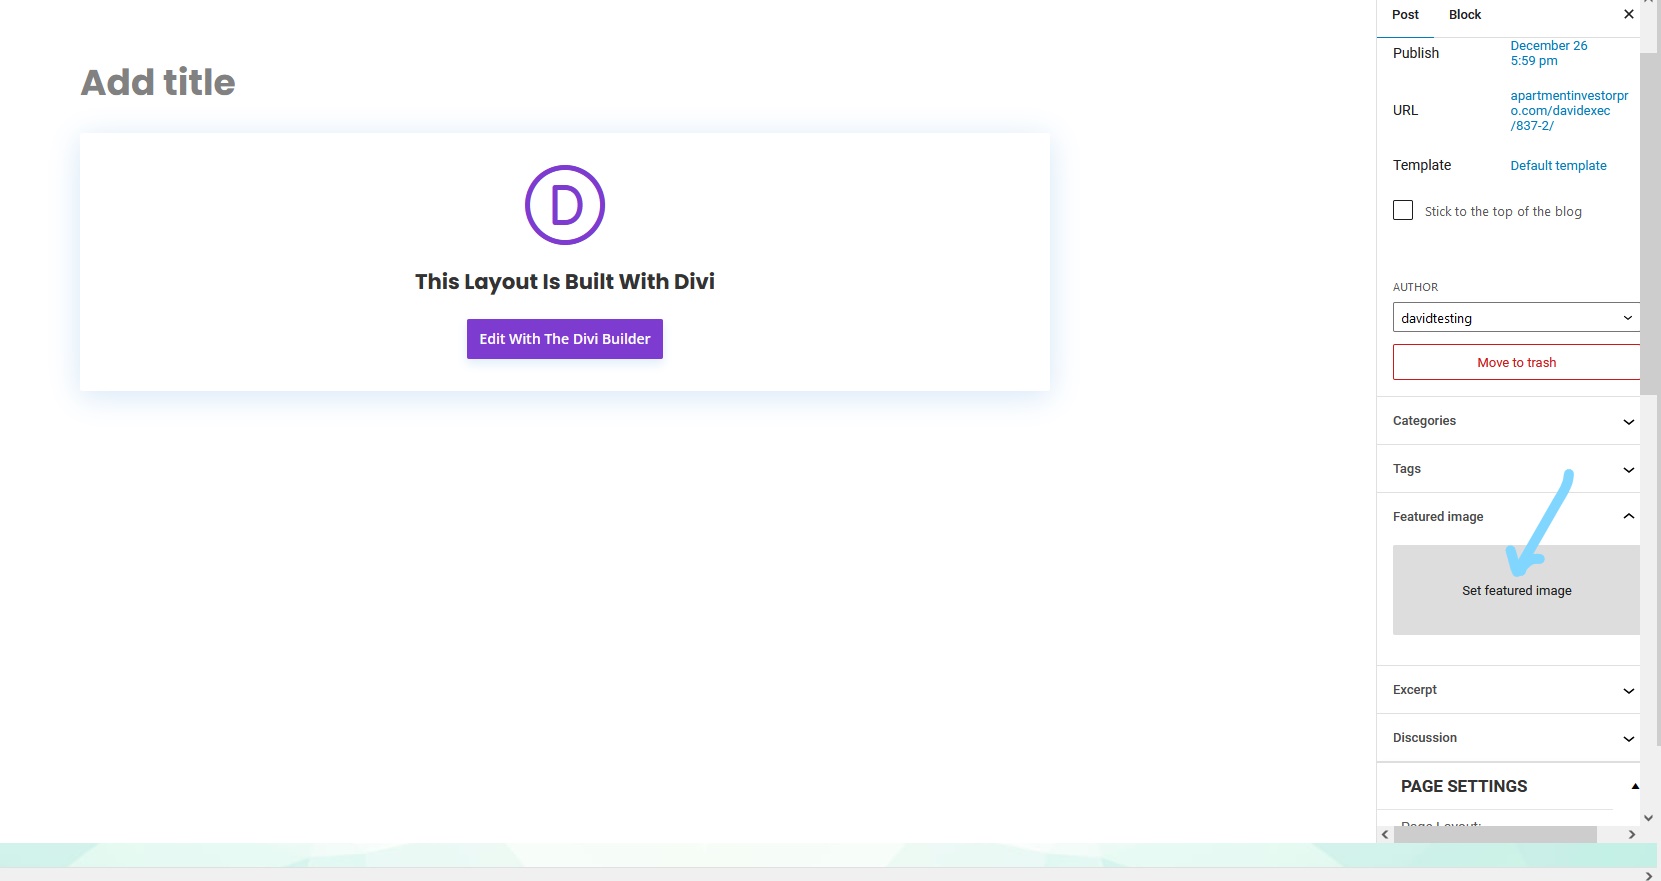
To add a featured image, click ‘Edit’. Not ‘Edit with Divi’.
Step 6: Saving, Preview & Publish
The top right menu also gives you 3 very important options.
- ‘Save Draft’ – So you can work on it later. Make sure to save as you go.
- ‘Preview’ – Which allows you to see what your post WILL look like on your website when the post is published.
- ‘Publish’ – This is what actually puts your blog post on your website.
NOTE: When you click ‘Publish’ you’re given pre-publish checks regarding who can see it and if you want to schedule a publish date or simply publish the post right away.

