Having a blog is a great addition to your website as it gives you three major benefits. The first two actually work hand-in-hand and they are increased traffic to your website and improved SEO.
To illustrate, with any living organism the more you feed it nutritious food the better it grows. So if you continuously add quality or “nutritious” blog posts to your website the more traffic you will receive to your website. Search engines will in turn take note of both the increase of content and traffic to your website and improve your SEO score, that in turn will again further increase your traffic and SEO. This process will take time though and only happen if you feed your blog with quality or “nutritious” posts.
NOTE: Here’s a link on some tips from SEO specialists on how to write quality content.
The third benefit is; by continuously adding blog posts, it’ll help to establish you as an authority on multi-family investing.
In order to publish any type of blog post however, you need a page to post them to. (If you have Pro or Executive membership, you won’t need this tutorial, you already have a blog page, with blog posts included!) To make a page for your blog posts is very easy.
Step 1: Create A New Page
In the left menu, click on Pages then select Add New. Now most people will name this page Blog or News, it’s up to you but for the tutorial we’re going to name the page Blog. Then click Publish.
What you may find helpful to do before you move on to step 2, is to write a few blog posts first. Then when you are ready and happy with your posts, publish them a day or so apart from each other. This will prevent your blog from becoming stagnant while you’re busy running your company and writing new posts.
Step 2: Make A Home For Posts
So you’ve just created a home where your posts will reside. Now you have to tell the posts to go there when you publish them. You do this in a few simple mouse clicks.
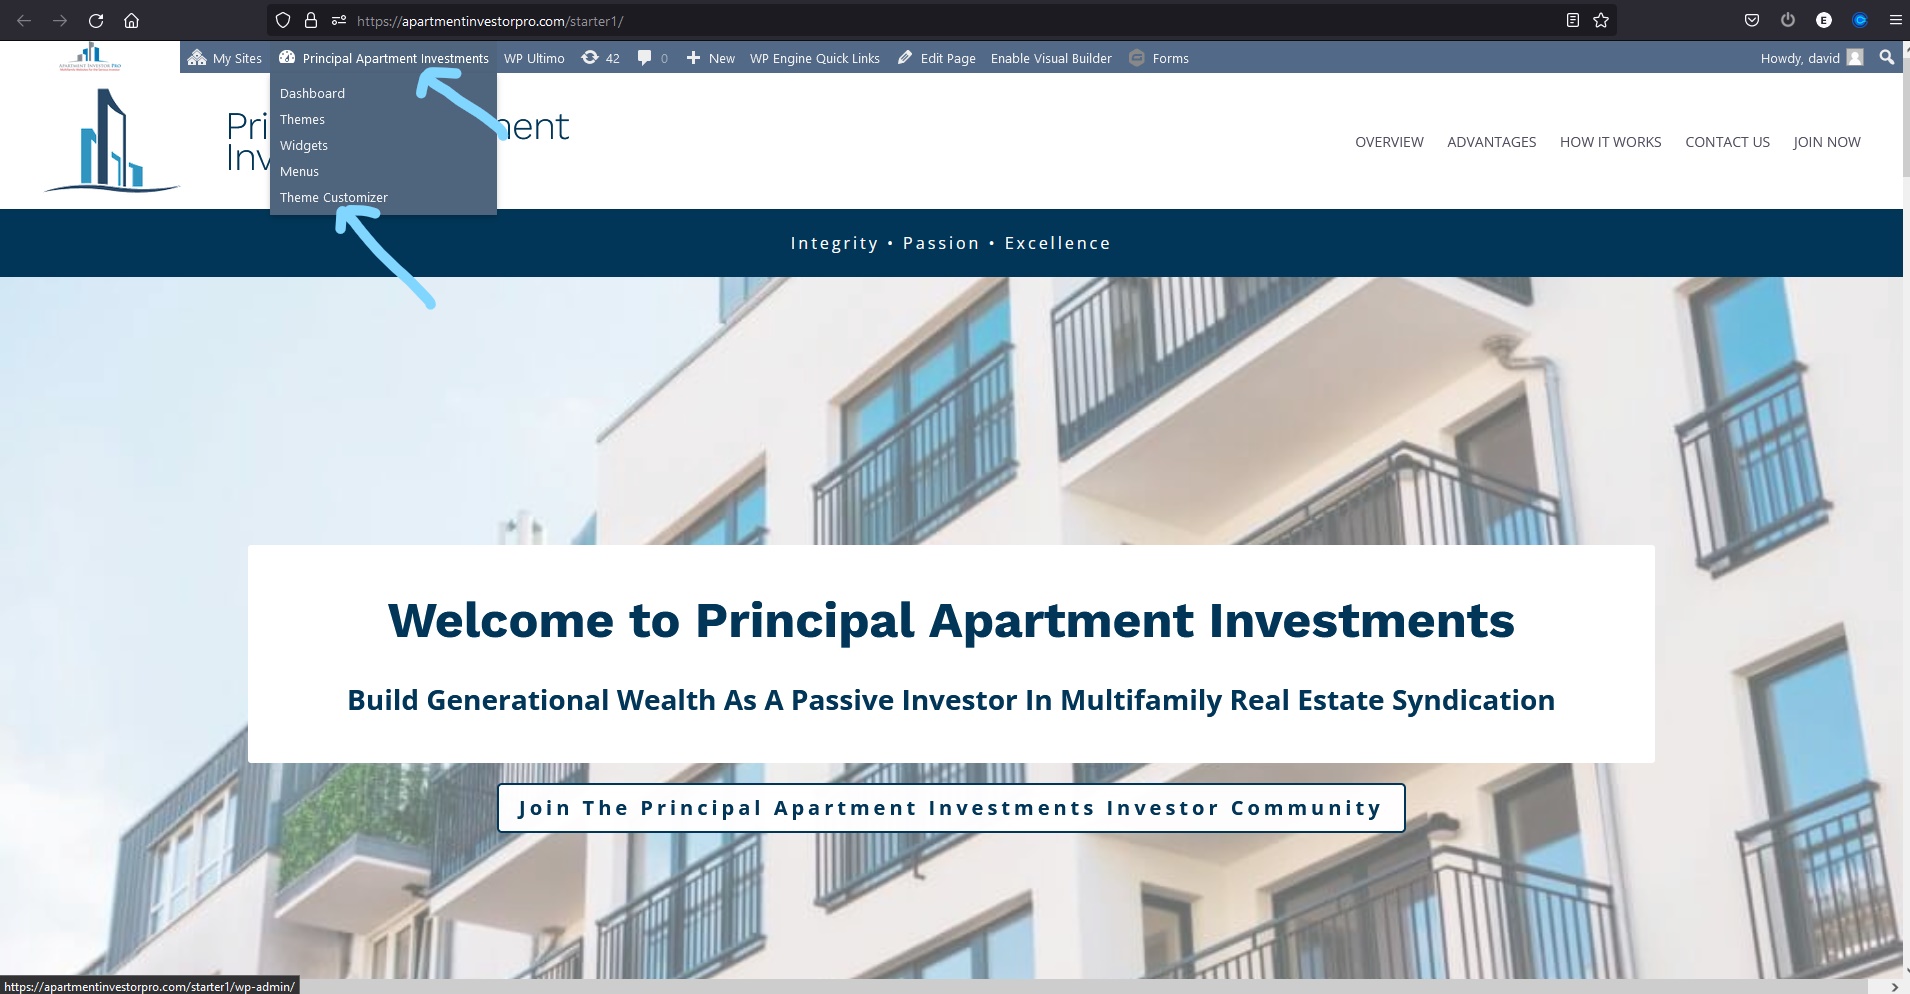
Make sure you are logged in, and then click the name of your site in the bar at the top of your screen, and in the dropdown menu click ‘Theme Customizer’ as in the following picture.
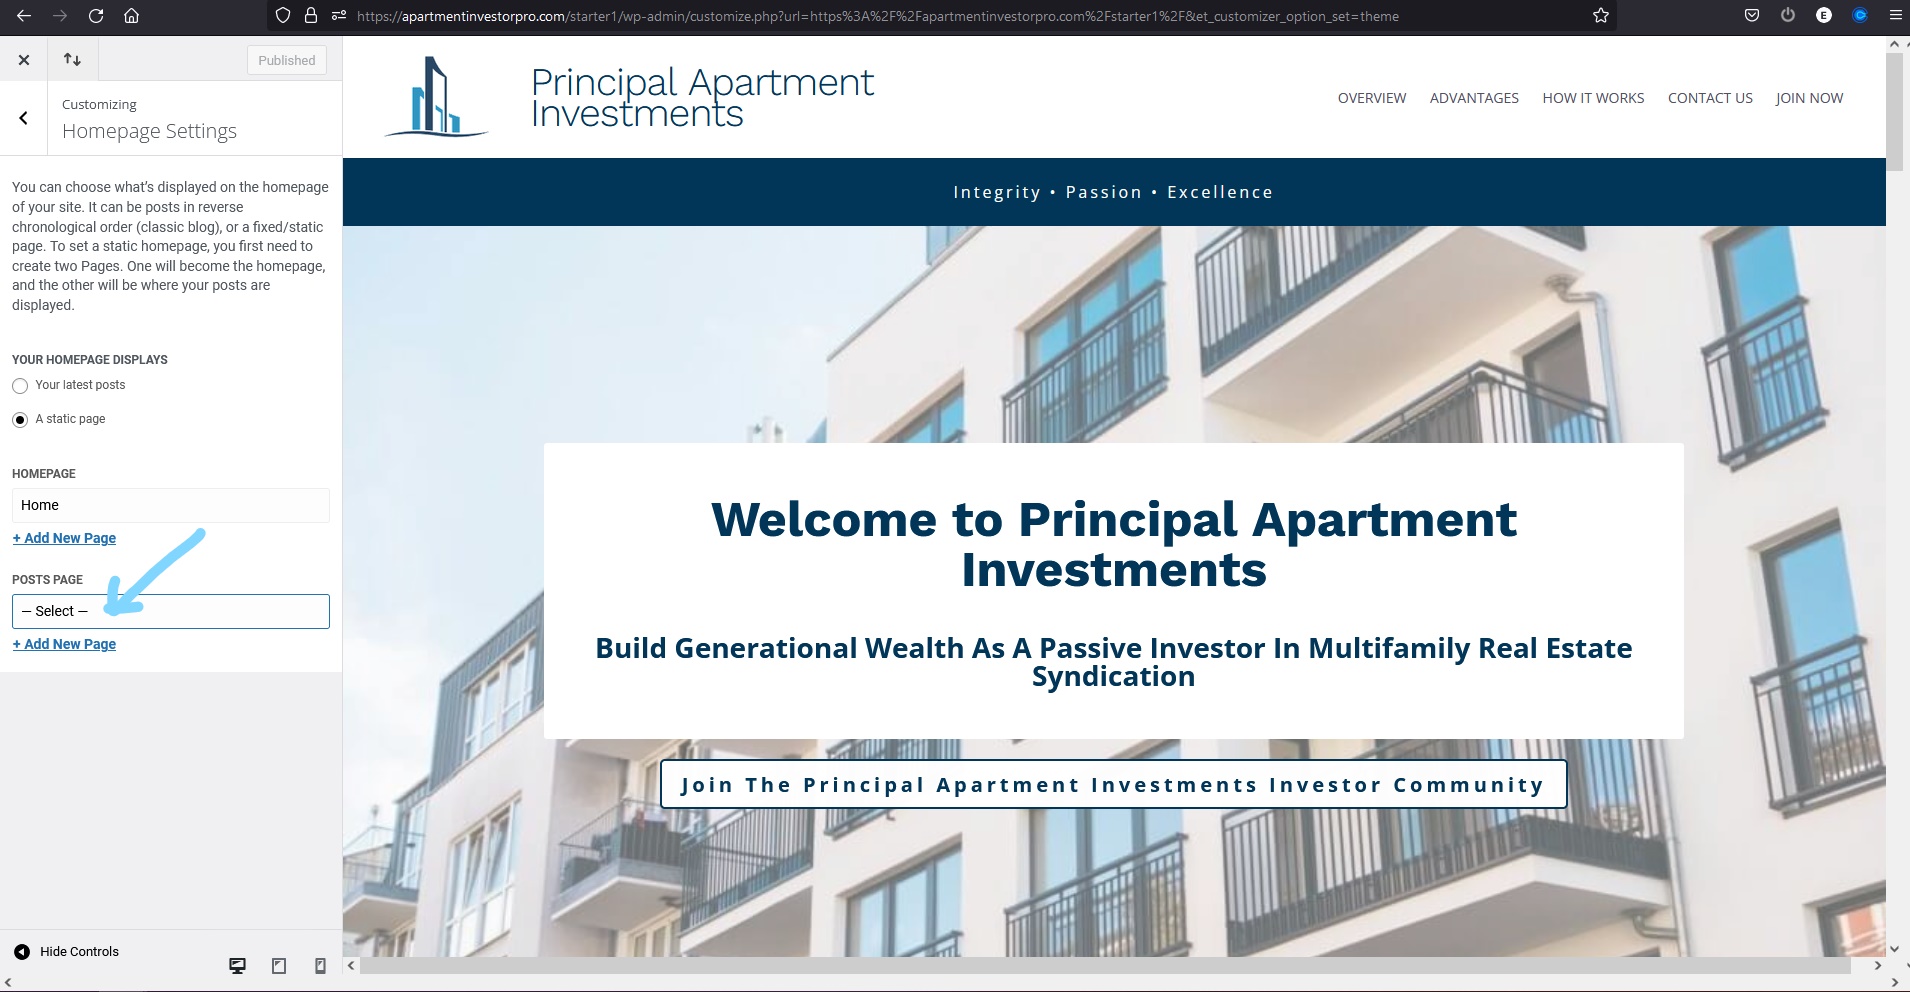
Click ‘Homepage Settings’ in the menu that appears on the left, and then in the open the dropdown menu for the ‘POSTS PAGE’ and choose the page you created for your blog.
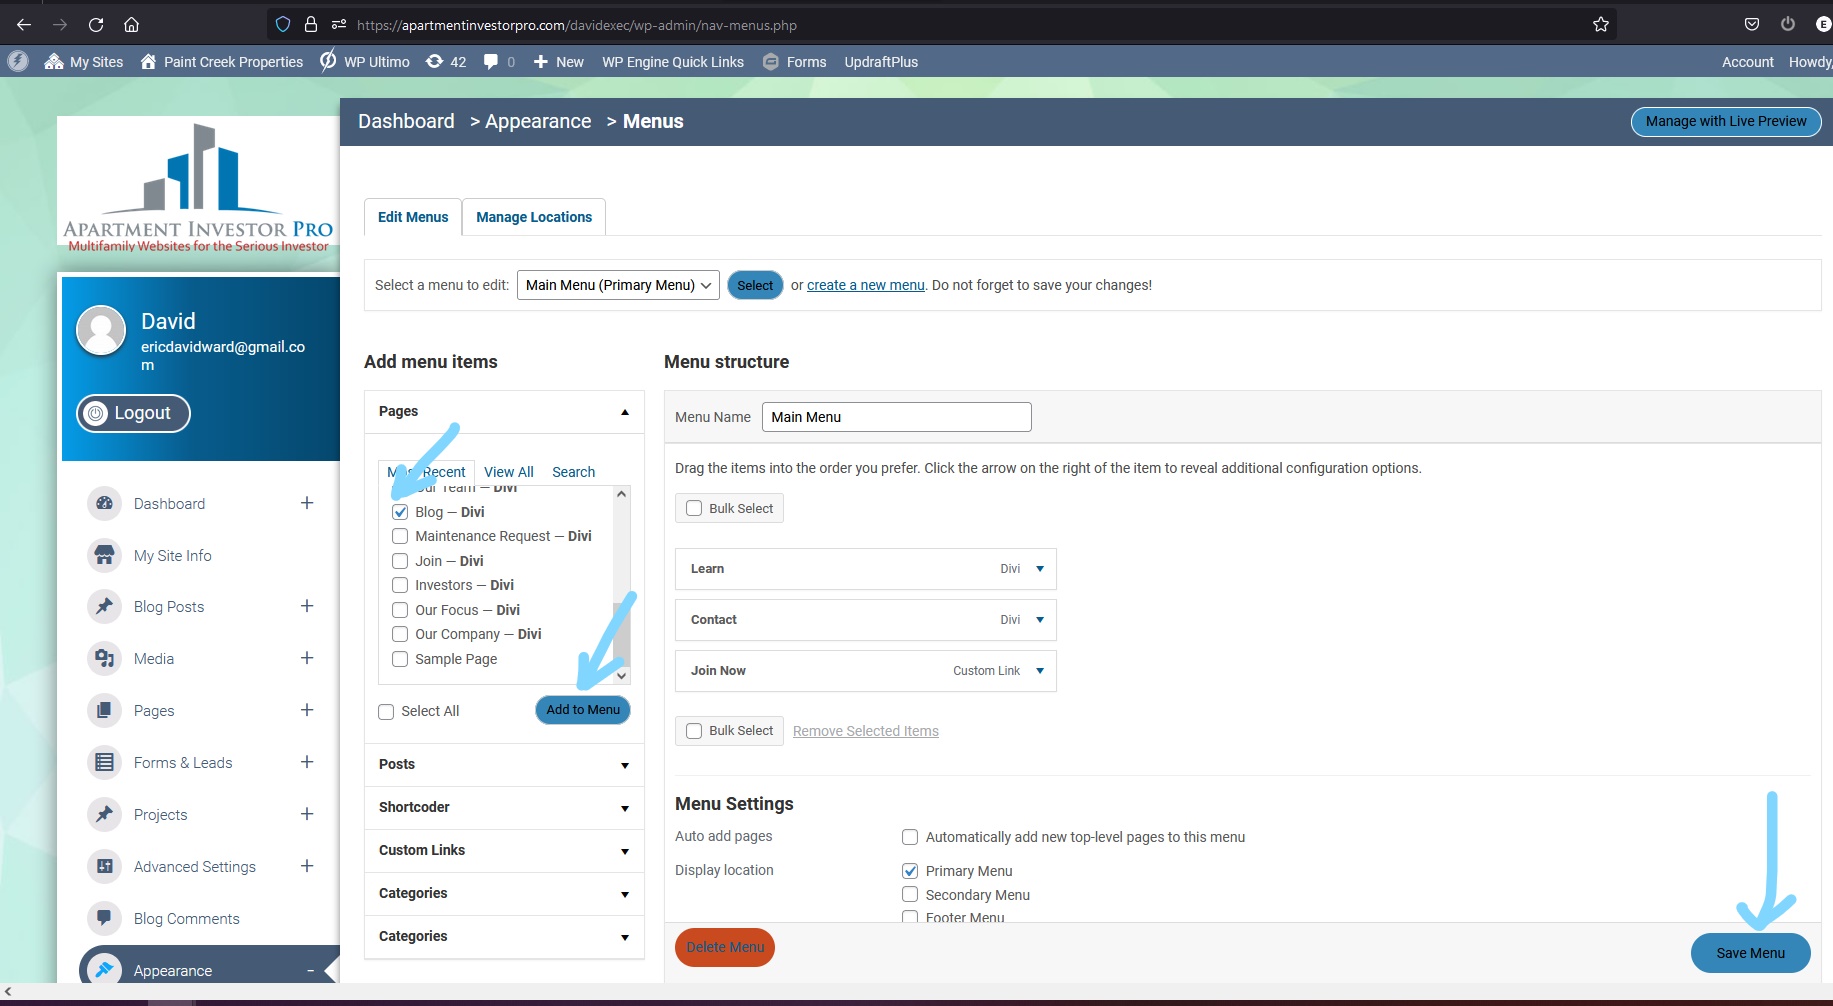
Step 3: Adding Your Blog to The Menu
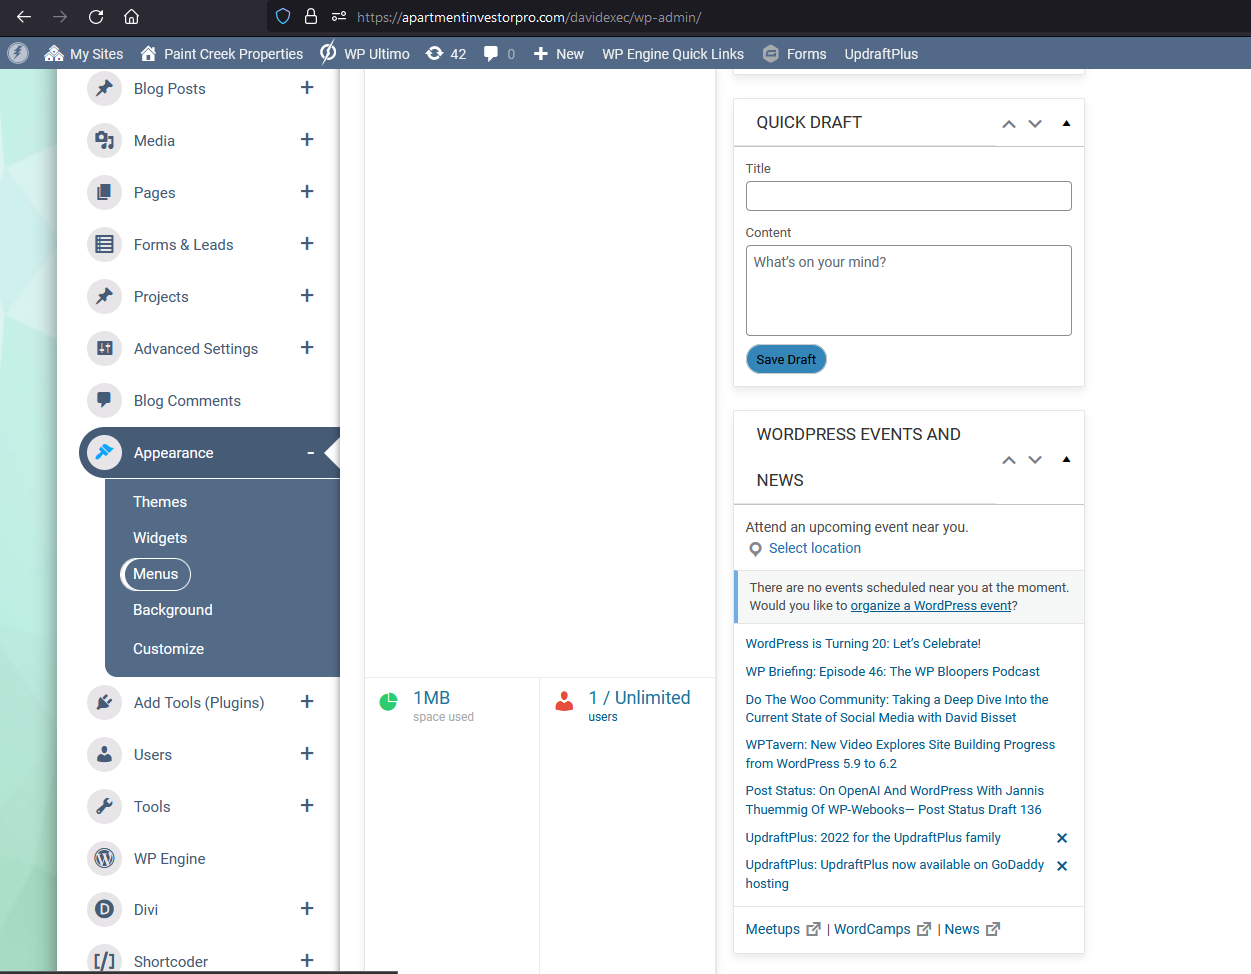
To make your blog easily accessible, you’ll want to add a link to it on your menu. From your dashboard on the left hand menu click ‘Appearance’ and then ‘Menu’
