Email marketing can be an amazing tool to help gain more clients. However connecting the forms on your website to a 3rd party email marketing tool can be a bit tricky. So to help you, in the series of tutorials called Third Party Services, we’re going to show you how you can do just that depending on which 3rd party tool you’re using.
For those of you using MailChimp you will need an API Key for this to work. So please follow ALL the steps below exactly.
Step 1: Login
Of course the very first thing you’ll need to do is log into or create a MailChimp account.
Step 2: Copy or Create API Key
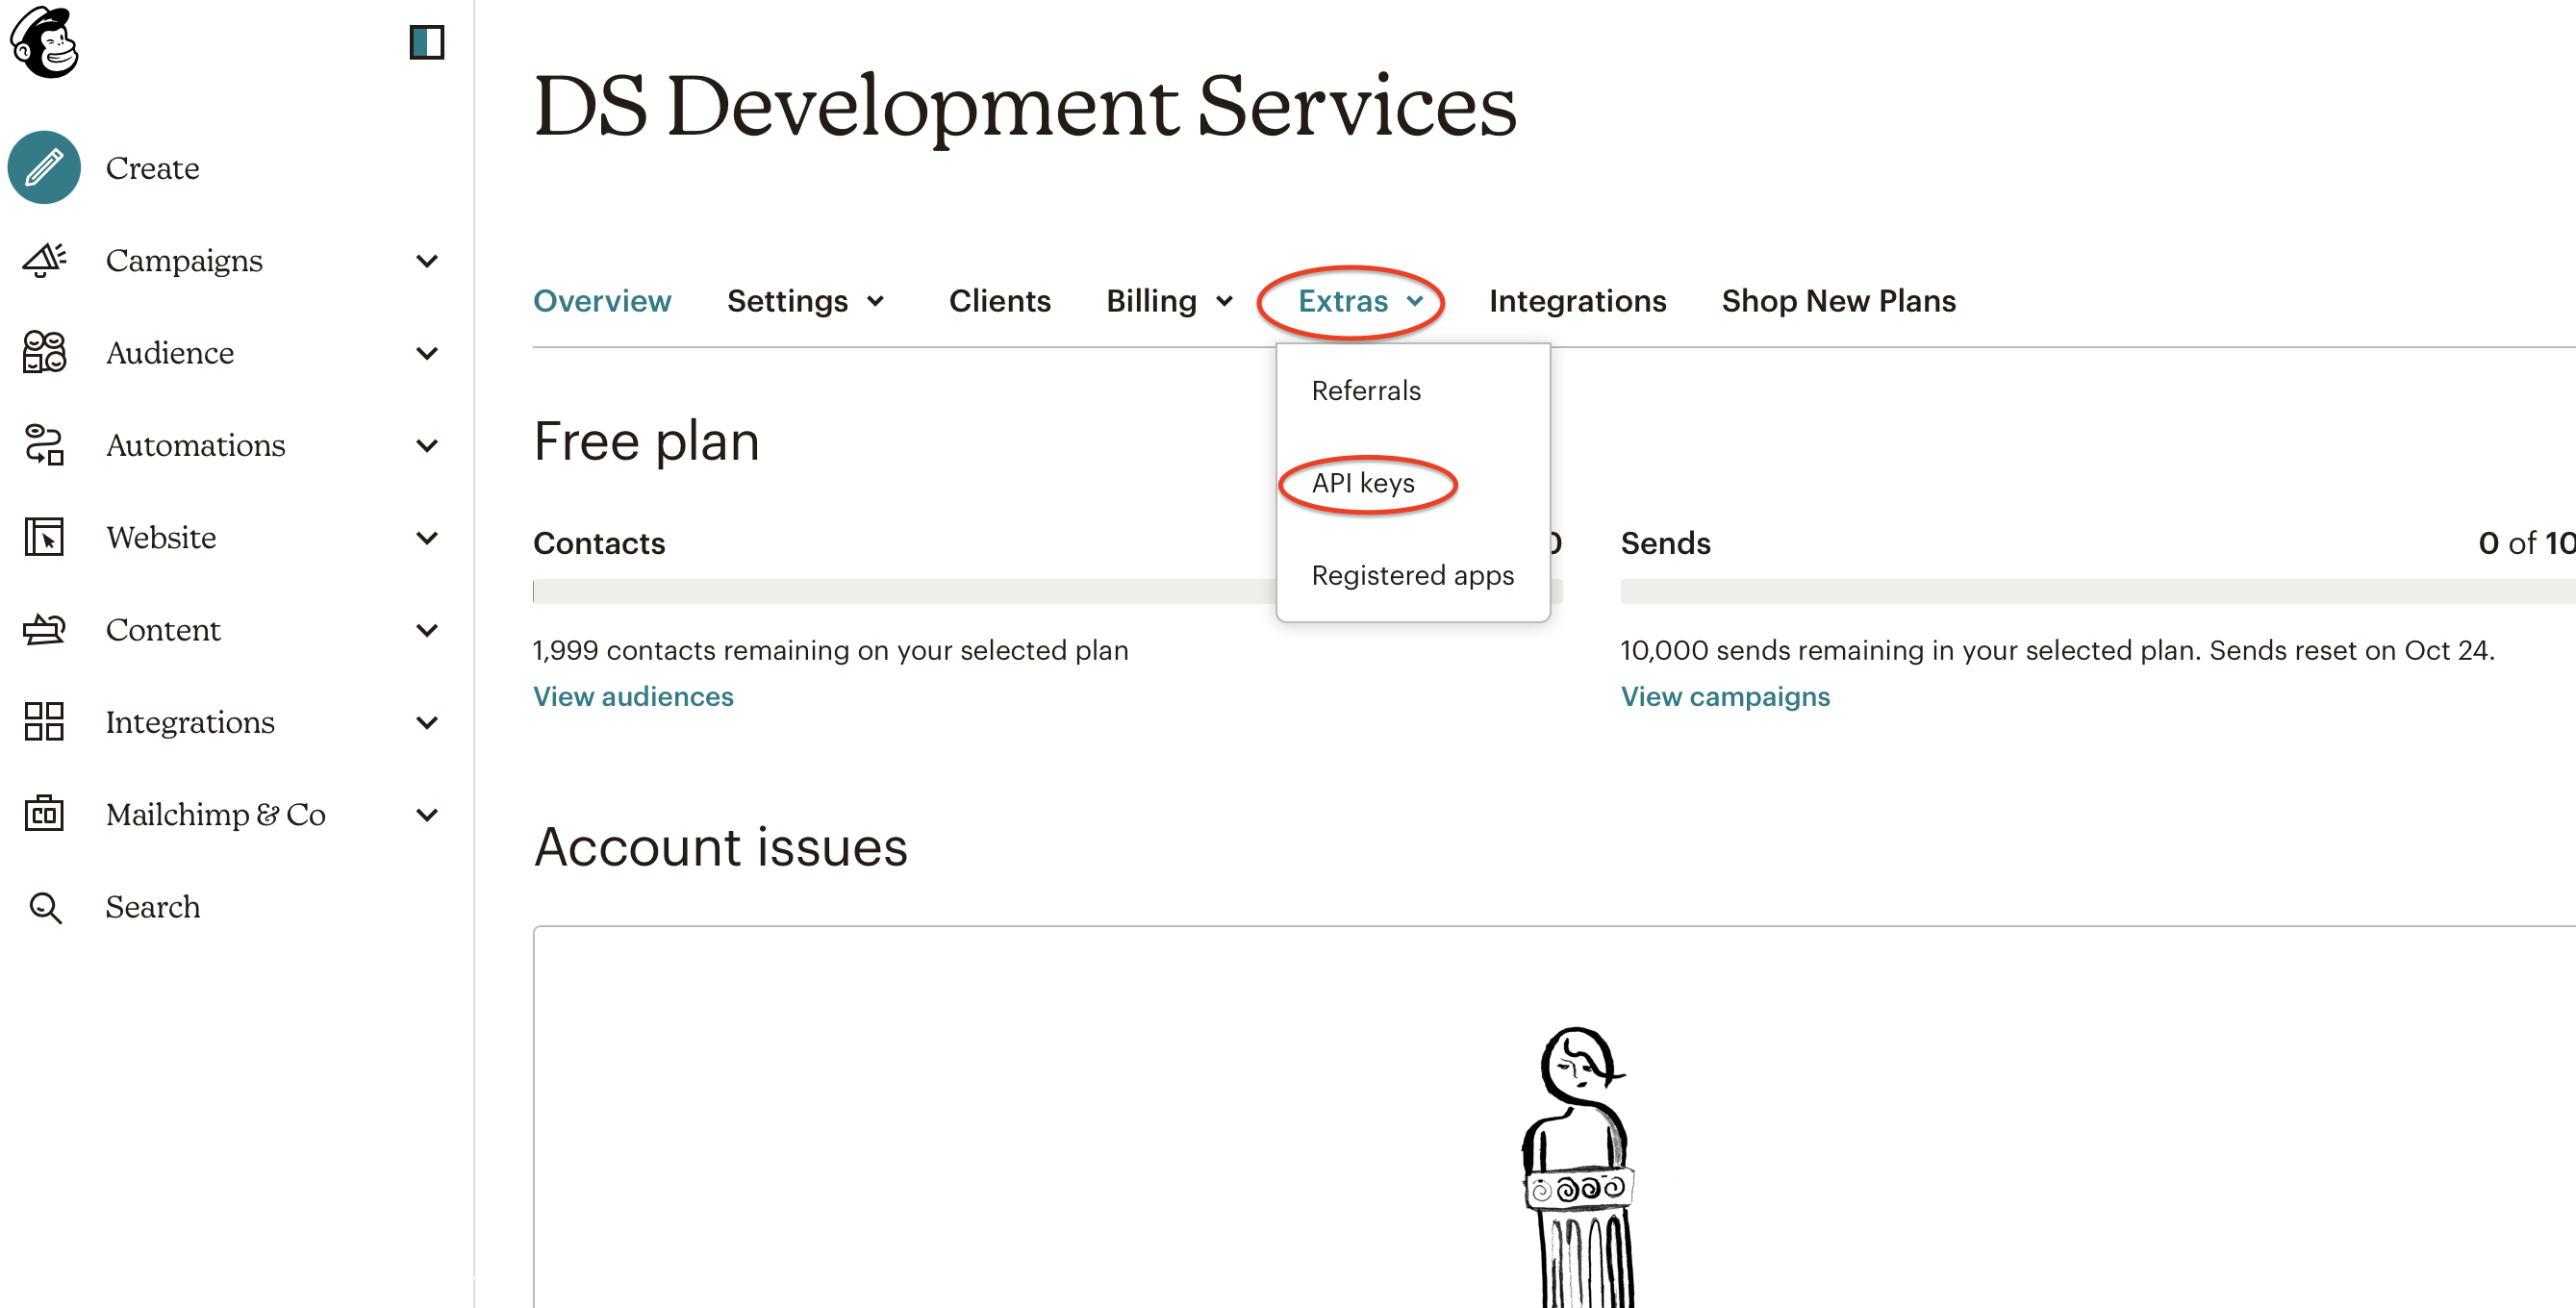
After you’ve logged in, go to Account and under Extras click API Key.
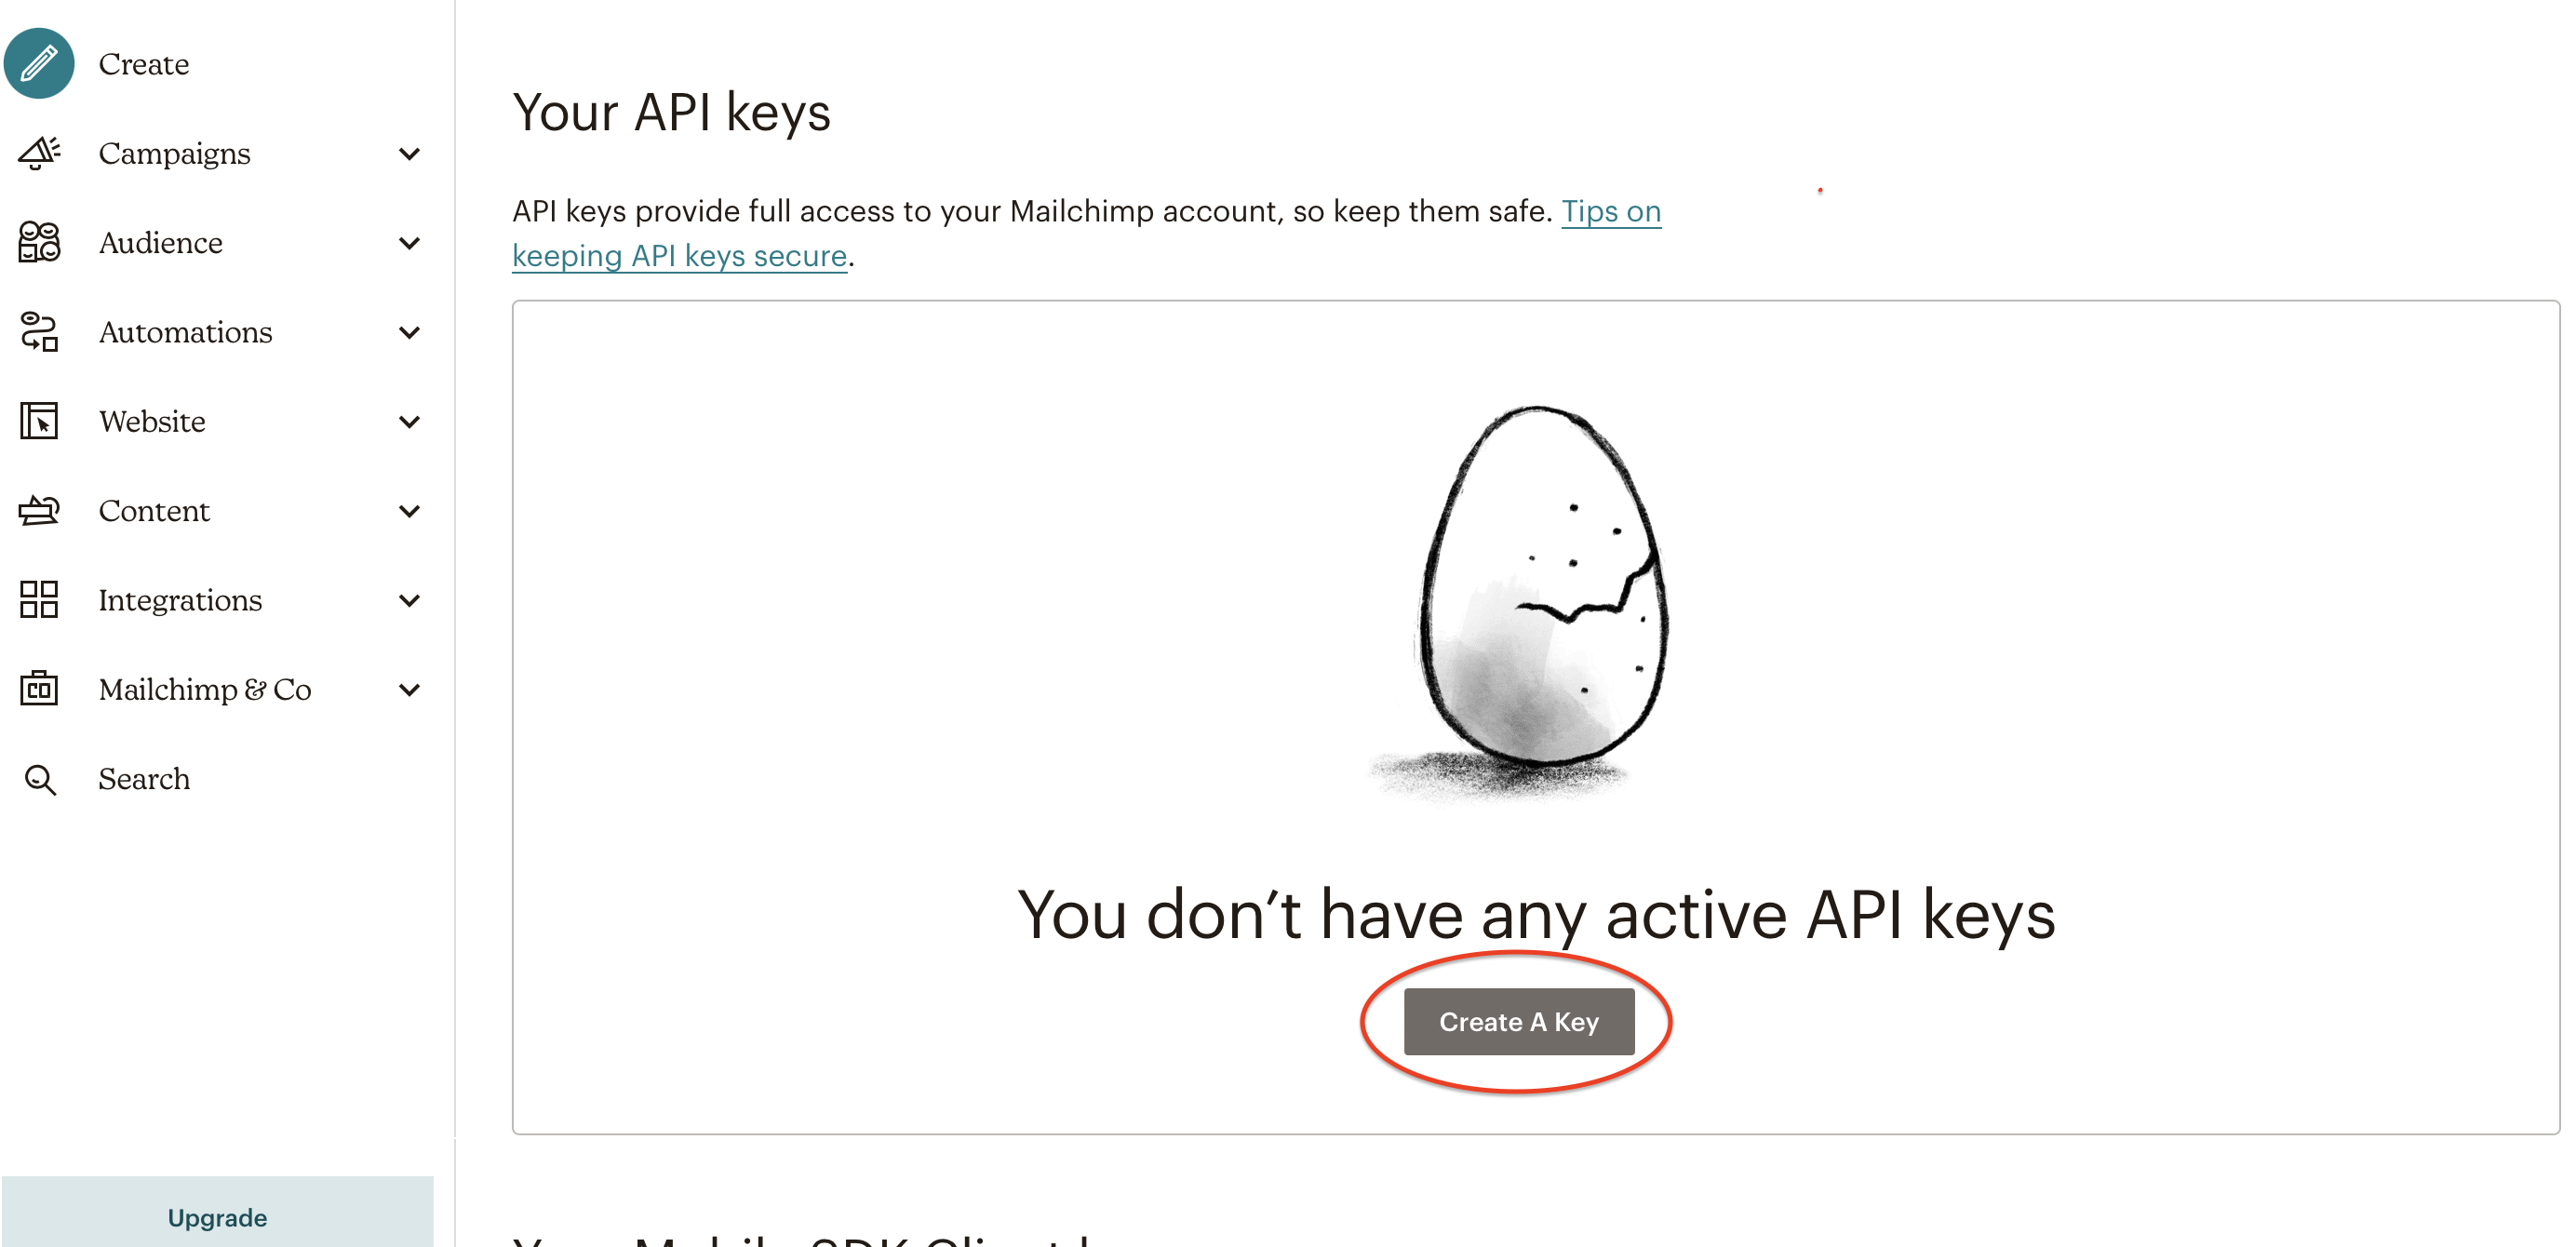
You most likely don’t have an API Key created yet, as they don’t provide you one by default. No need to fear though, it’s as easy as clicking 1 button to create your API Key.
Now that you have your API Key created and copied, you’ll need to log into your Apartment Investor Pro account.
The forms on your website were created using a tool called Gravity Forms. We need to activate a tool/plugin that allows Gravity Forms to connect with your MailChimp account.
Go to “Add Tools (Plugins)” from the menu on the left.
Find the one called “Gravity Forms MailChimp Add-on”. Click the Activate link.
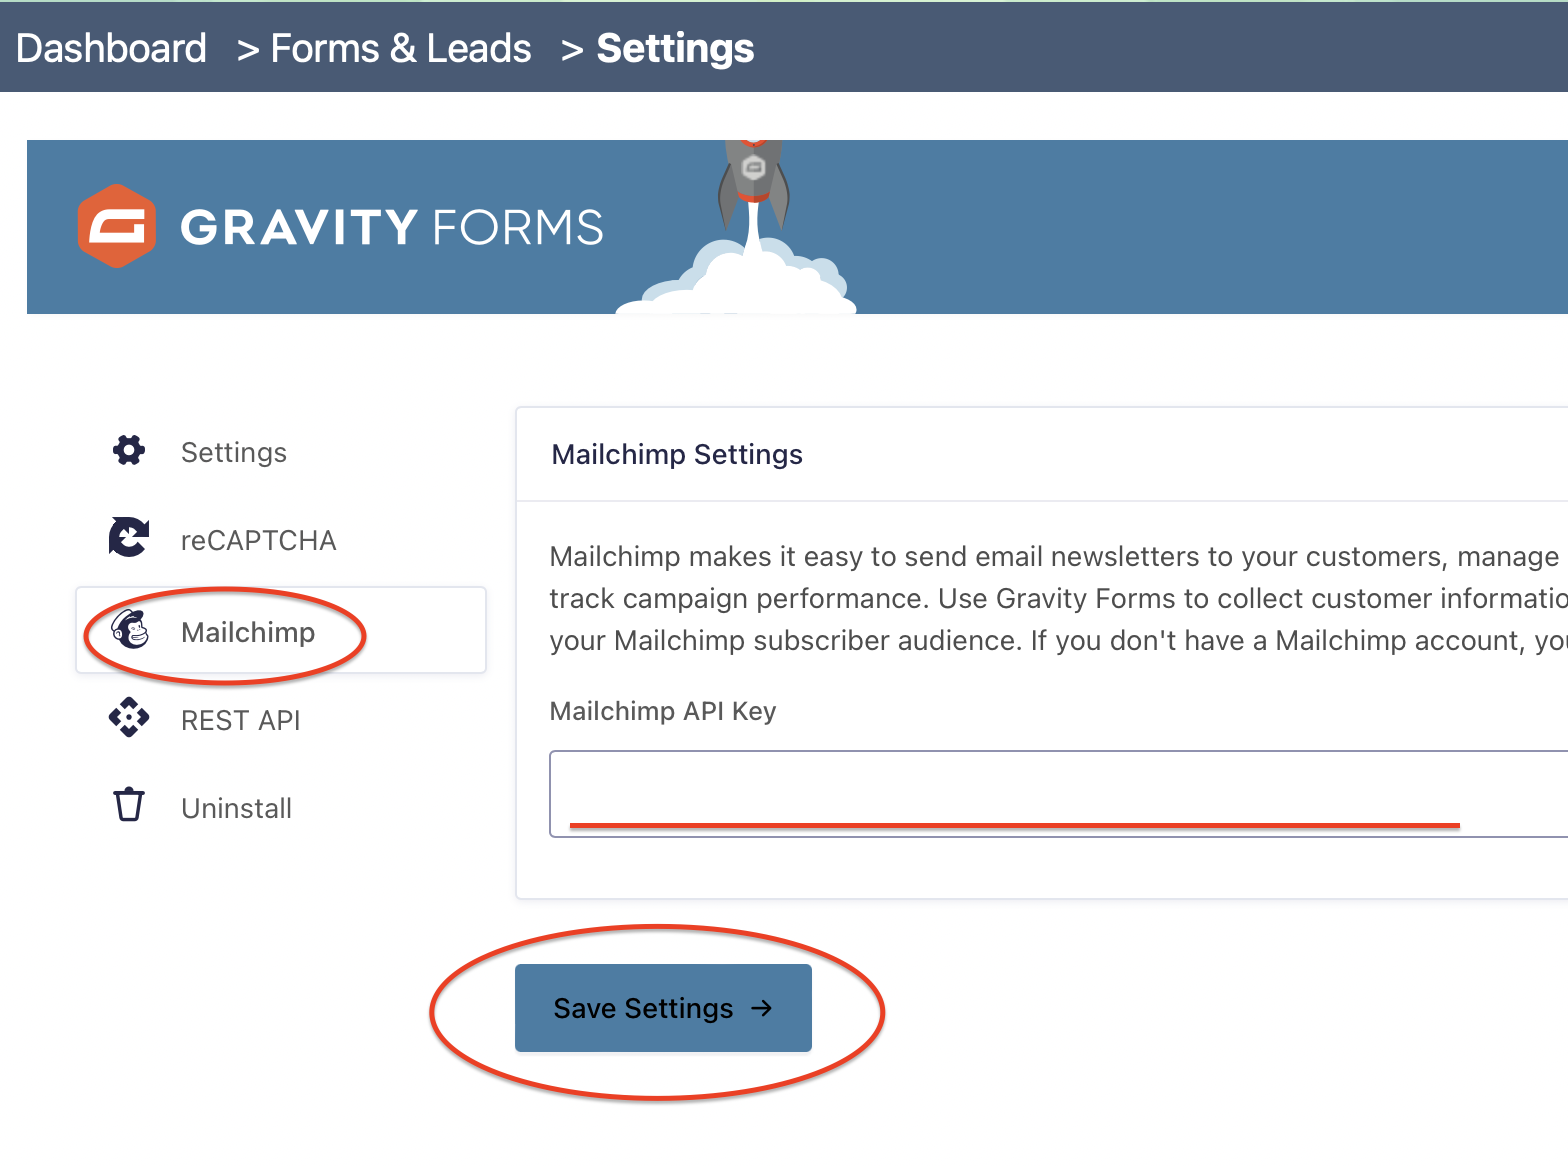
Now go to Forms & Leads from the left menu, and under that menu click Settings.
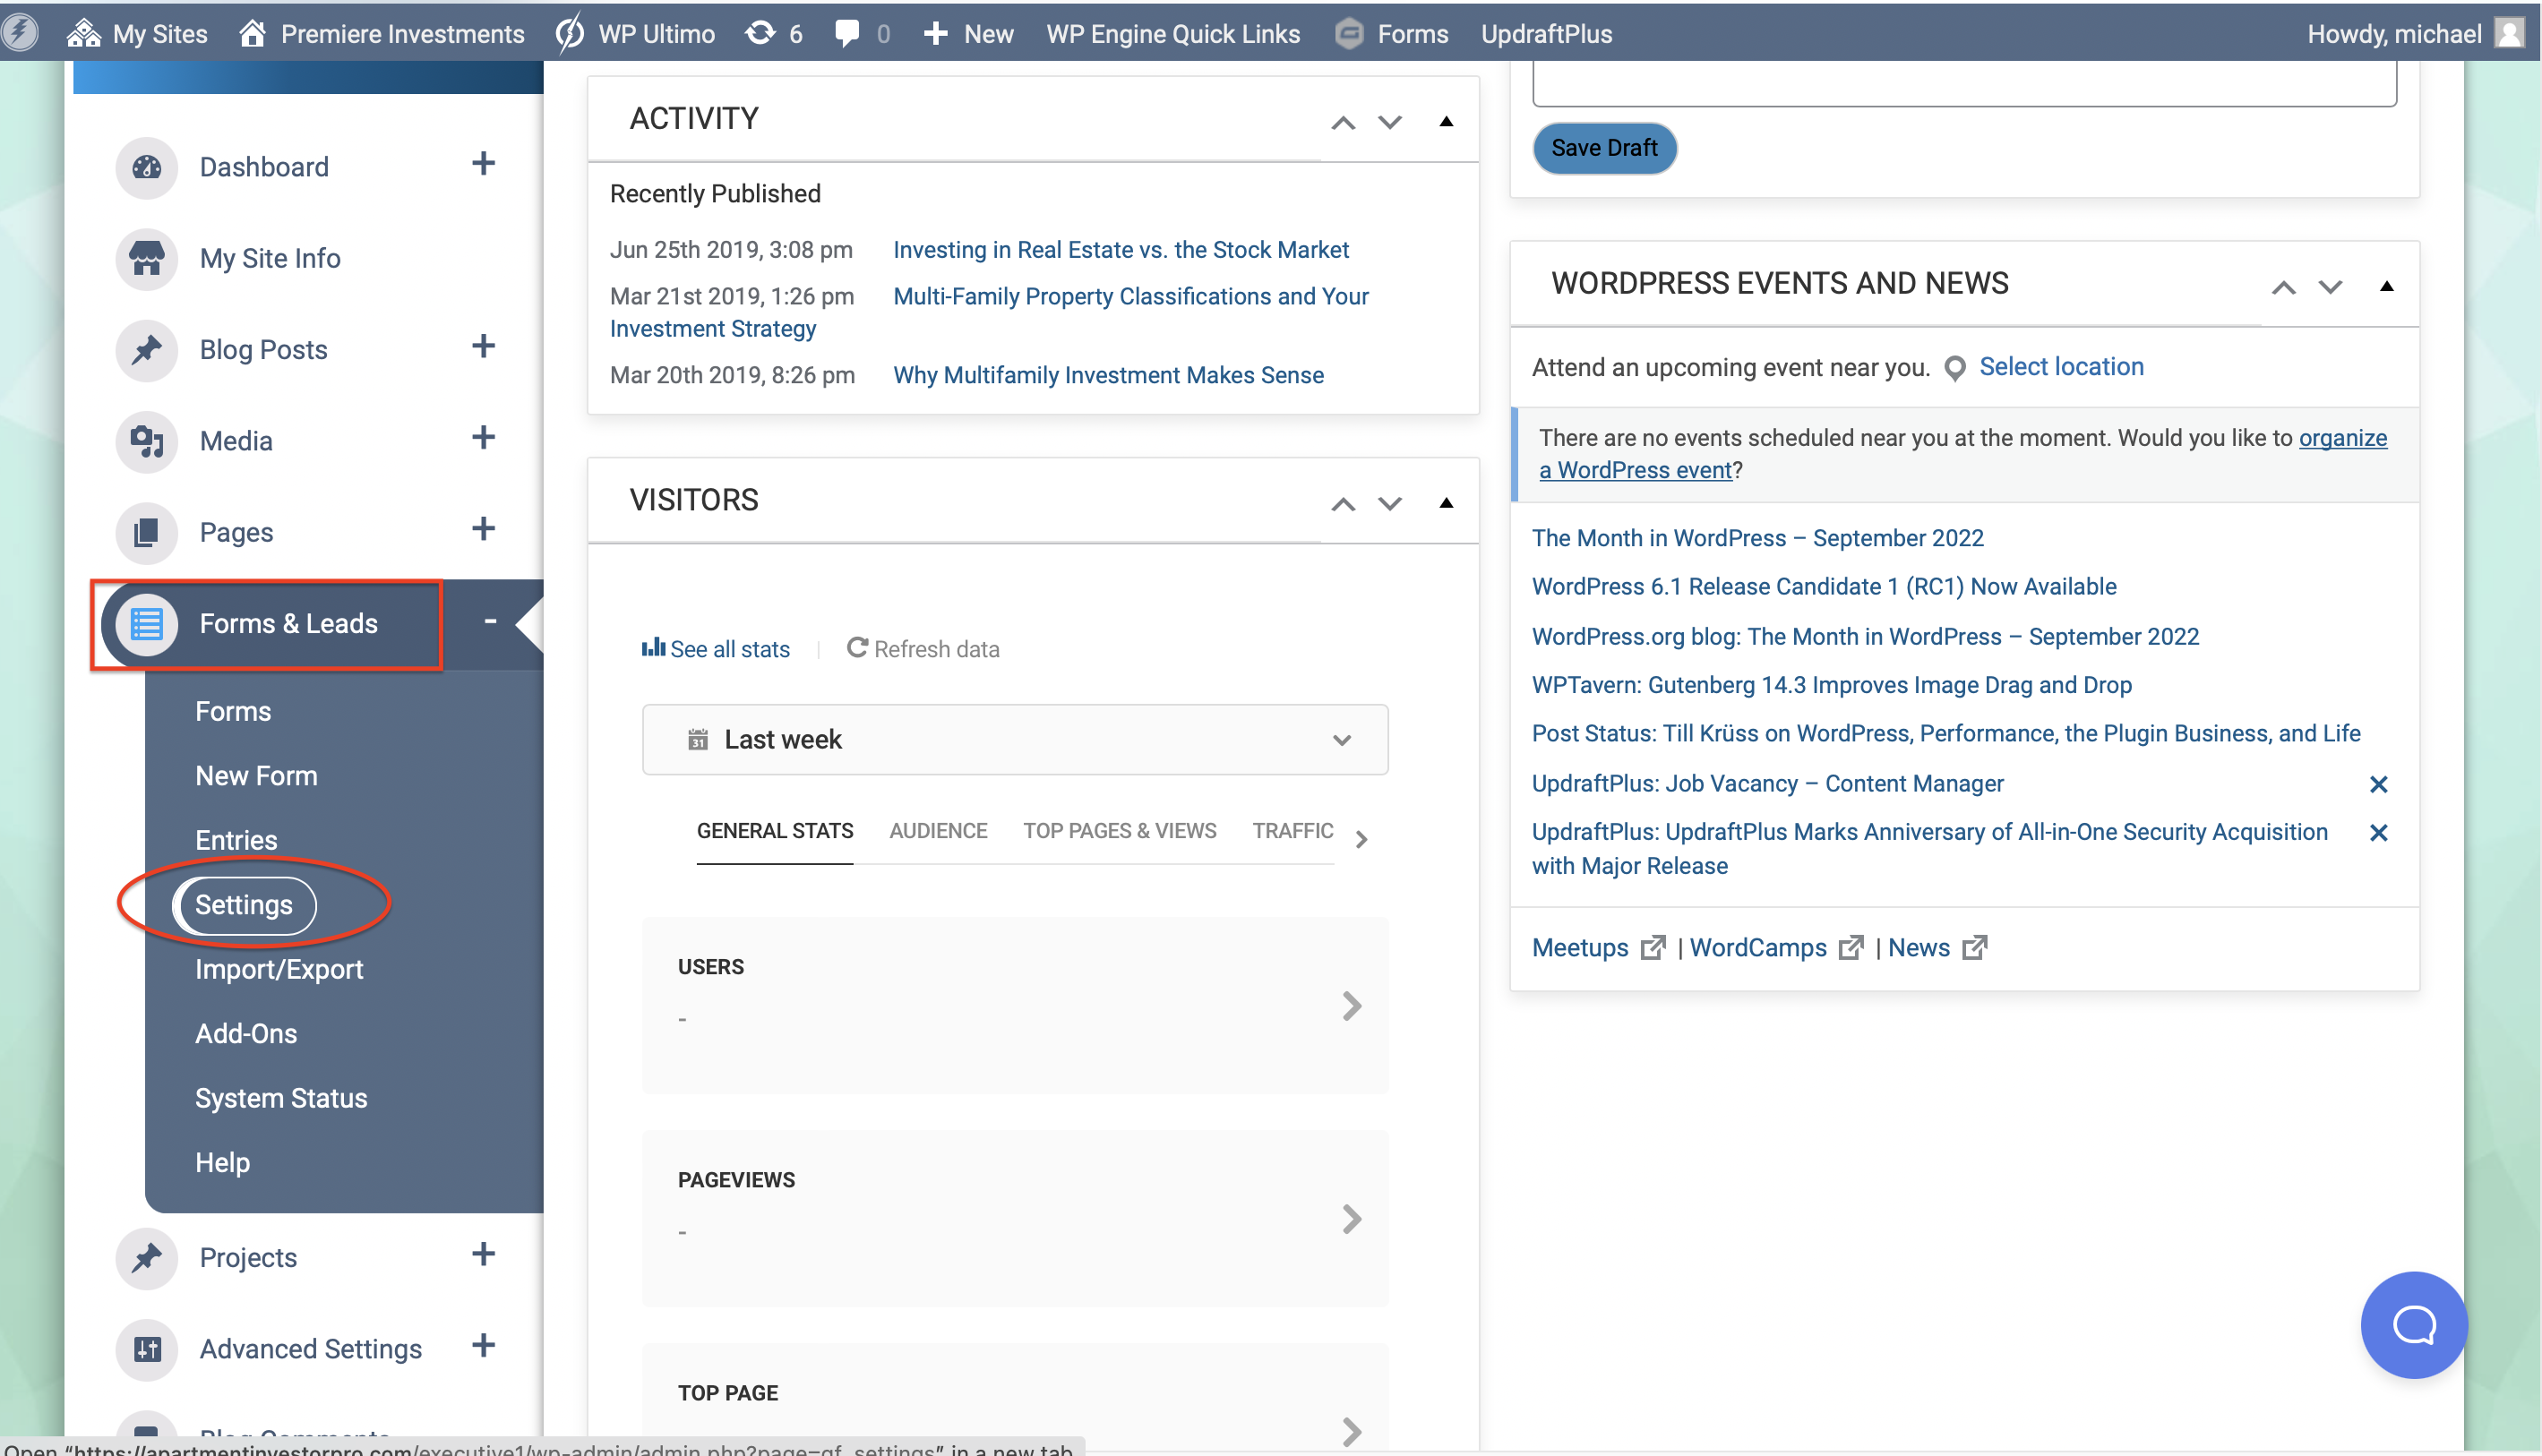
Then Select MailChimp. And paste the API Key in the field called Mailchimp API Key, and update the setting.
Step 3: Creating A Form Feed
So now your API Key is connected to your website, however you need to make a feed. Feeds allow the information from your form to be sent to MailChimp.
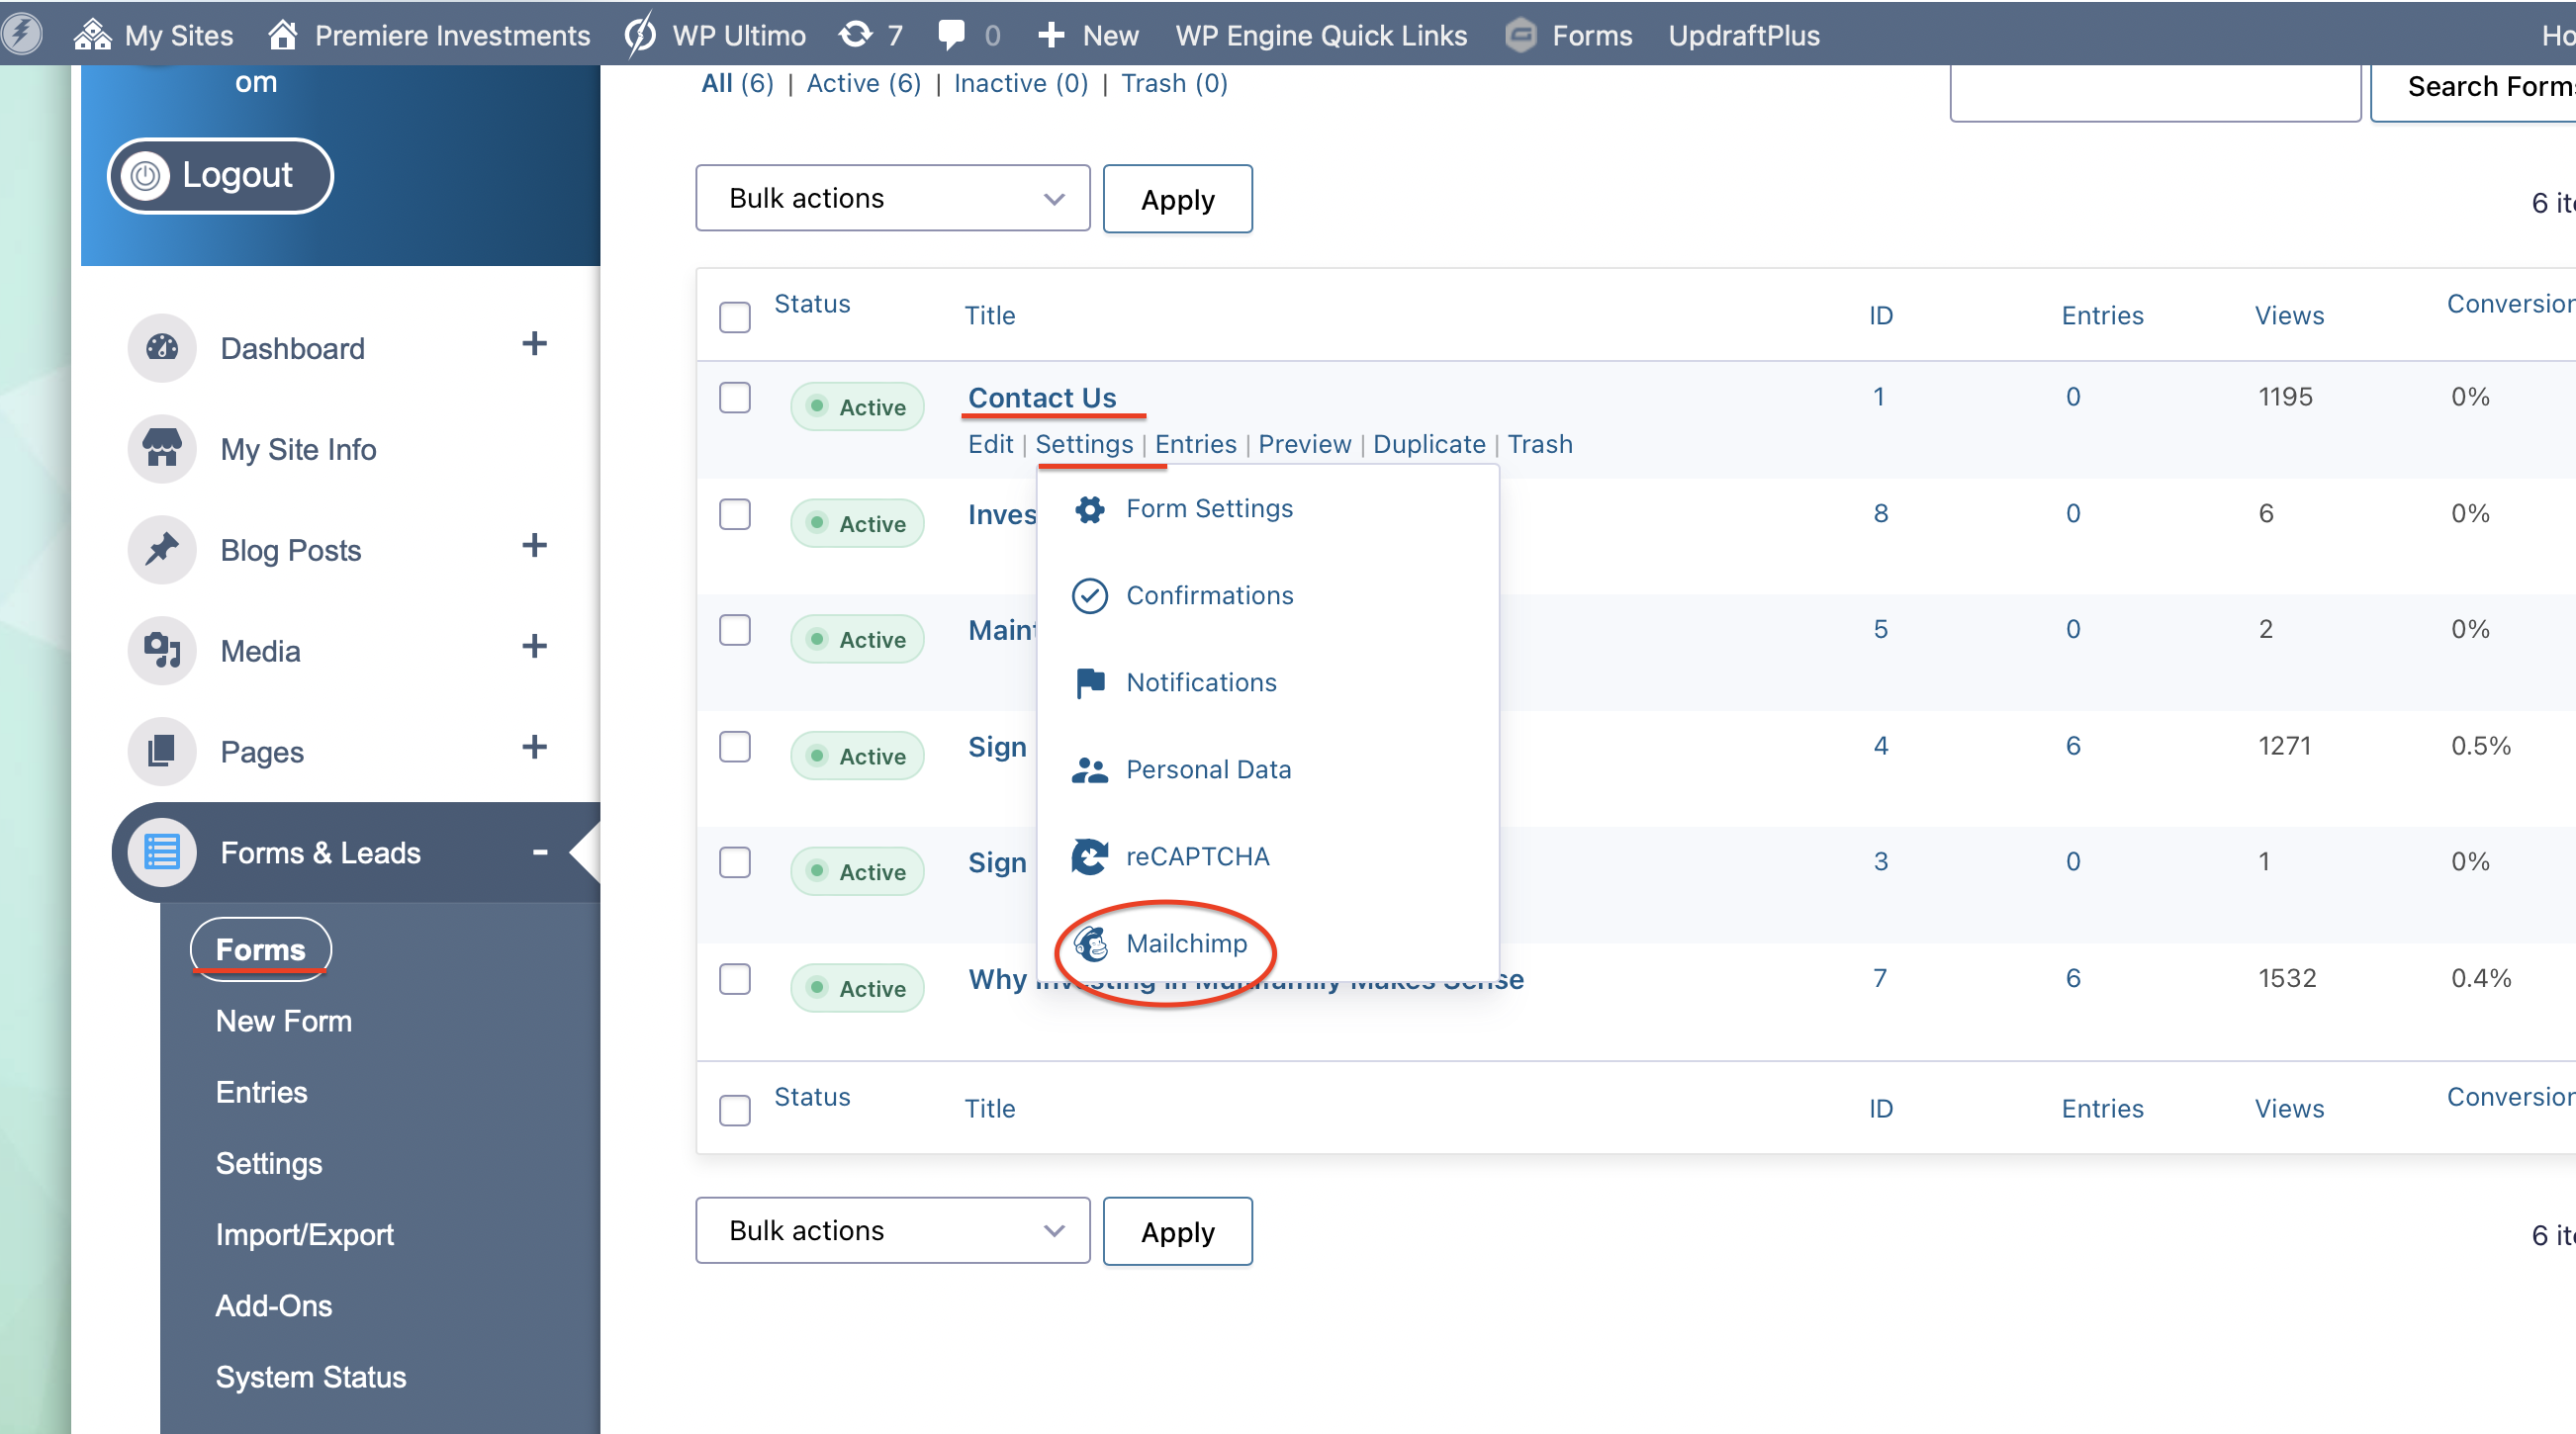
To do this click on Forms, then select any form you wish to create a feed for. In this tutorial I’m using the Contact Us form. Under the form name, move the mouse over “Settings”, then select “Mailchimp”
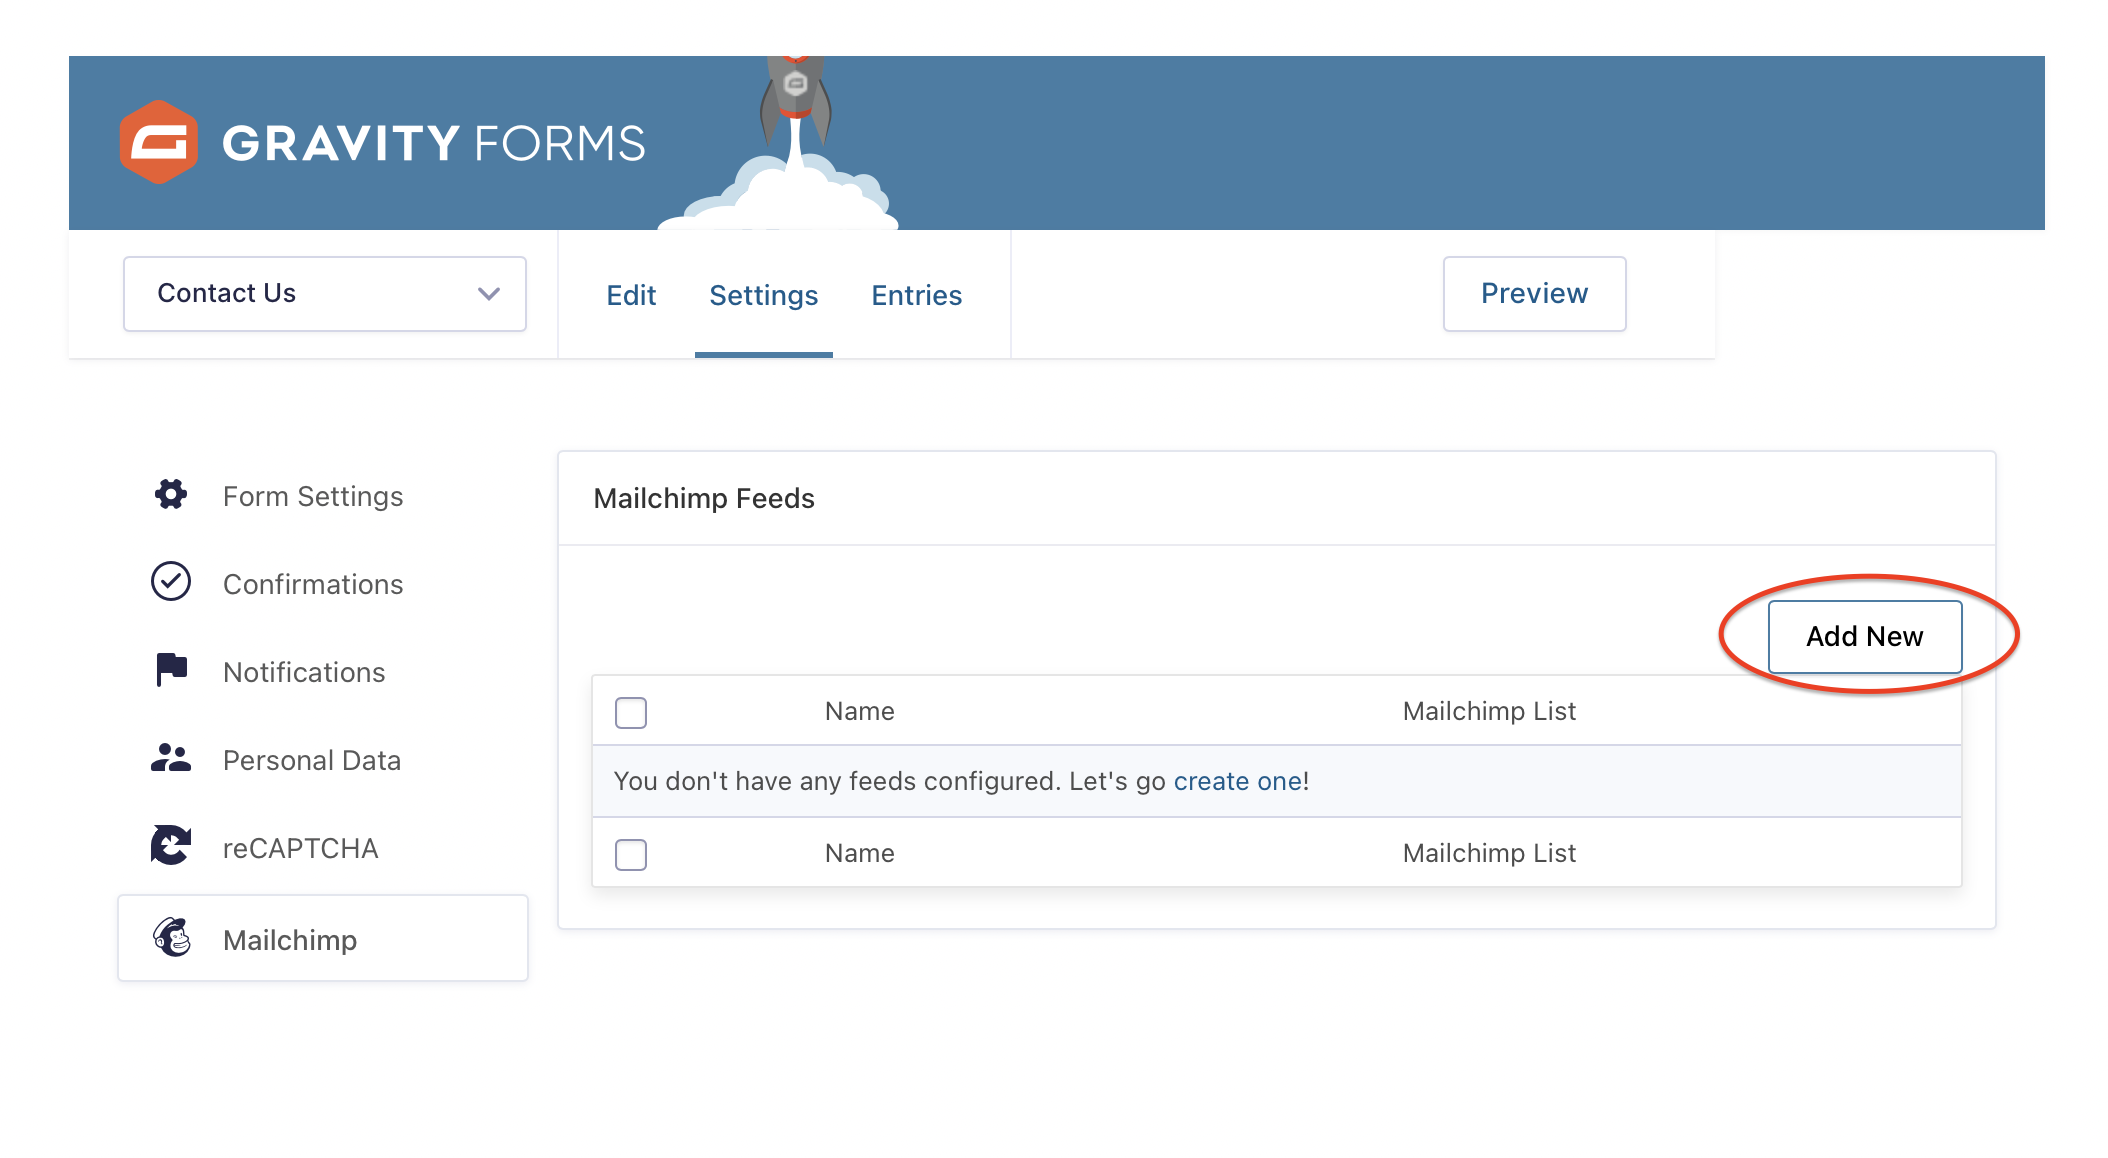
When the page is redirected click Add New.
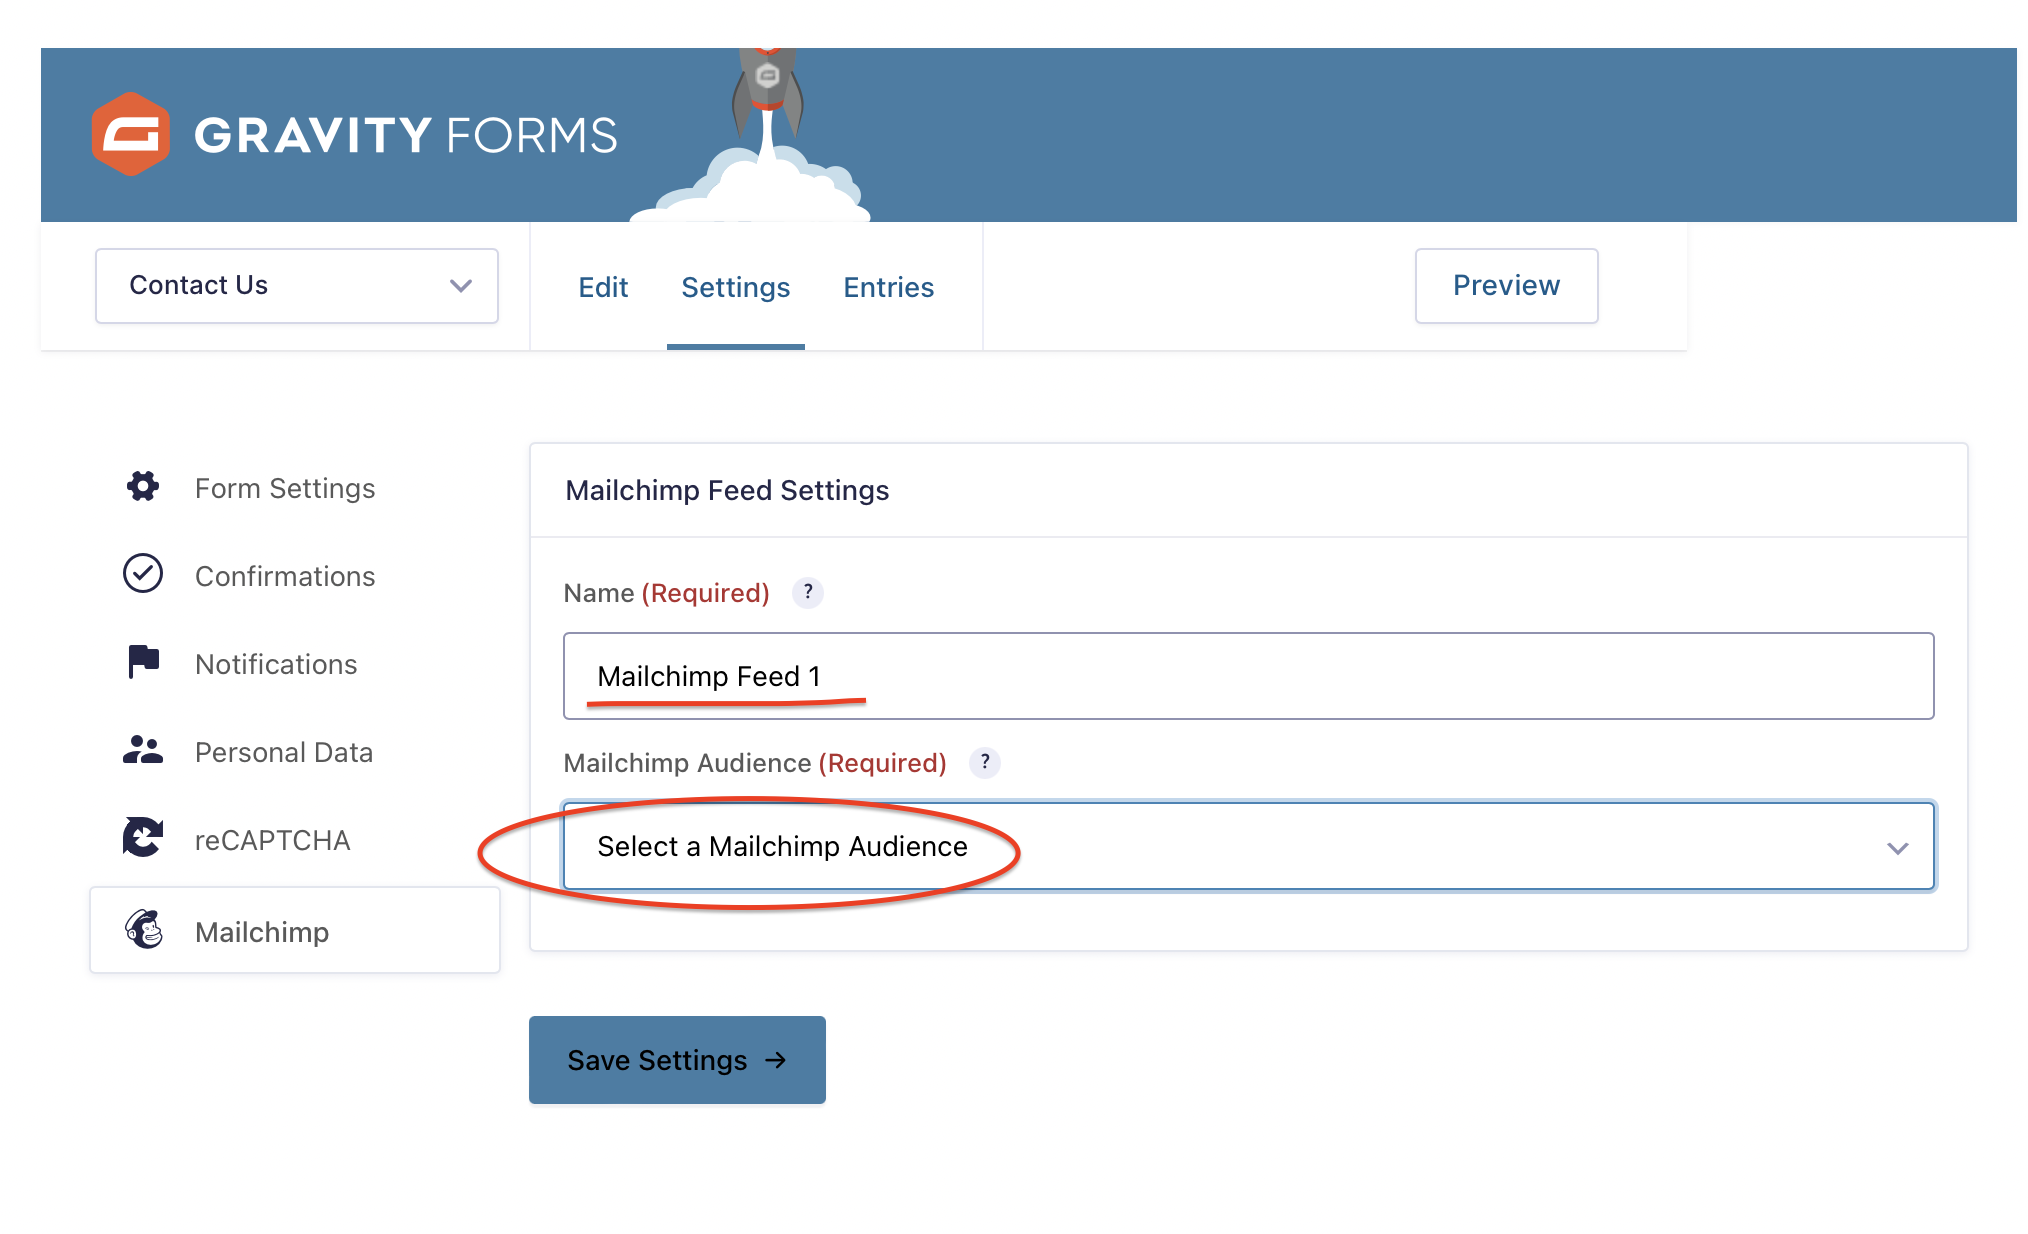
Next you’ll want to create a name for the feed and select the list you wish to use. The MailChimp List is from your MailChimp account, you’ll most likely only have one option to choose from.
Step 4: Map The Fields
This step sounds complicated but it’s actually quite simple. If you’ve followed the previous step correctly your screen should look similar to the picture below.
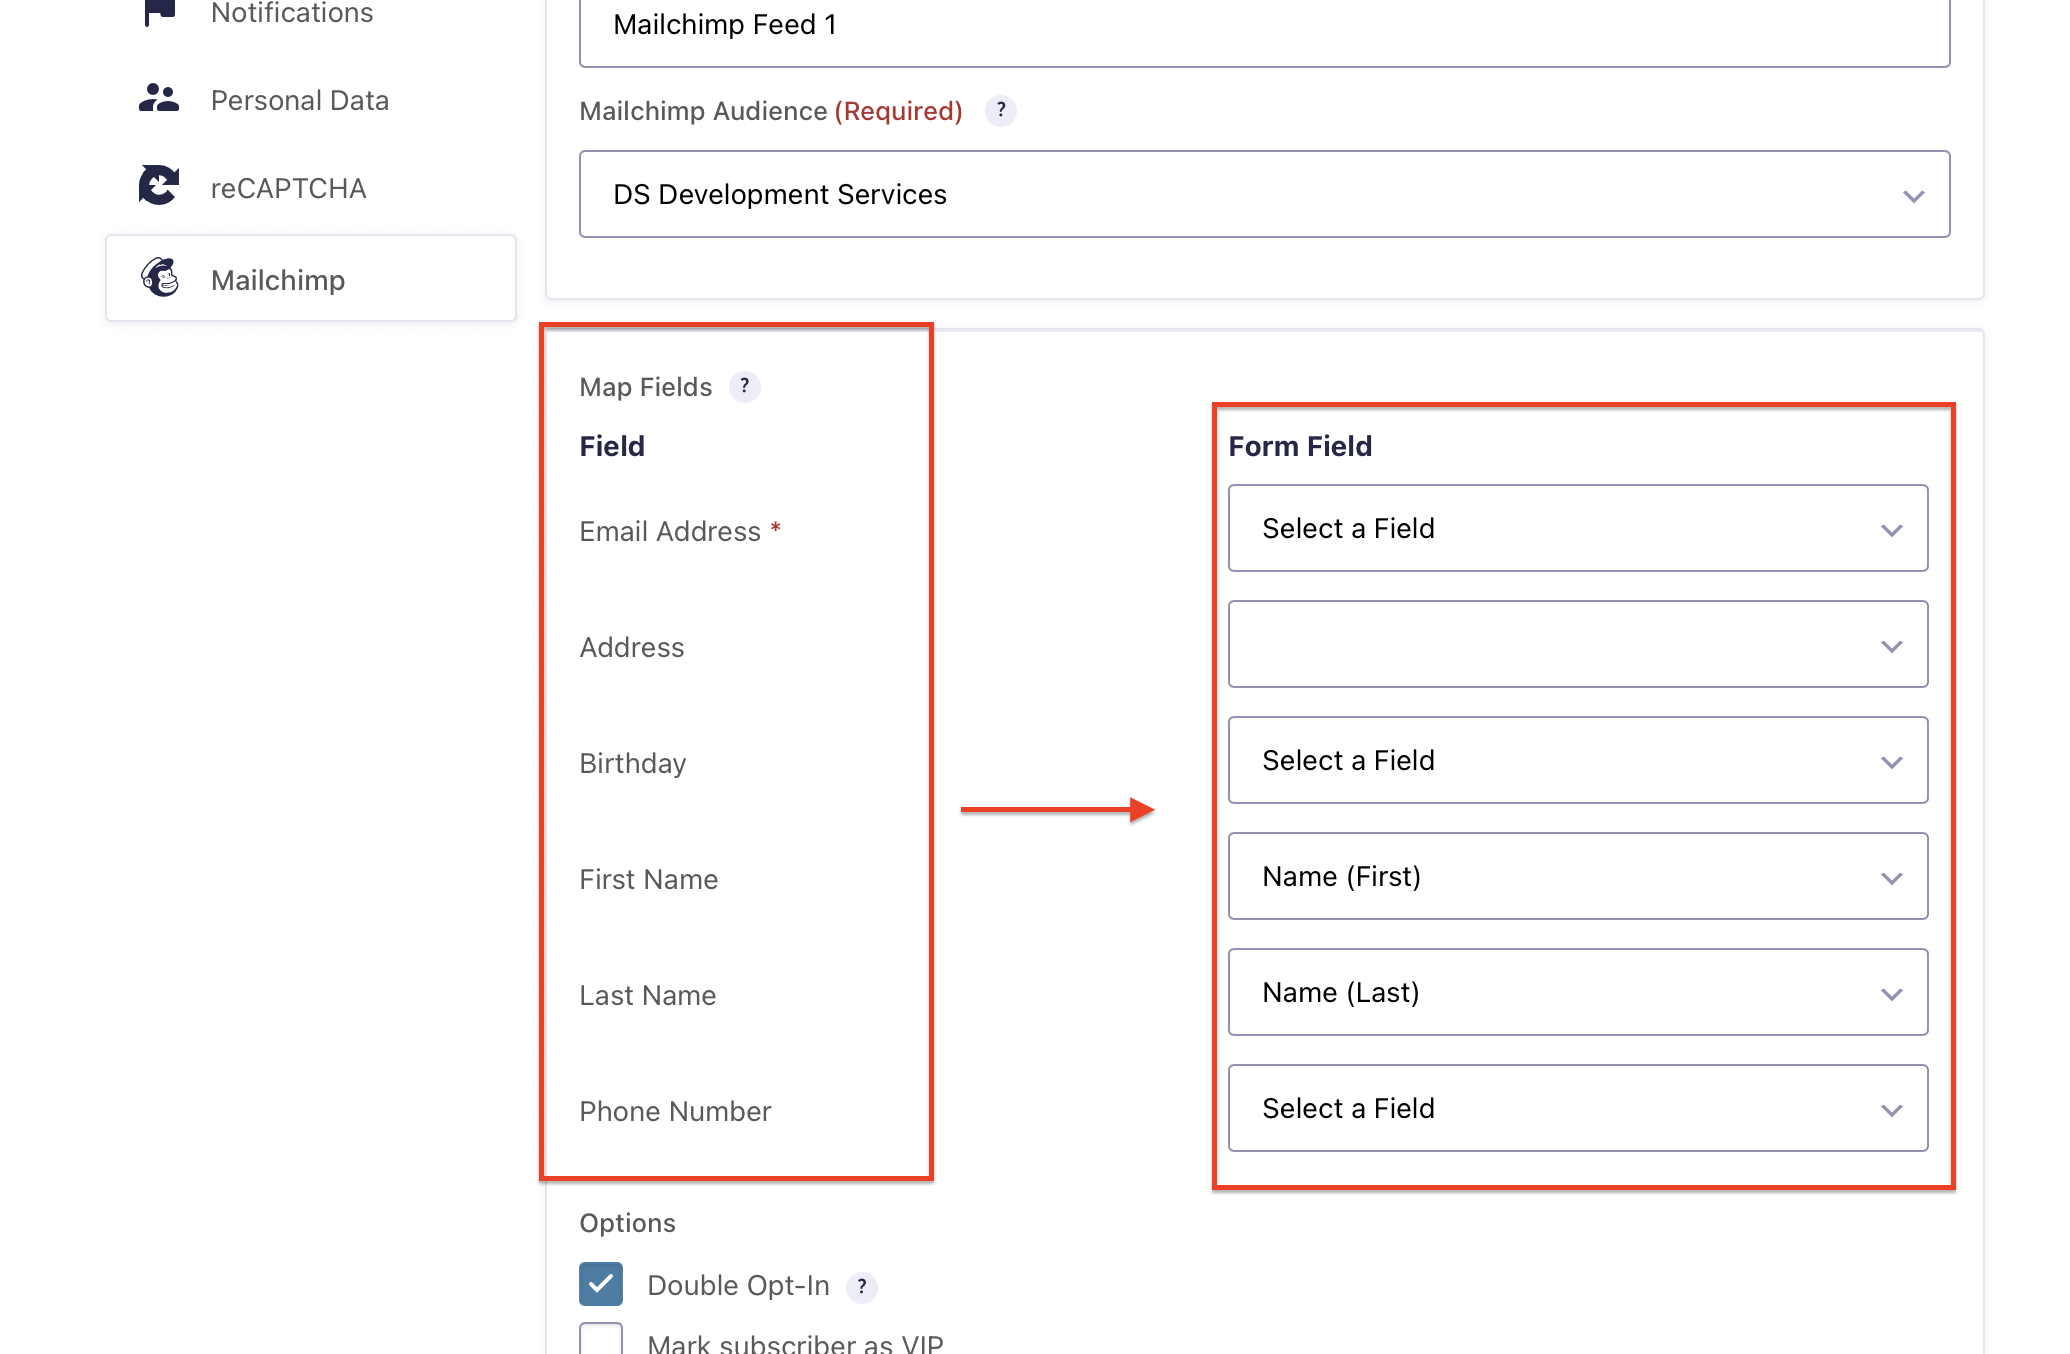
Now all that’s left to do is assign the Form Fields on the right to match the Fields on the left. And once you’re done click Update Settings.
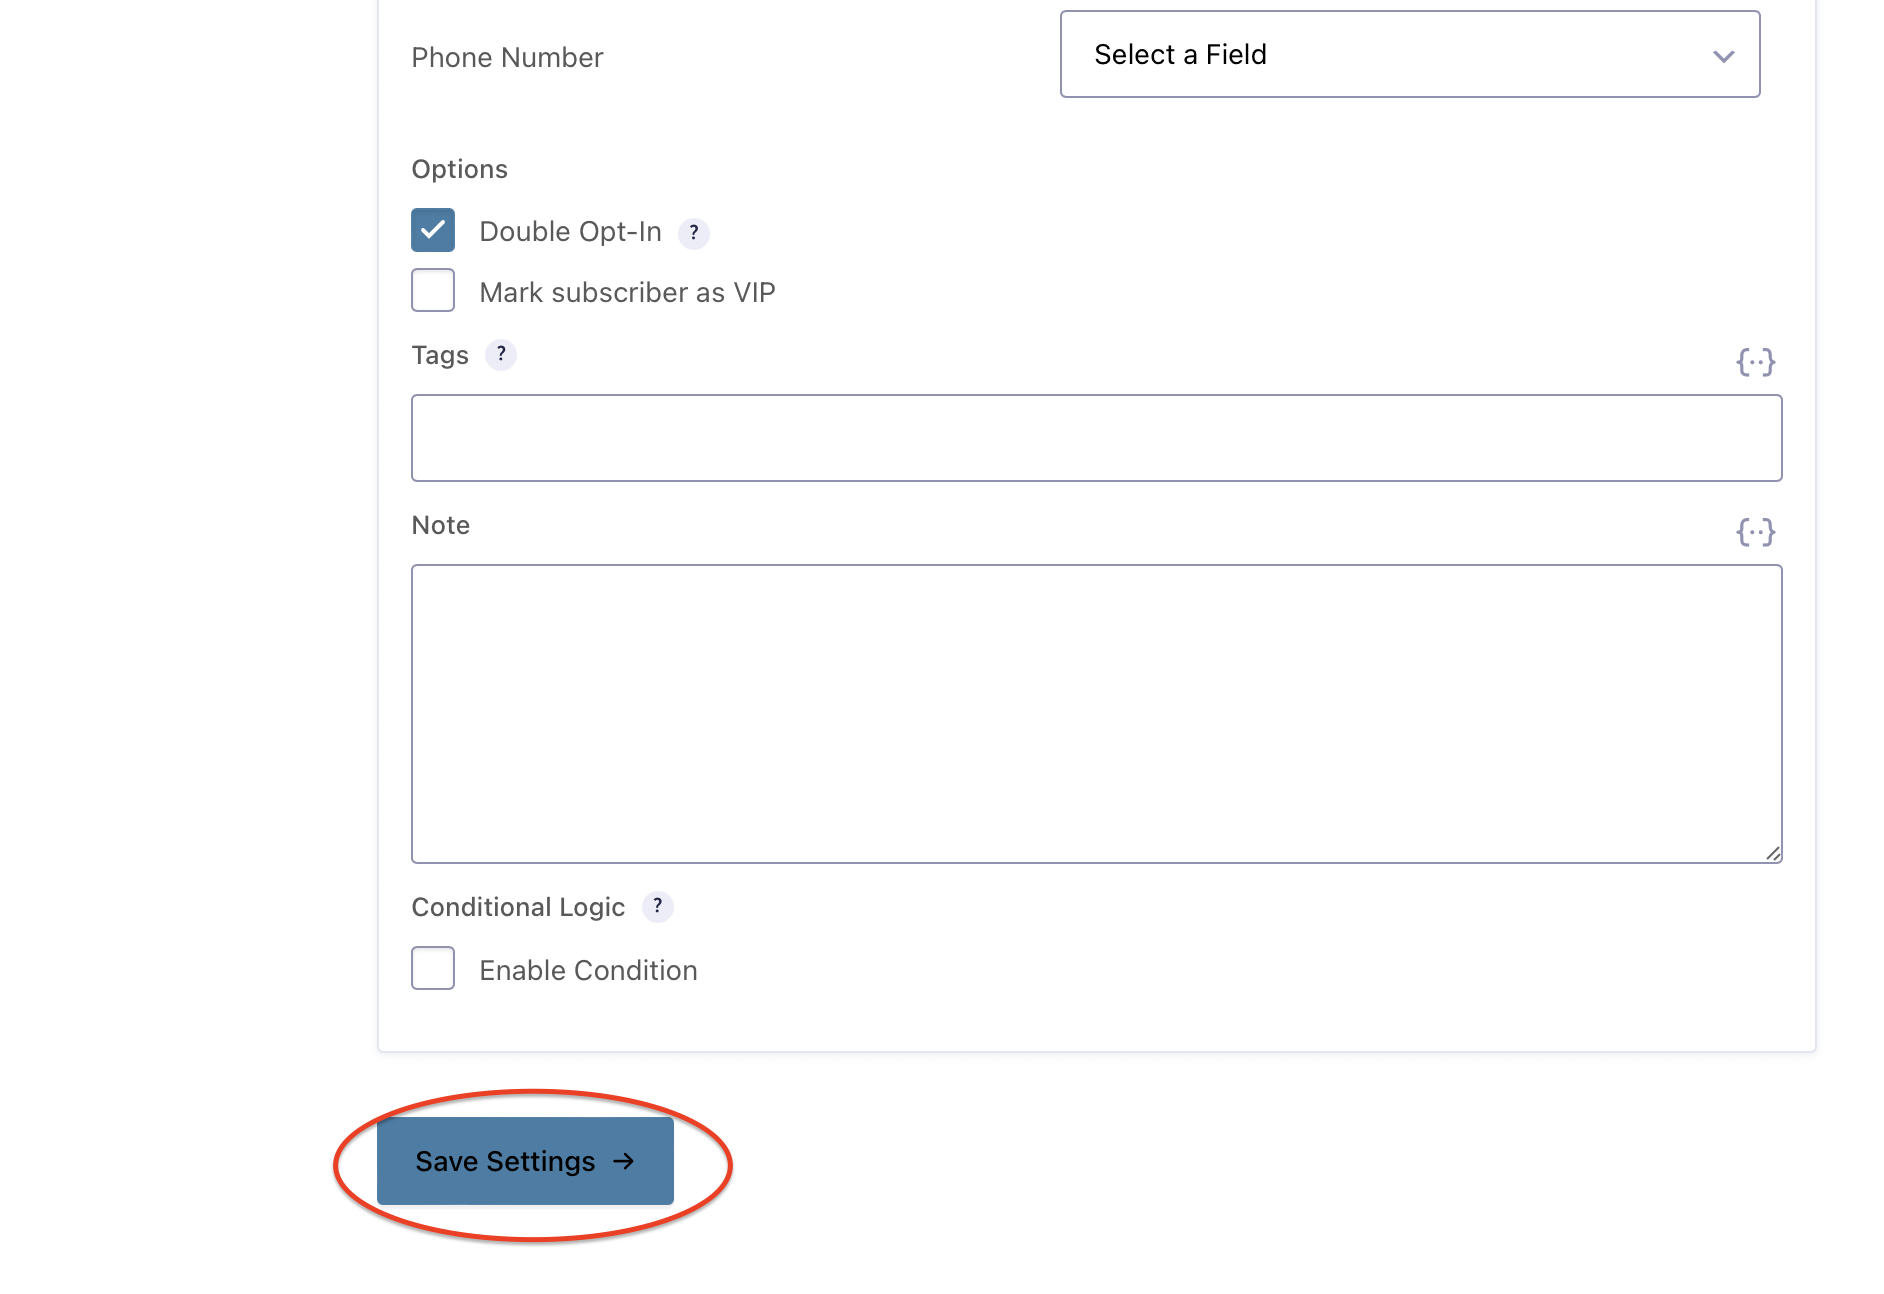
And there you have it. Your form should now be connected to your MailChimp account! To see if it’s working properly, test out the form for yourself.
