
In this article we’re going to show you how to add a custom favicon to your website. Favicons are the little icons that appear beside a website title in a browser tab.
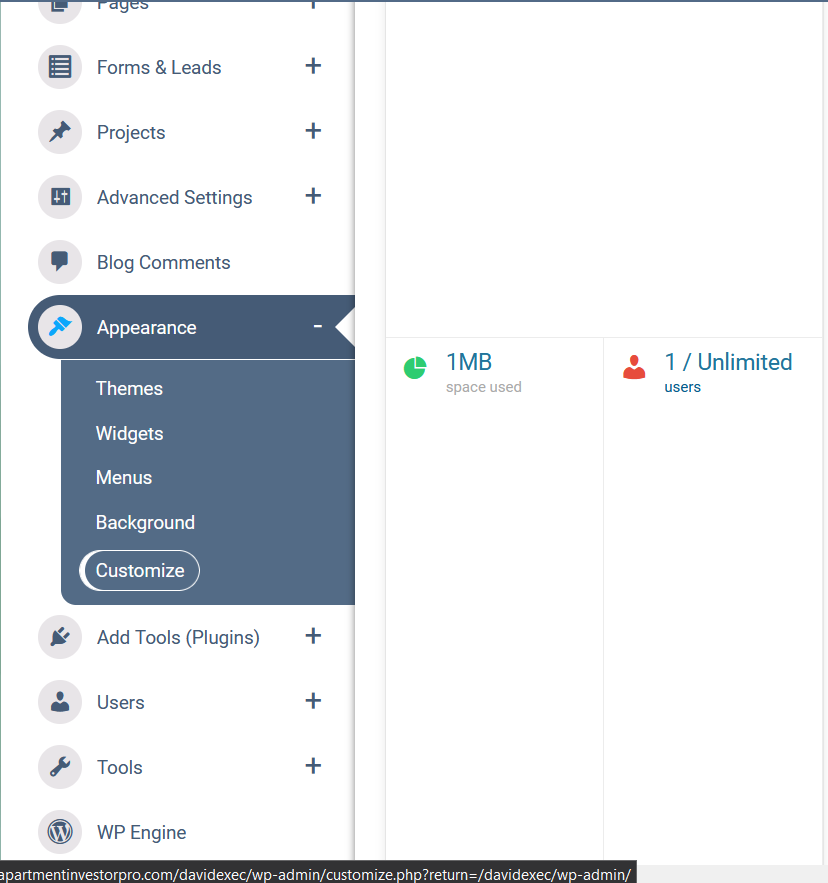
Step 1
Log into your dashboard. In the left hand menu bar find ‘Appearance’, hover over that and select ‘Customize’.
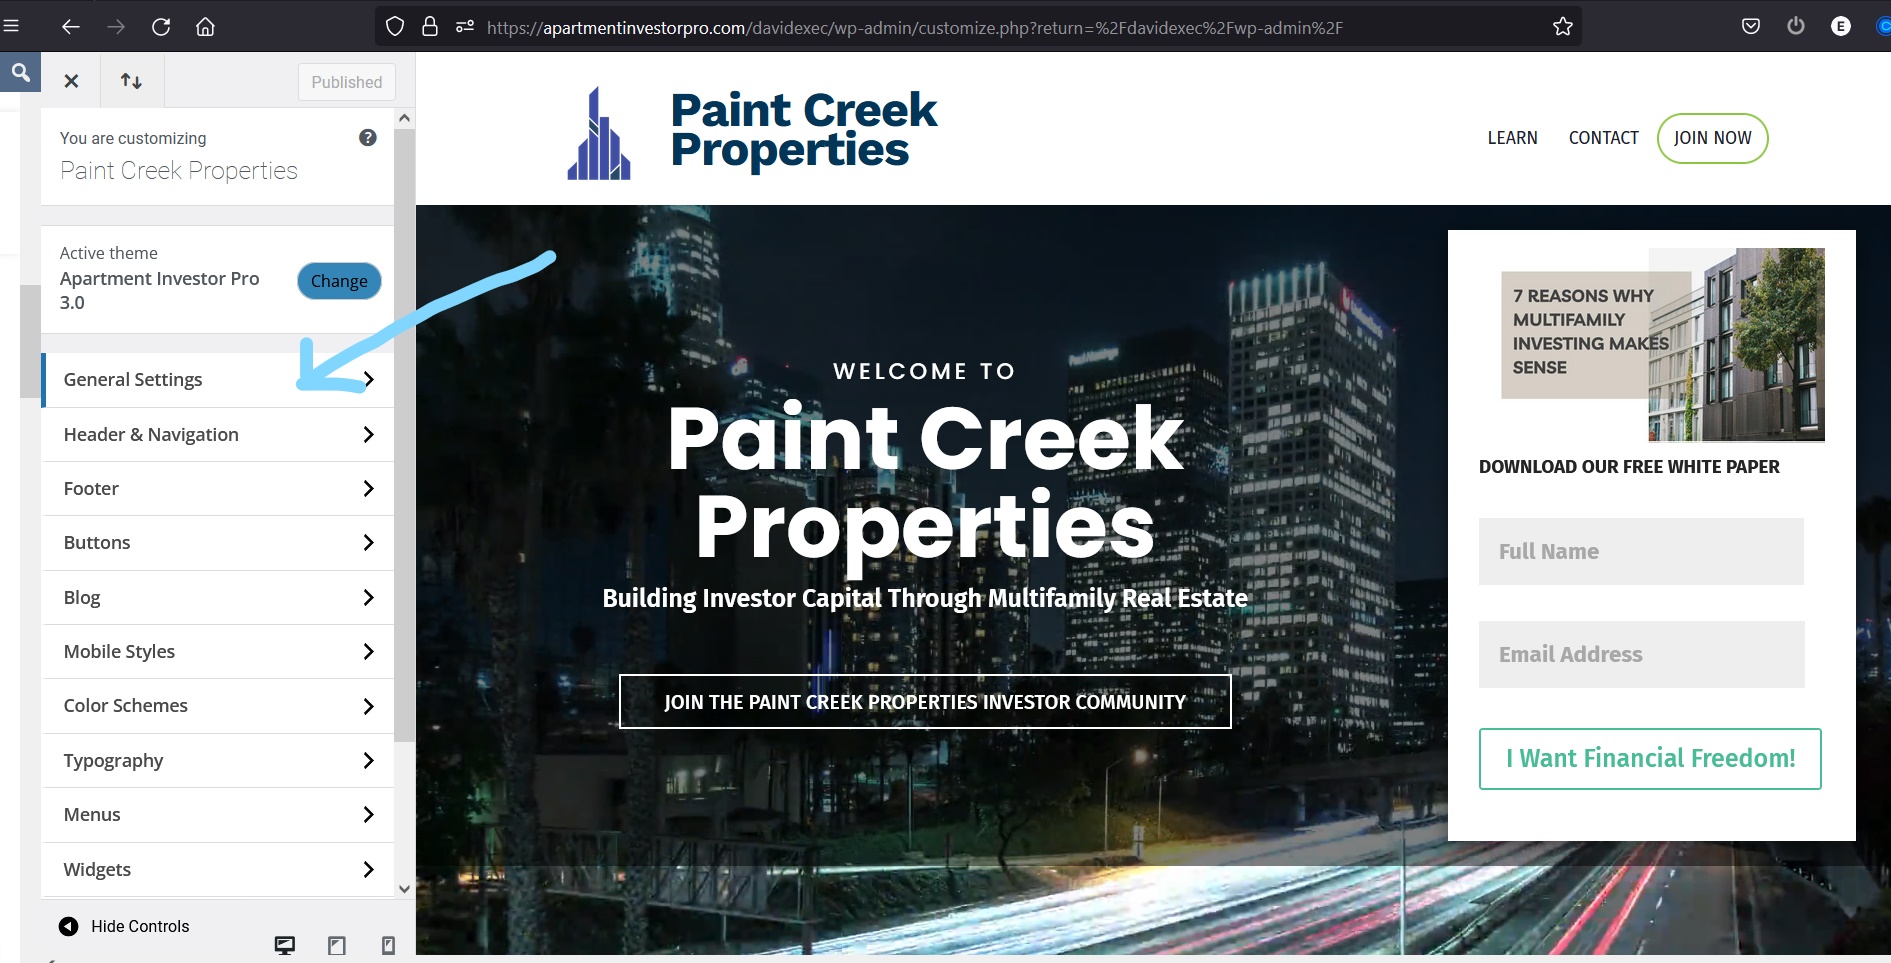
Step 2
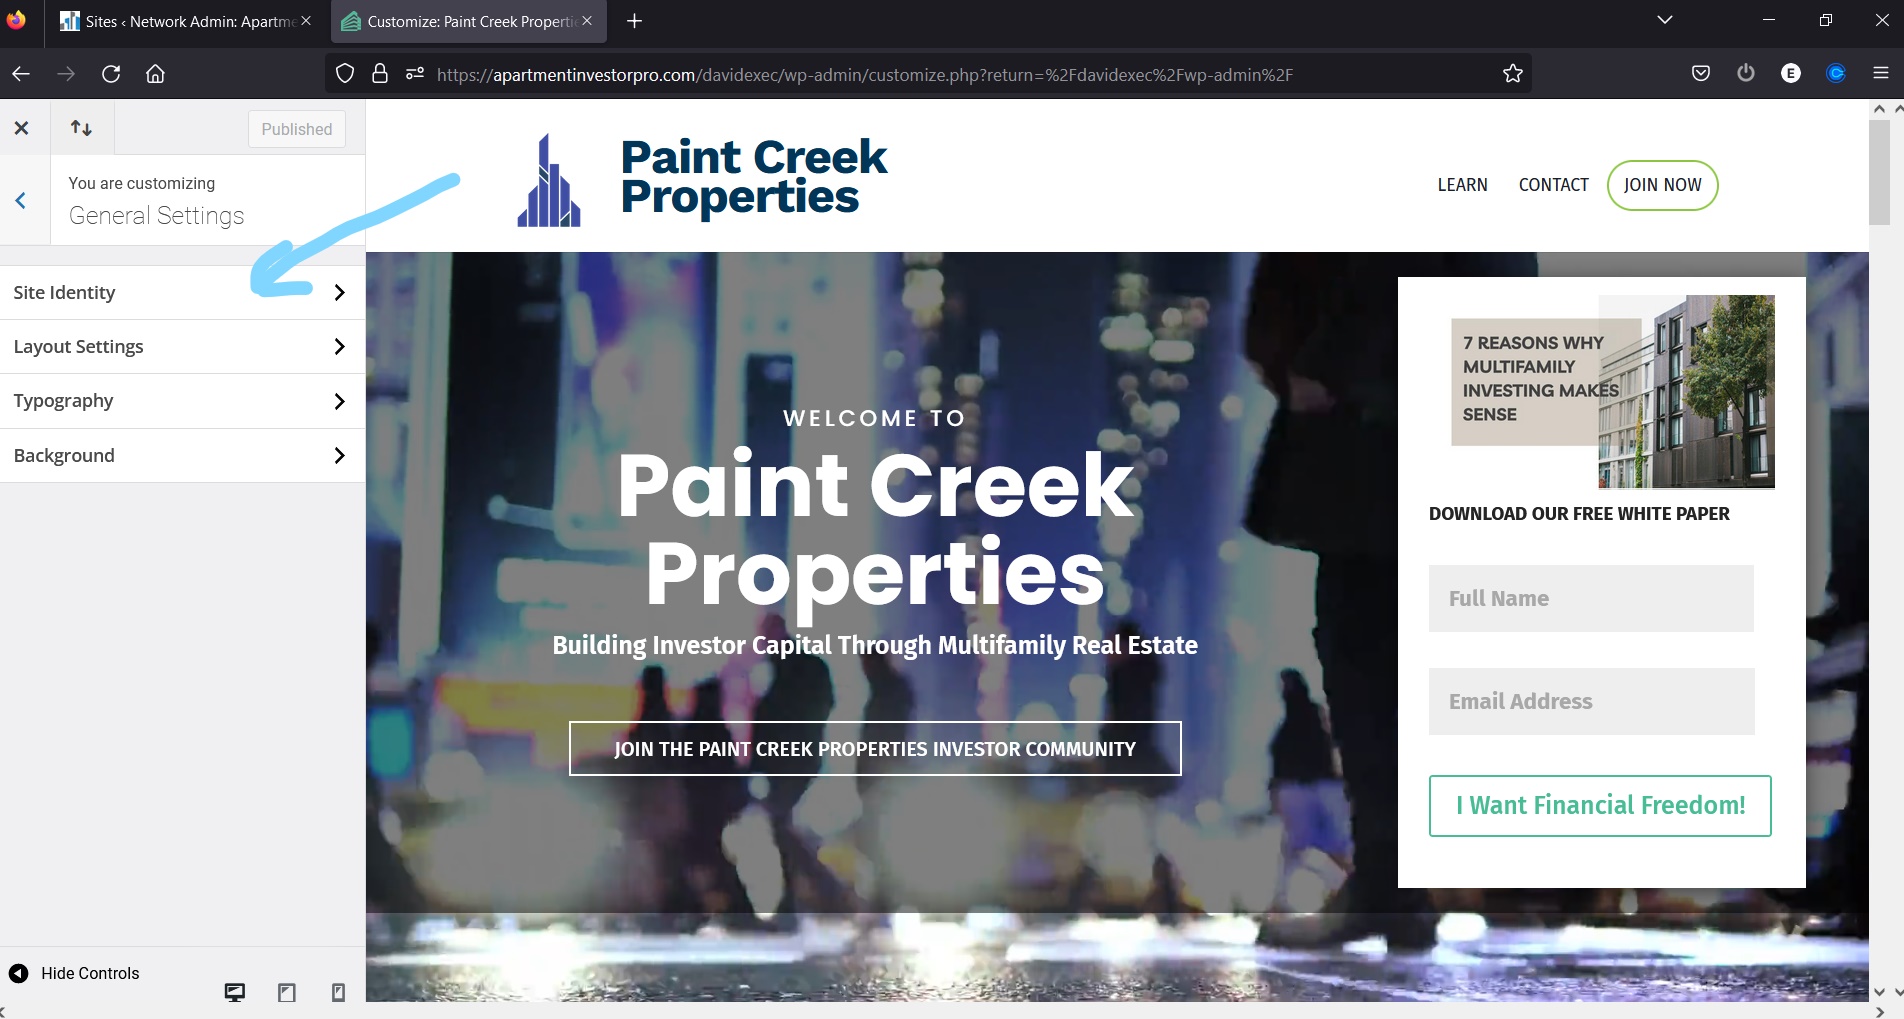
After clicking ‘Customize’ you will be redirected to the home page of your website. There will be a new customization menu on the left. Select ‘General Settings’ and then ‘Site Identity’.
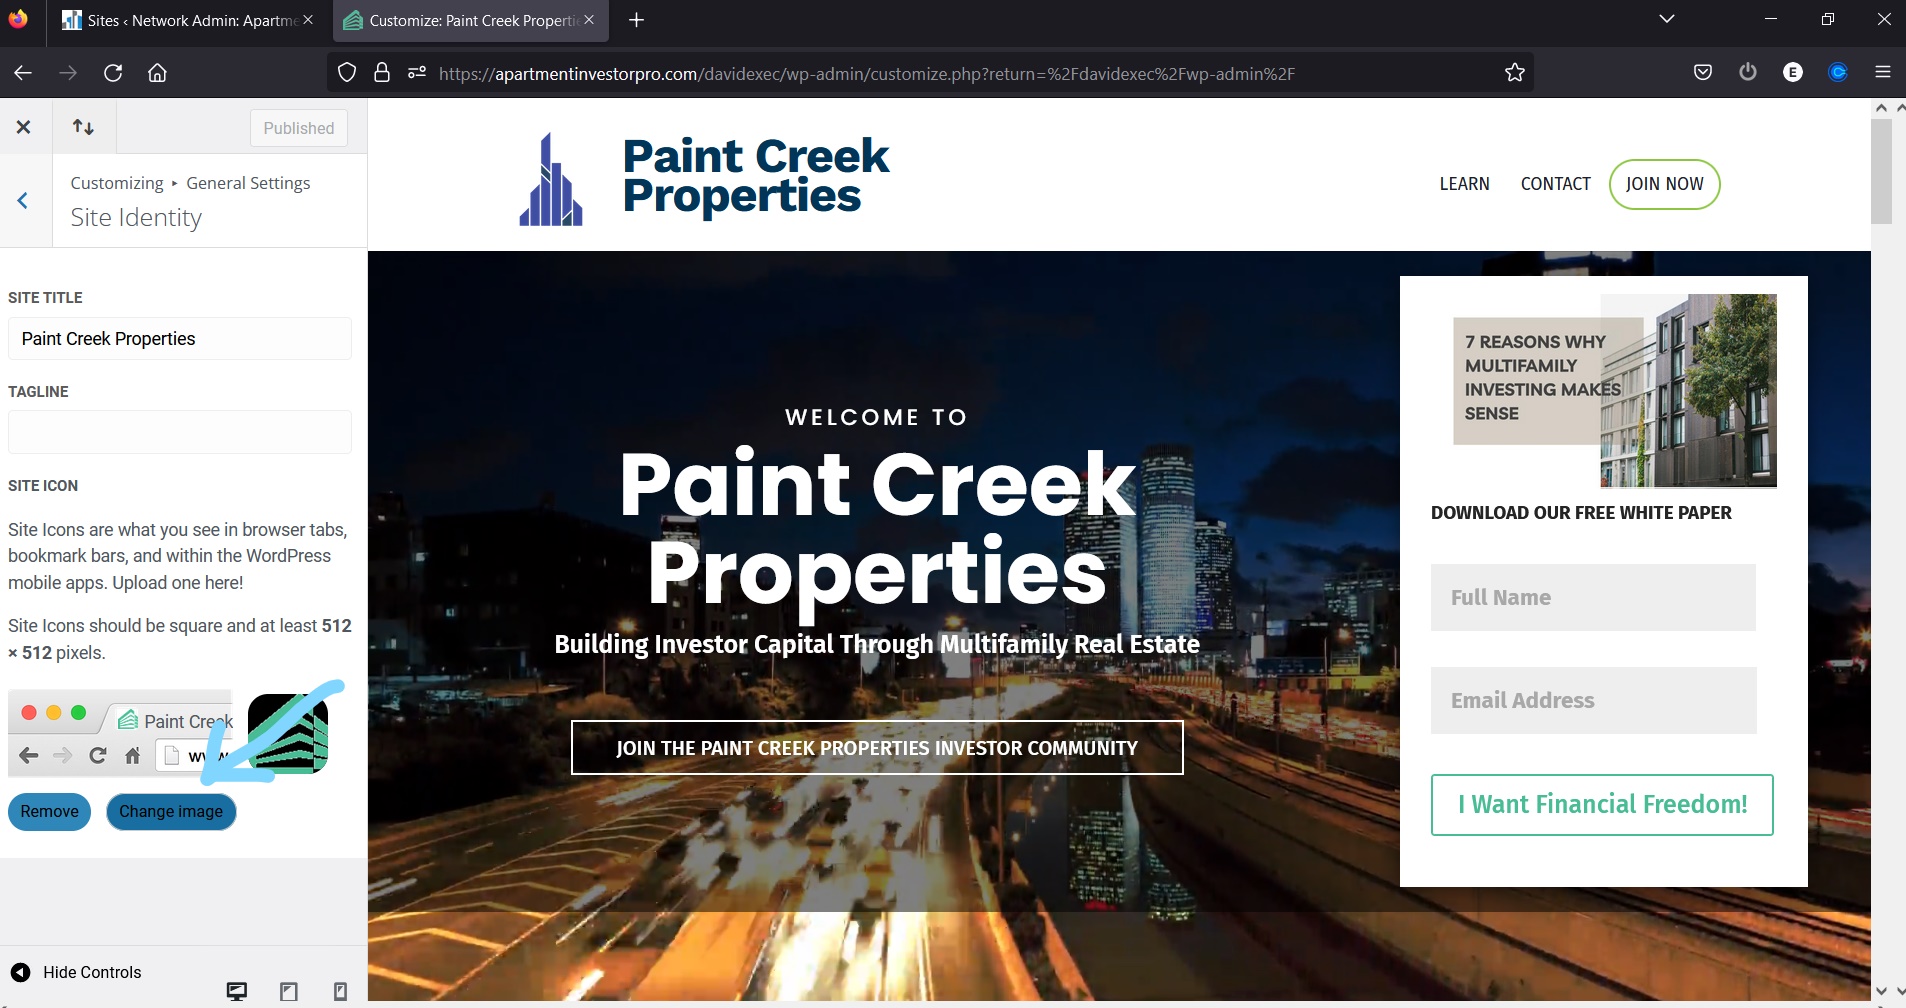
Step 3
You’re given a few options in ‘Site Identity’ that you can change. For now at the bottom click on ‘Change Image’.
Step 4
A pop-up will appear that will allow you to select your favicon image from either the media library or to upload it from you computer.
NOTE: The recommended image size from WordPress for a favicon is 512×512 pixels.
Step 5
You’ll be given the chance to adjust how it appears in the browser tab just before saving. When you click ‘Crop Image’ it will save the favicon for you.

Step 6
To actually save and publish your changes, click ‘Publish’. Afterwards you can close the customizer menu.

Now you’ll see your new favicon in your browser tab.