This is a great feature included in all our plans. A ‘Projects’ menu item has been added right inside of your Admin Panel so you can create projects as if you were creating a Post or Page. You also have the option to use the basic project structure, or to use the builder to create truly amazing project layouts.
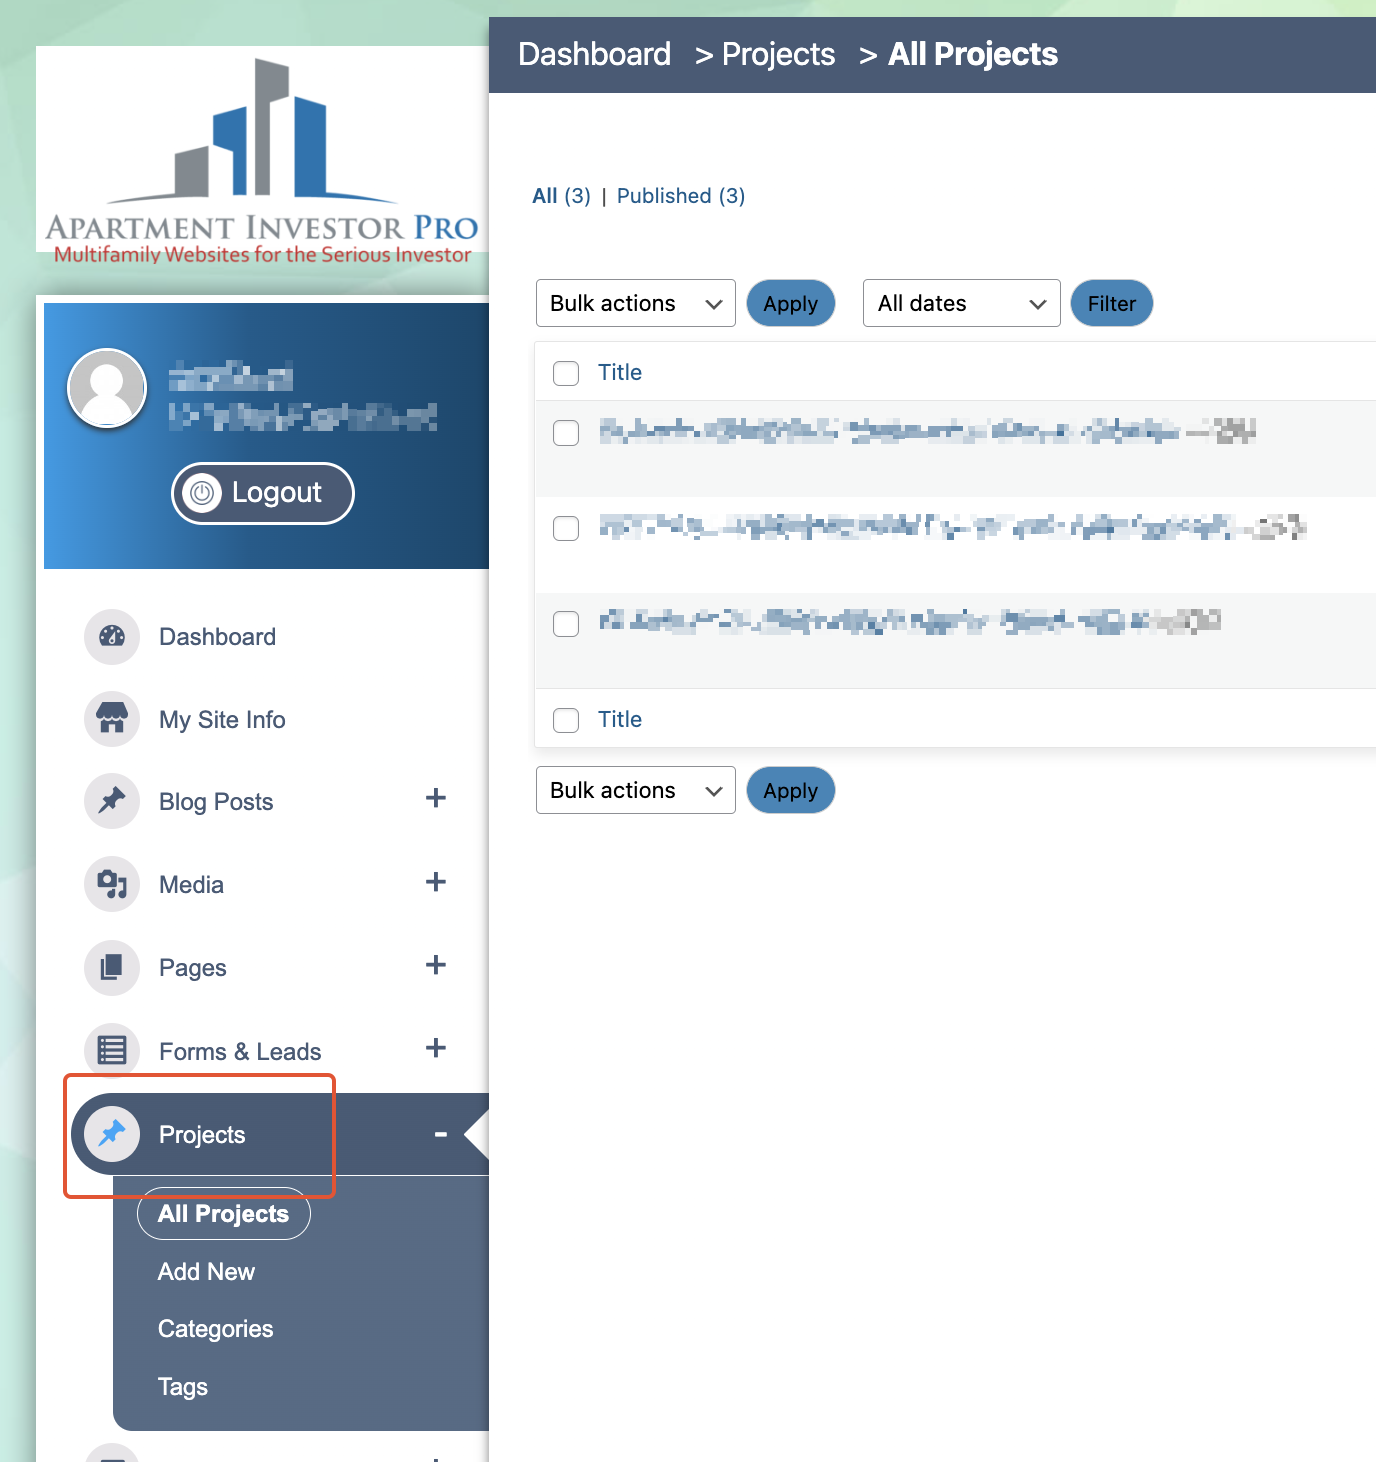
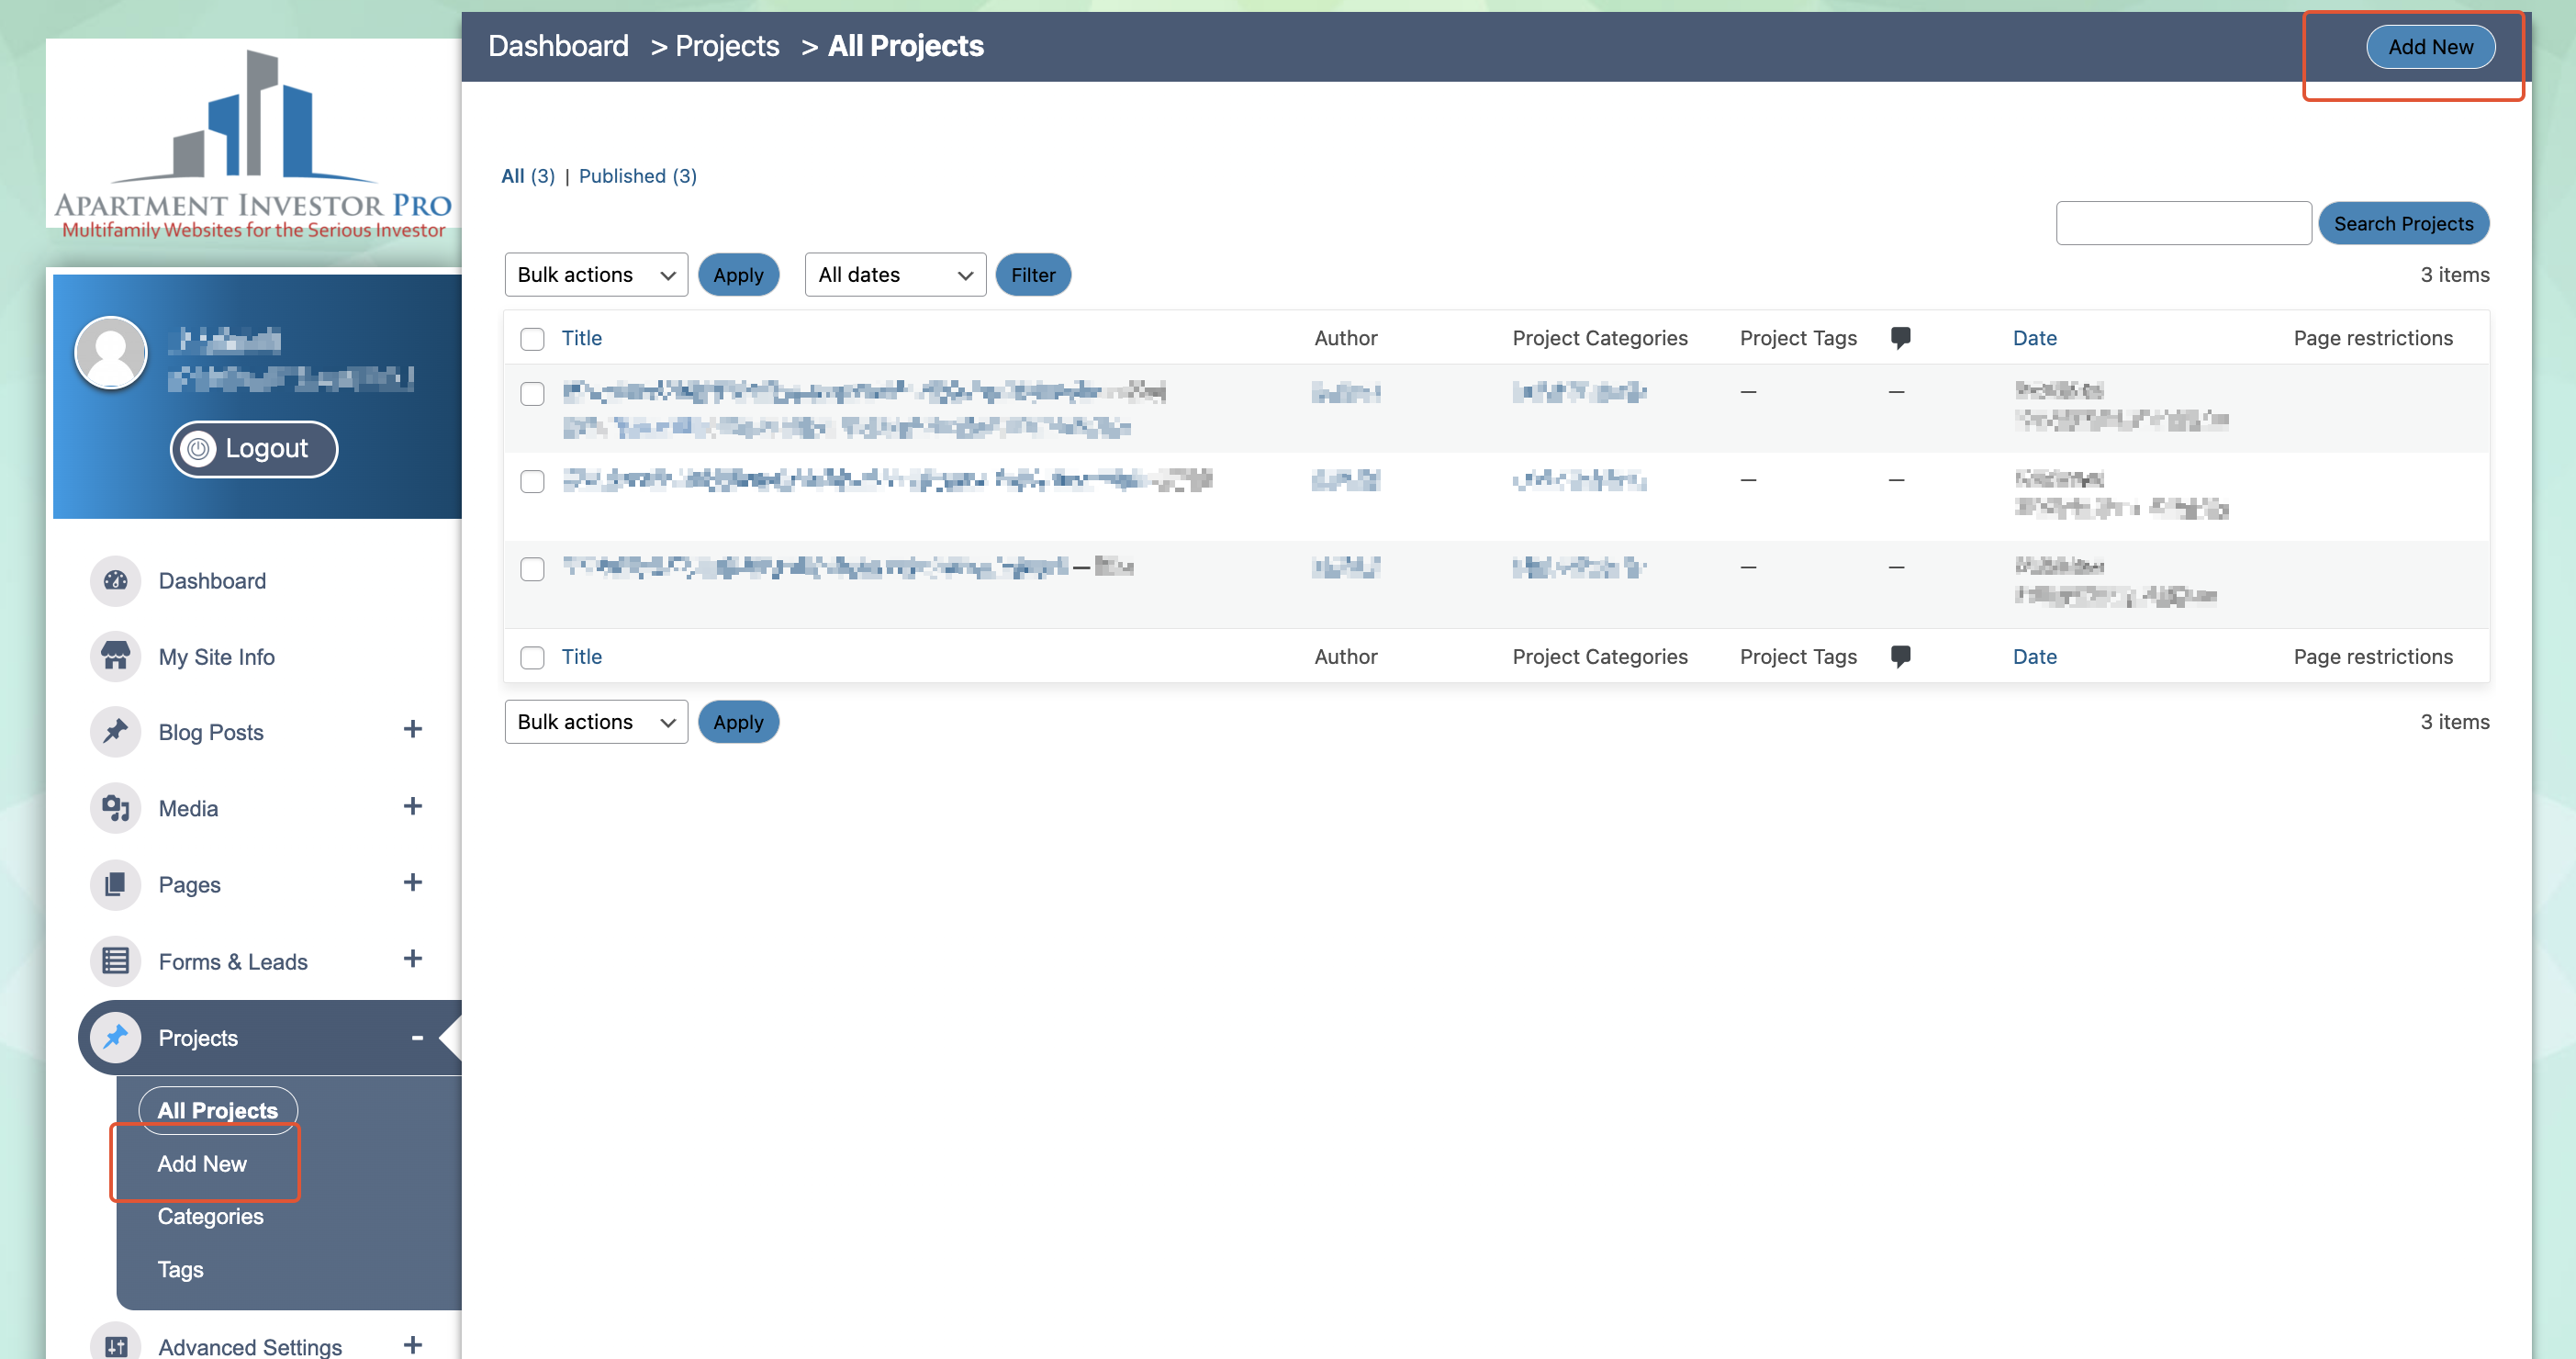
Creating Your Project
Creating a project is just like creating a blog post. You have a title, body, categories, tags and you can add images.
NOTE: You must add a Category in order for your project to be displayed on your website.
Features Of Project Page
Title
Start off by defining your project title.
Page Layout
You can choose from three project page layouts—this can be unique to each project if desired. The three layouts include a left sidebar, a right sidebar, or a full width option.
Categories
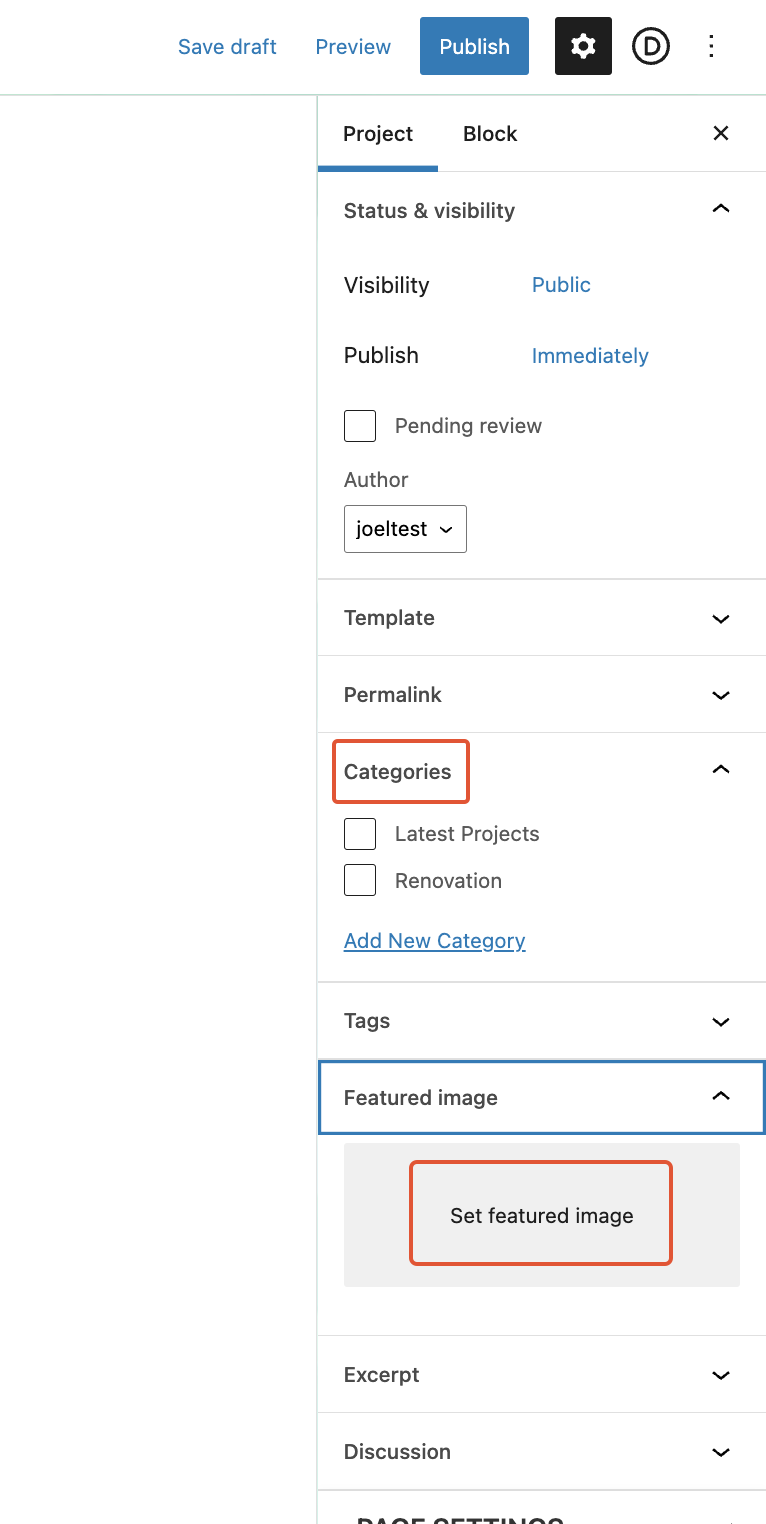
Project categories are separate from post categories so that you can have full control over what appears inside of your portfolios. Within the Project Builder you can add a new category or choose from existing ones.
For example, you might decide to have some projects that you show publicly on your site and others that are only shown to your investors who are logged. Or you might have one section for past projects and another for upcoming projects. By grouping them into categories, it makes it easy to keep things organized on your site and make sure new projects go into the right section of your site.
Tag
Use project tags to define the Skills that were used on the project. These will display on the the project page in a Skills list. Each skill, or tag, can be clicked on to view all projects that include that skill.
So for example you could use things like: value-add, renovation, raise rents to market, enforcement of fees, etc. as skills for the project.
Featured Image
Select a featured image by choosing/uploading an image via the WordPress Media Library. This will be the image that gets displayed as a thumbnail in your portfolio.
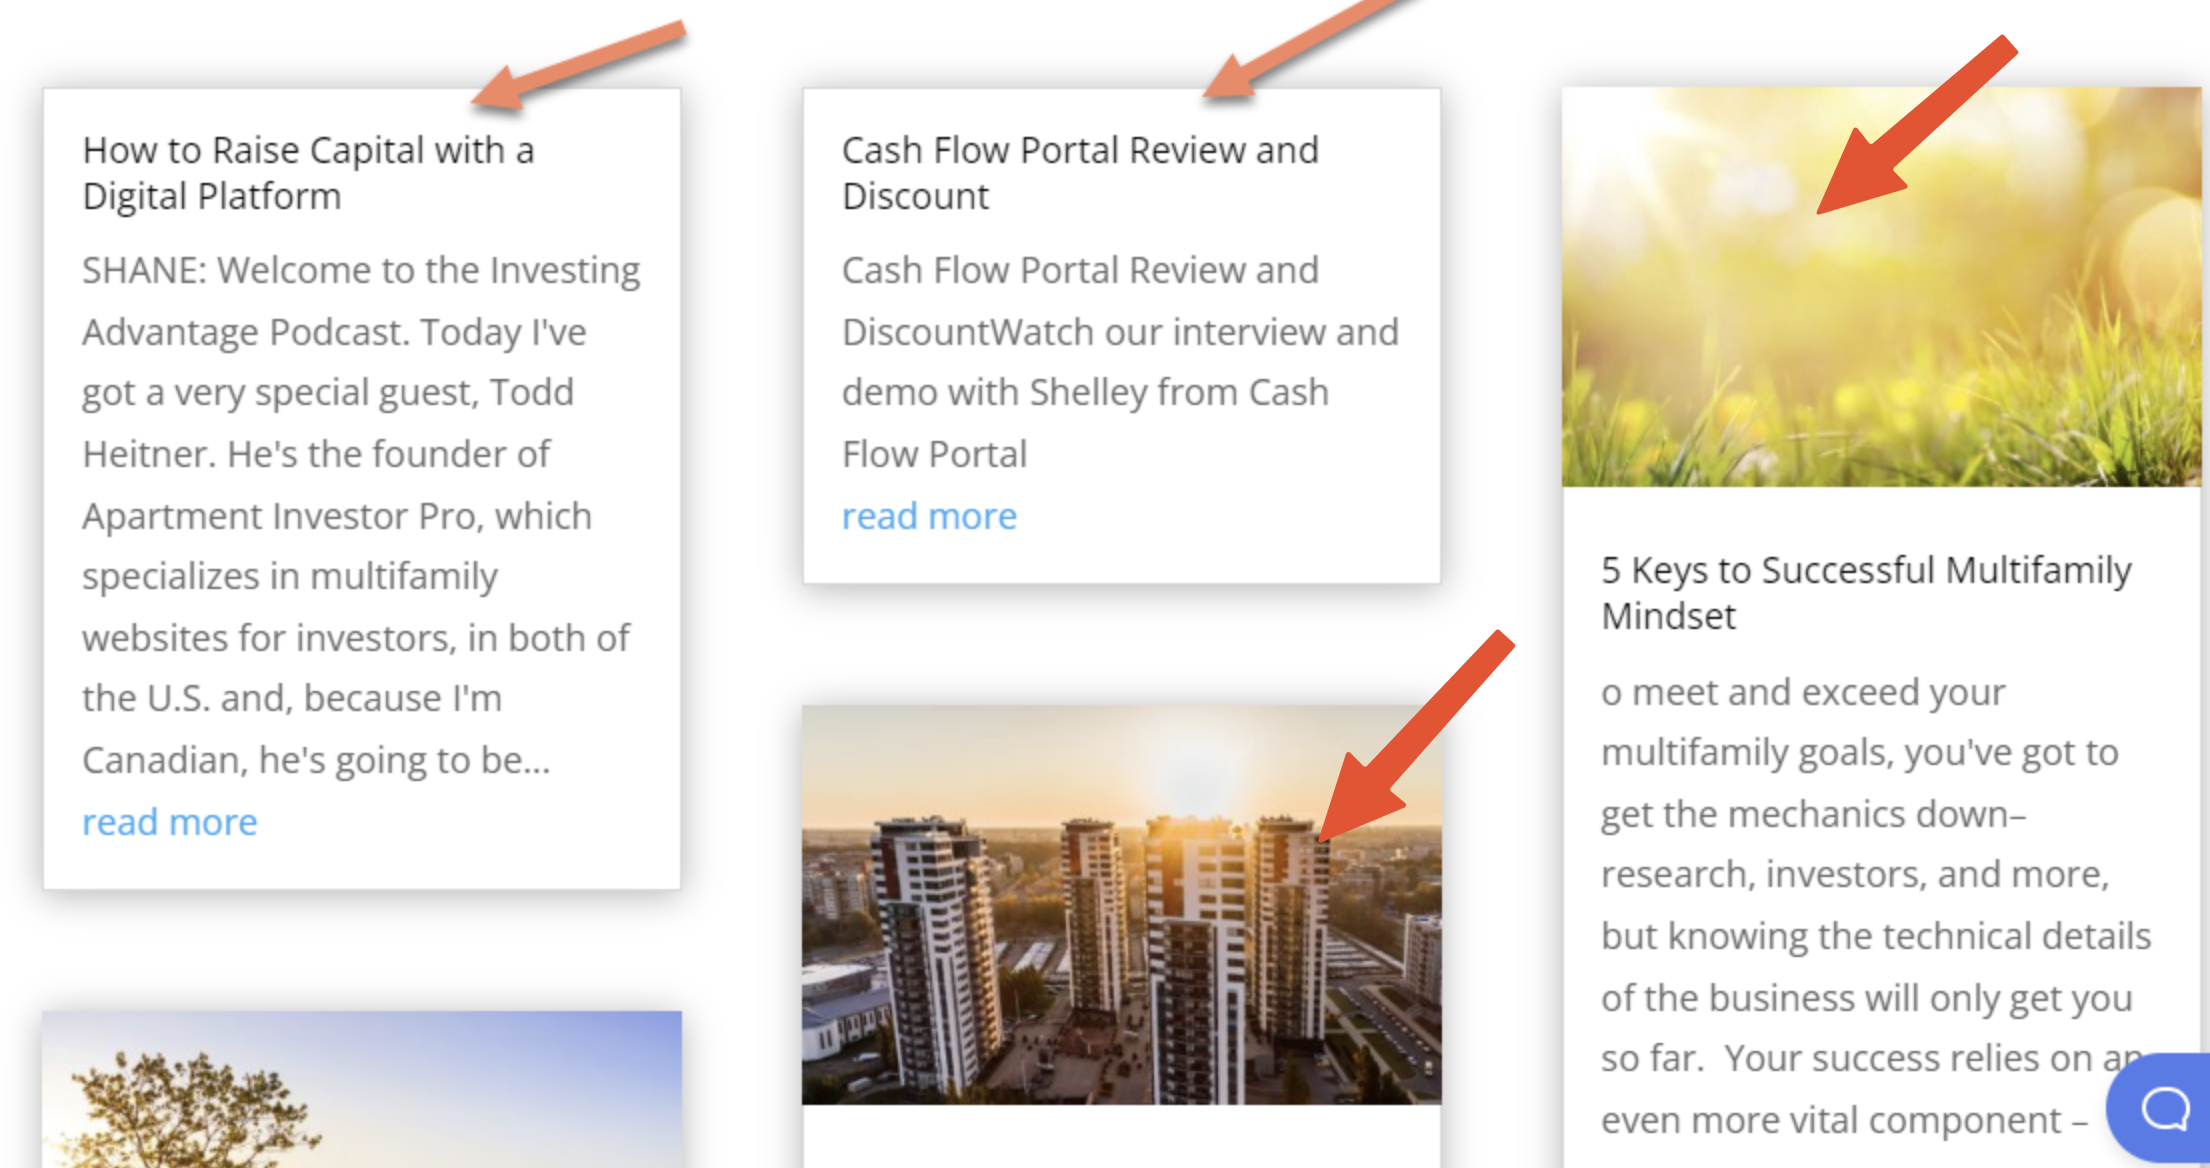
We recommend adding a featured image as it will help visitors see a preview of the project and it will look a lot nicer on the page.
Without Featured Images and With Featured Images
Displaying Your Project On Your Website
Once you have your projects made and they’re ready to be displayed, you have 2 ways of displaying your projects. 1) Creating a new page. 2) Adding your projects to an exsisting page.
Note: You do not need to choose one or the other of these methods. You can do both if you choose.
Creating a new page
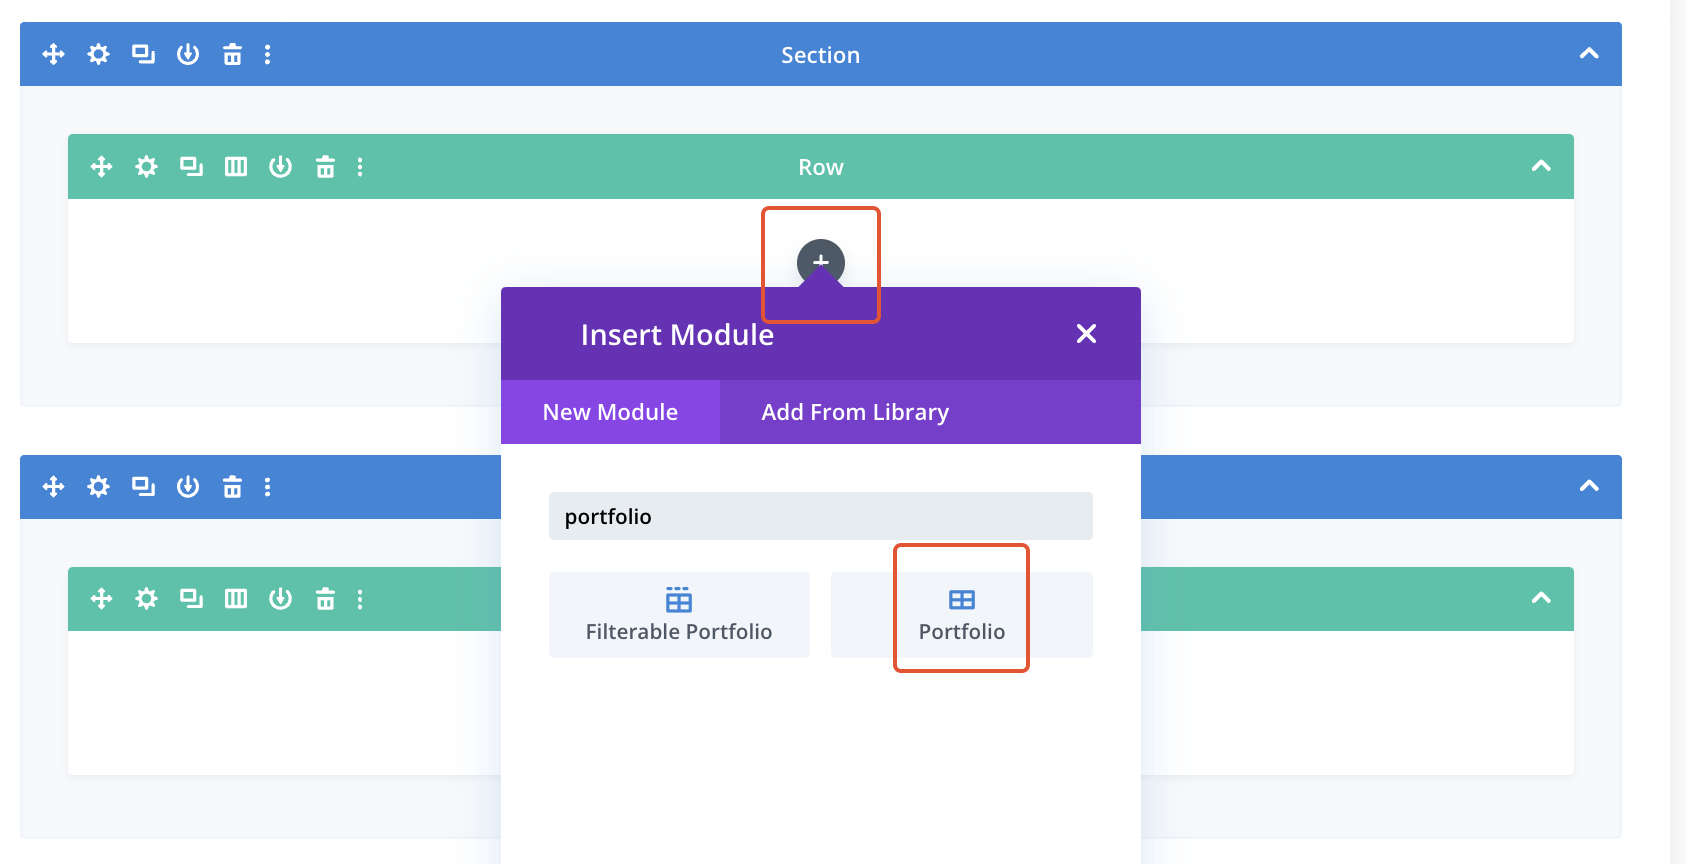
First you’ll need to create a page where you want the projects to be displayed. When you have that page made you will use the Portfolio Module in order to actually display the projects.
To do this, enable the Visual Builder and select the Portfolio Module.
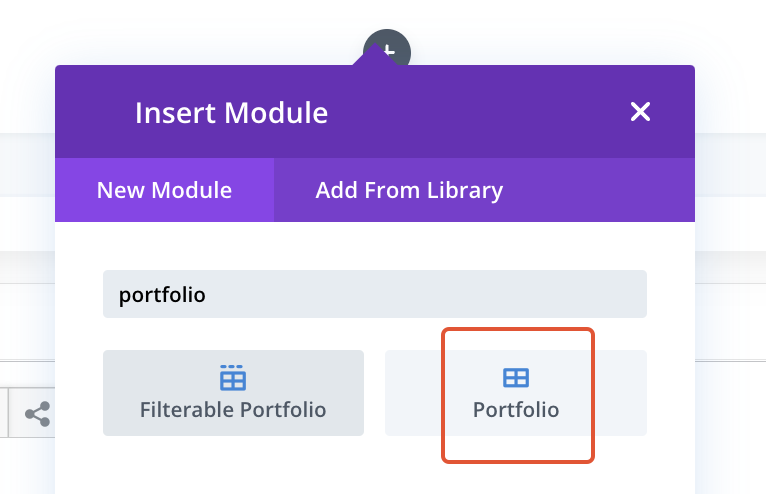
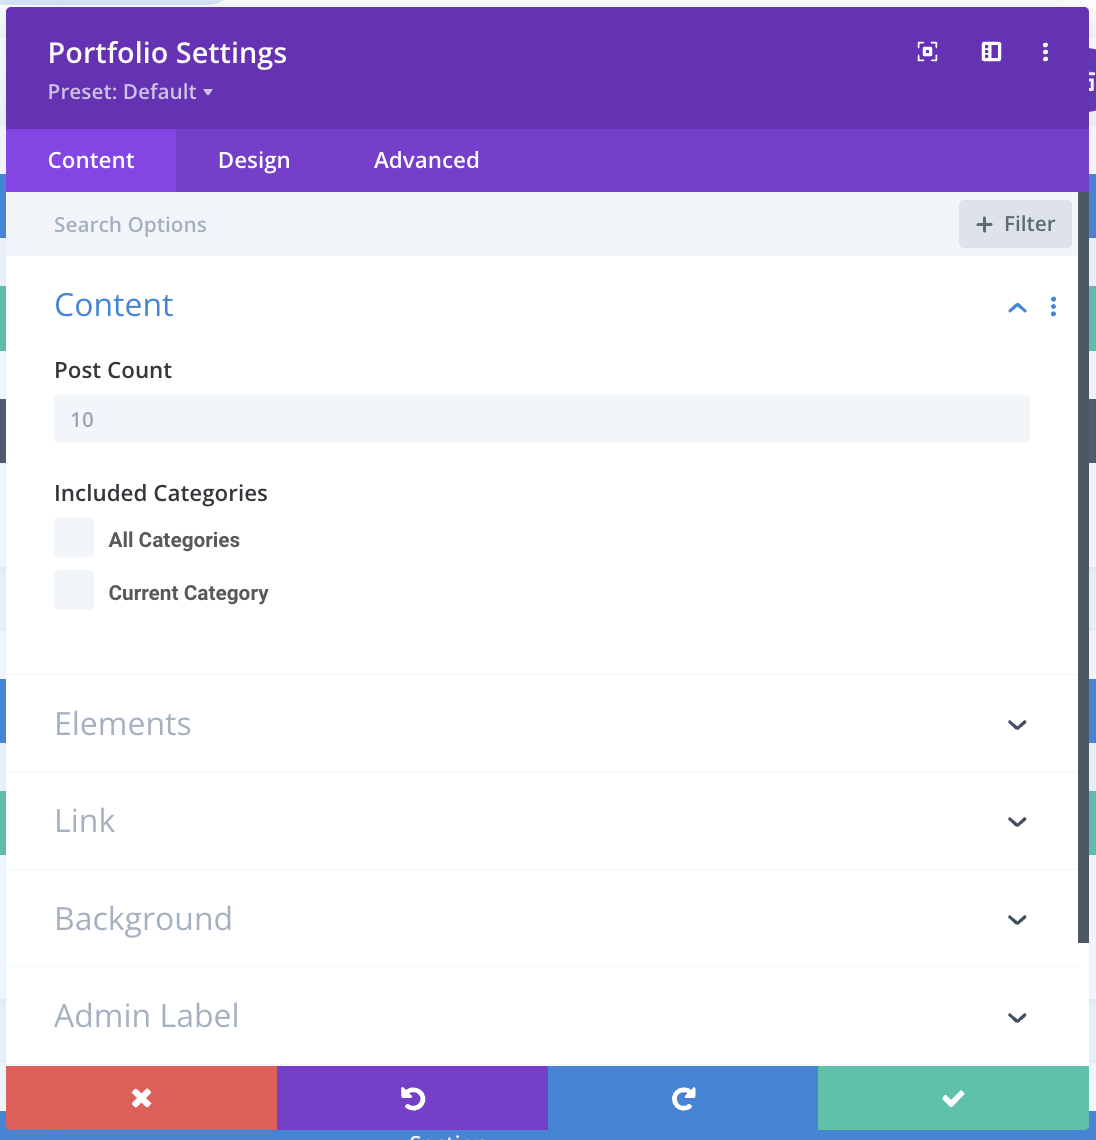
Then choose which project categories you’d like displayed. You can choose all or only specific categories.
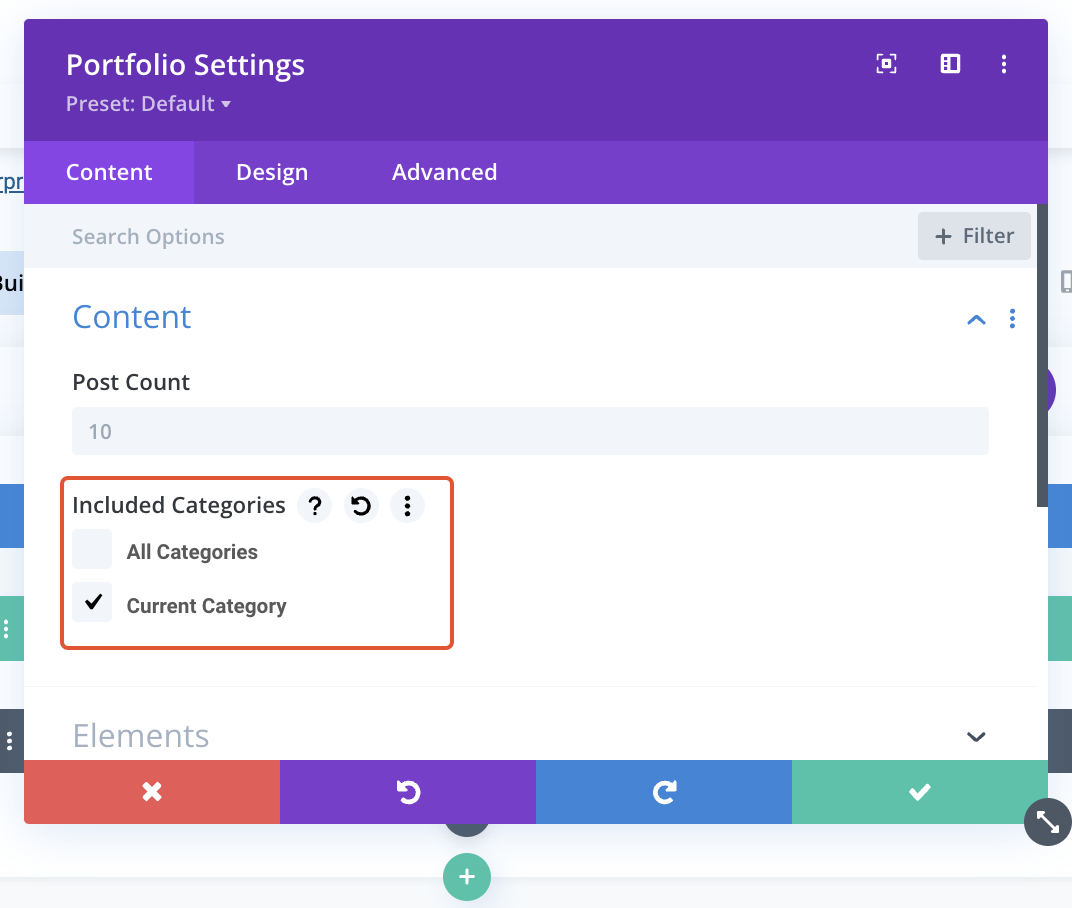
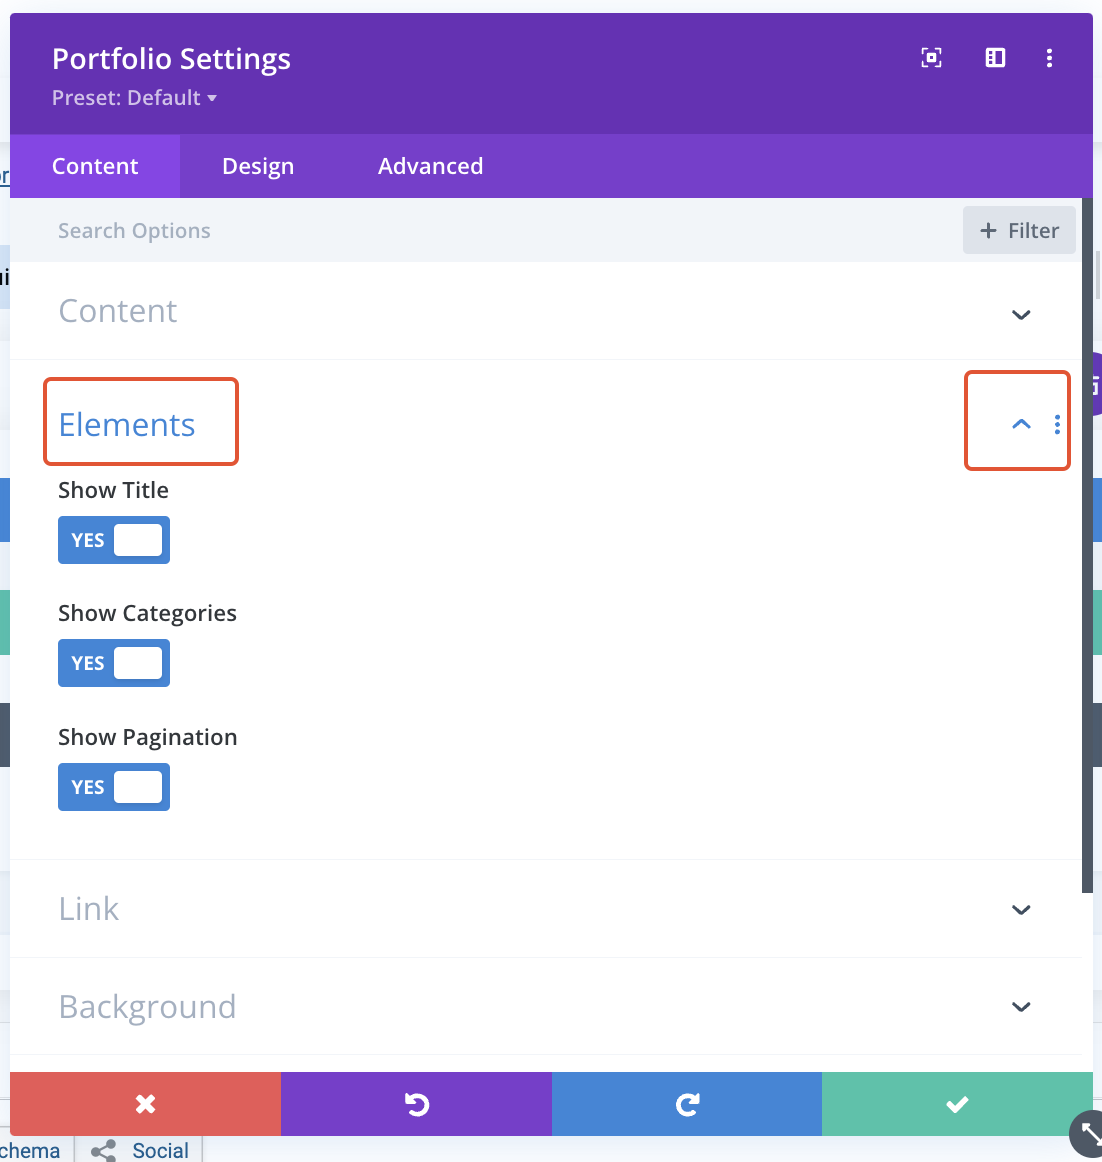
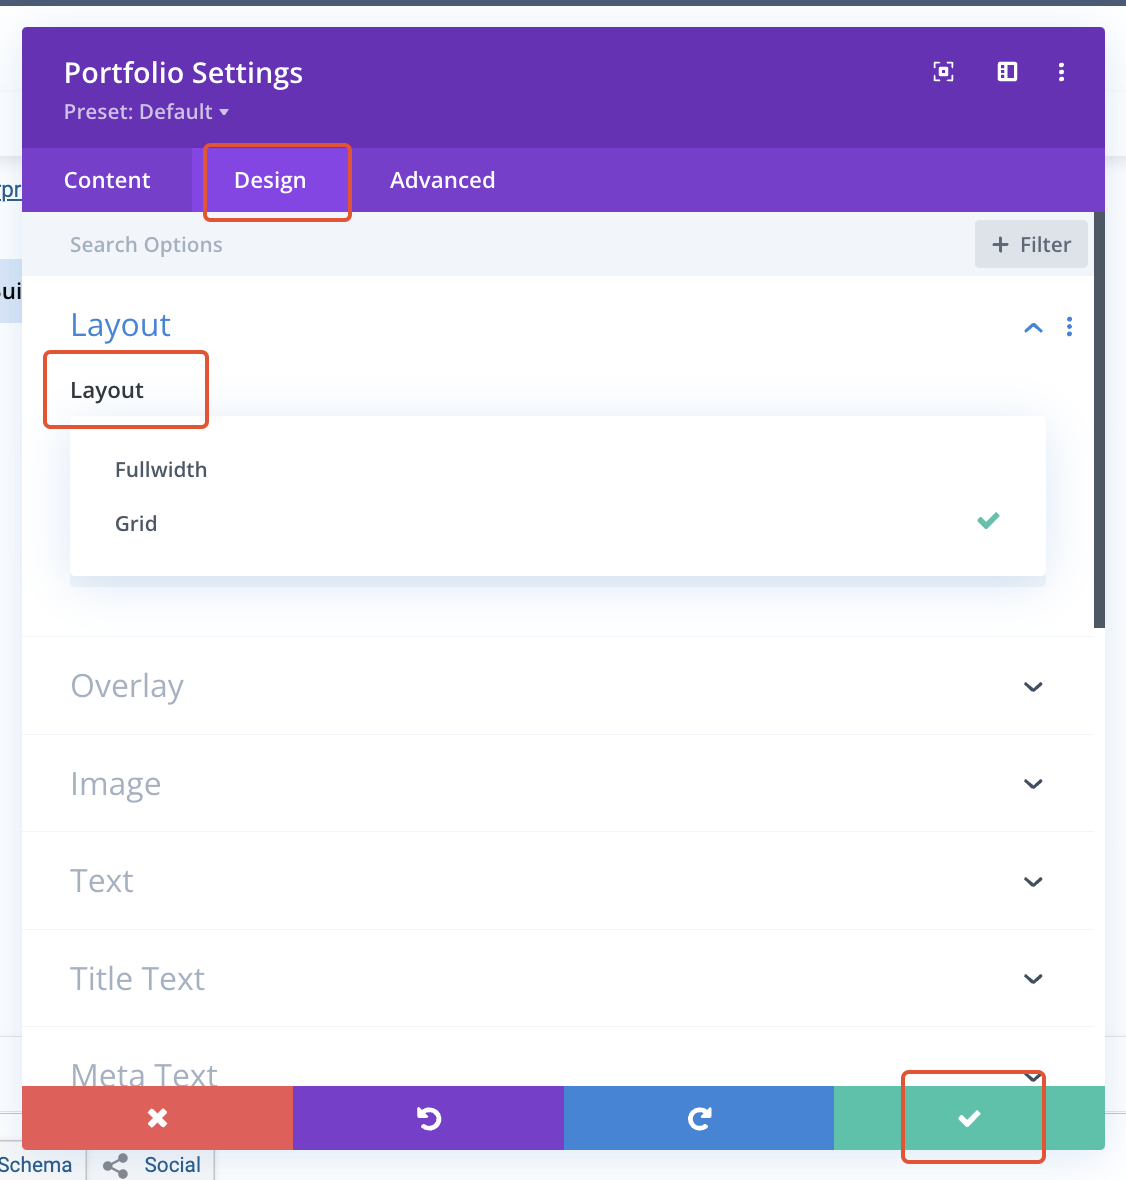
Scrolling down you will find other display options under the Elements tab. What we recommend for displaying your projects nicely on the page is to display them as a Grid. In order to do this go to the Design tab and click Layout. Click the dropdown and choose Grid.
Adding Projects To An Existing Page.
Sometimes you may not want to create a new page, you may want to add feature projects or your most recent project to an exsisting page like your Home page.
In order to do this, it’s very easy. All you will need to do is select a spot on the page you want to add your projects. Next add a new section then select the Portfolio Module and follow the steps mentioned above.
Lastly make sure you save and then close the Visual Builder.
NOTE: You will need to add your new page to you menu. How can I add items to my menu?
