NOTE: This applies to Executive customers only, who receive our pre-written email follow-up series.
As one of AIP Executive customers you’ll get access to our Follow-up email series. This is a series of 5 pre-written emails that you can add to your CRM or email marketing tool such as ActiveCampaign, MailChimp etc.
This tutorial will show you how you can add and customize the content of the Follow-up email series. First, we’ll go over 3 ways you can copy or download the content and then show you what parts of the content you’ll need to edit so the emails are personalized to your company.
Option 1: Copy Emails To Your Google Drive
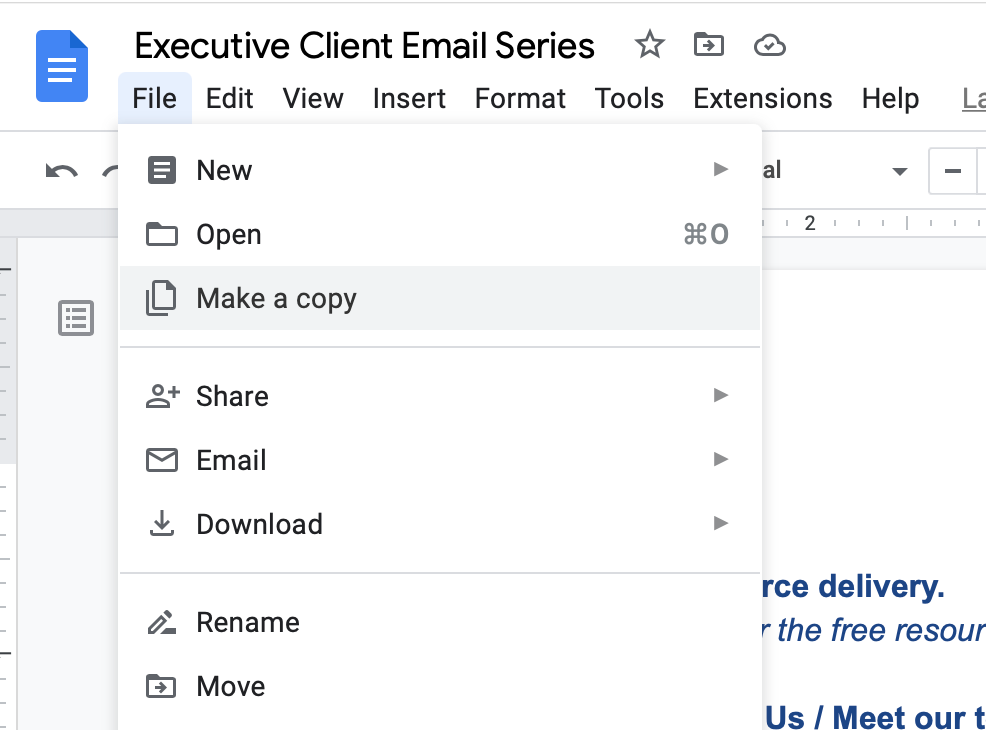
If you have an email with Google either a regular Gmail or one using Google Workspace you can easily add the email series to your Google Drive and editing the emails there. To do this click ‘File’ > ‘Make a copy’.
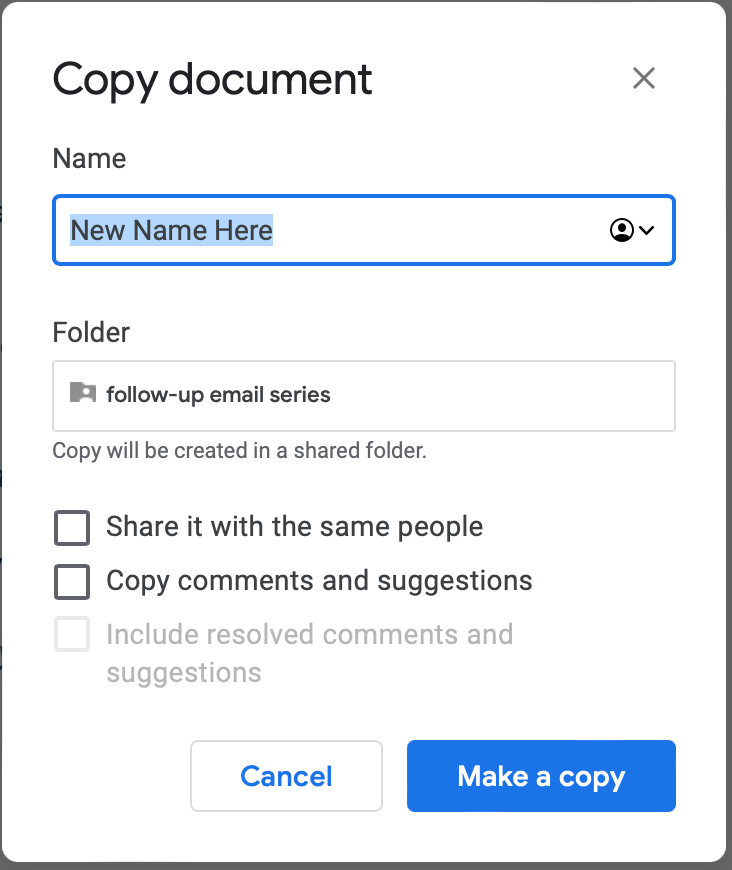
A window will pop up which will allow you to edit the name if you wish and select a save location. Then click ‘Ok’ and the file will be saved to your drive.


Option 2: Download As Microsoft Word, PDF Or Plain Text
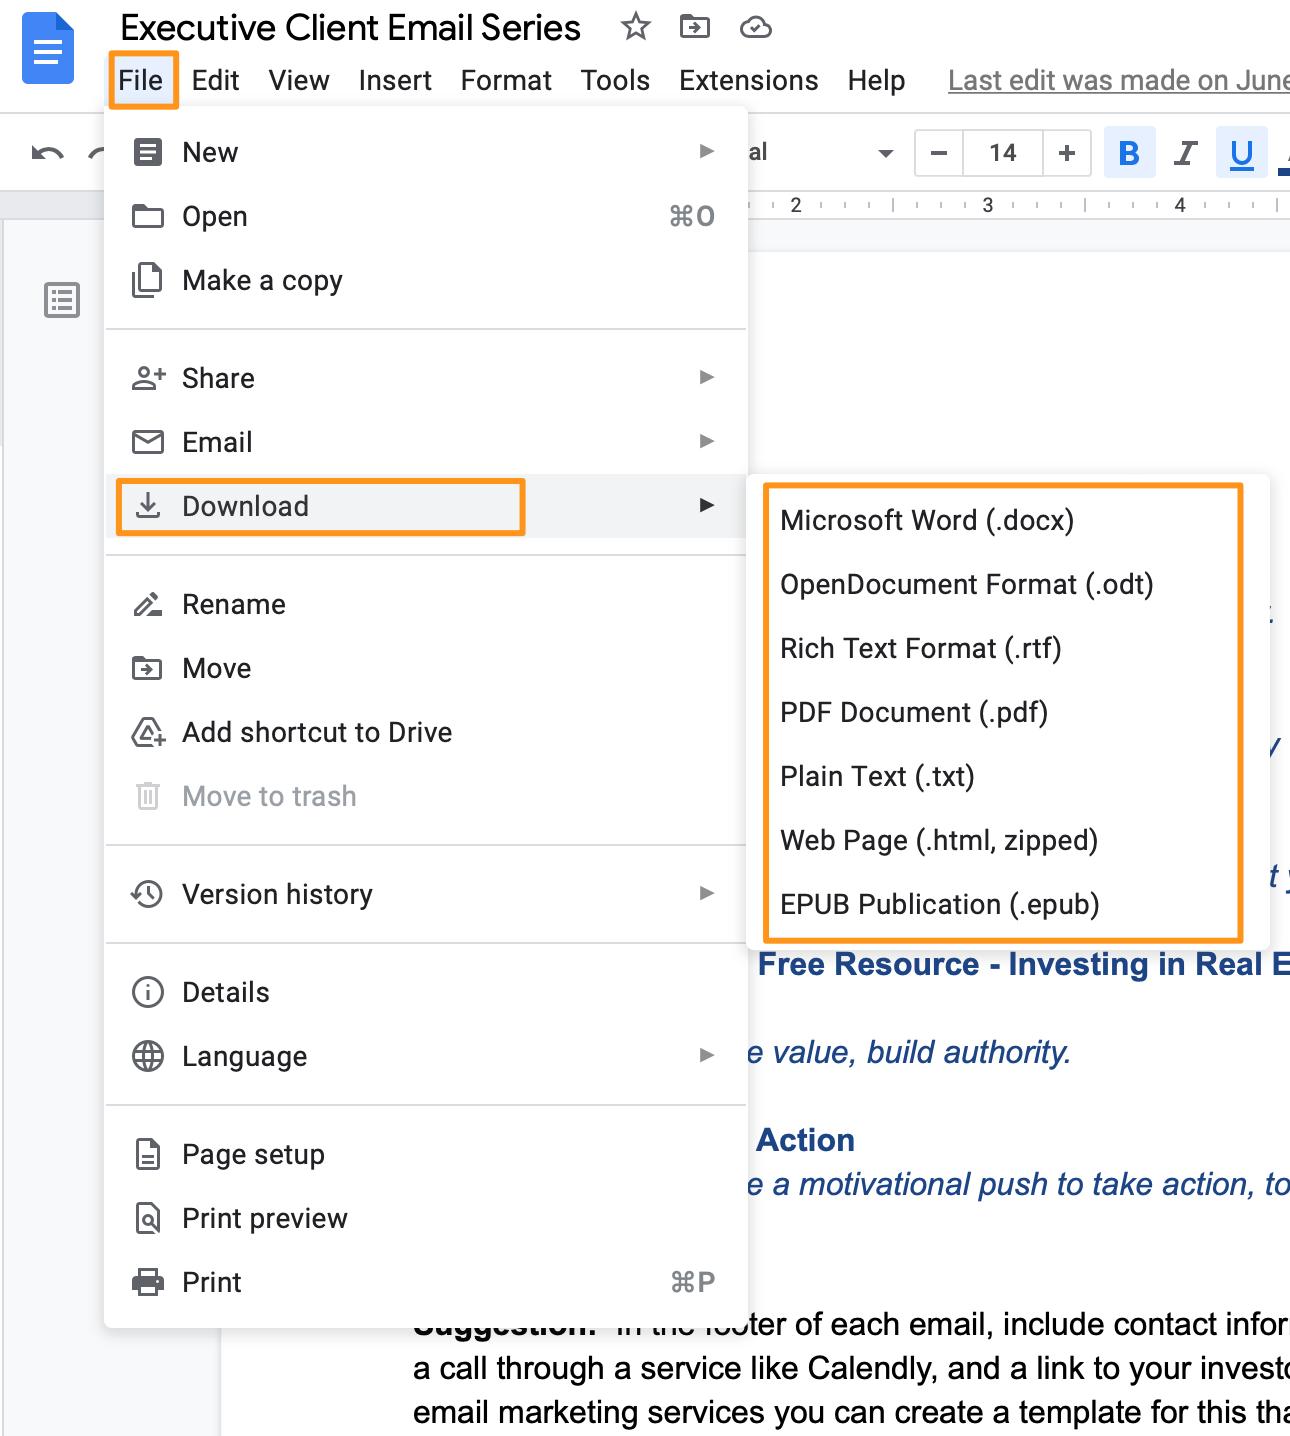
Now what happens if you do not have an email with Google? Well there is hope still. You do have the option to download the email follow up series file. Like option 1, click on ‘File’ hover over ‘Download’ and you’ll be given a number of options to choose from.

From here you can select Mocrisoft Word, PDF, Plain Text or any of these other options you’d like to use. Once you select one the download will begin right away and then you can start editing.
Option 3: Copy & Paste Directly Into CRM
The third option you have would be to copy each email and paste the content directly into the email you’ve created in your CRM or email marketing tool. However, before you hit send you’ll need to edit the content of the email first.
Editing The Emails
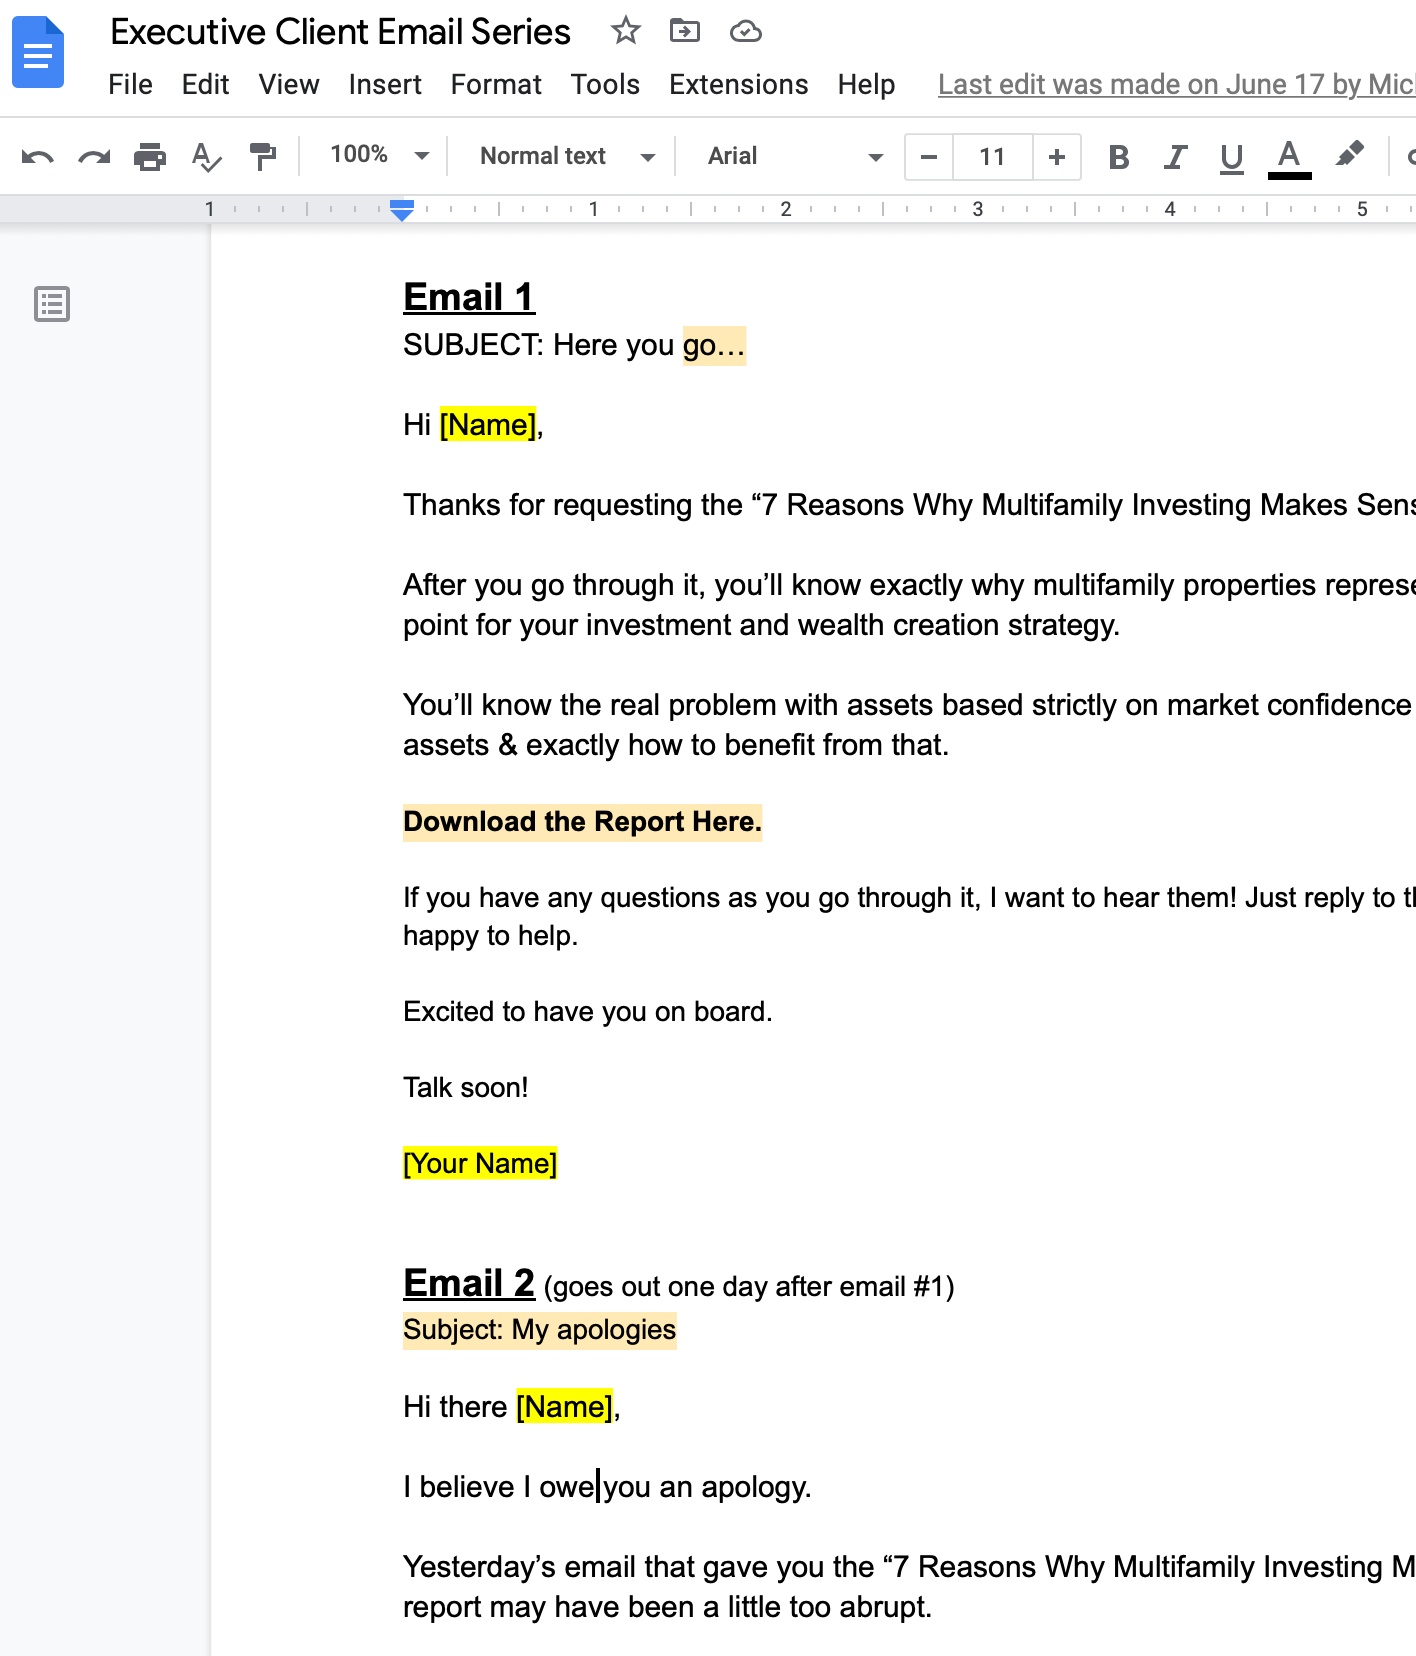
The last thing you’ll have to do is replace the placeholder text with your own information. As you look through the emails you’ll notice that some text is highlighted in yellow or an orange-ish color.
For example, at the beginning and end of each email you’ll see [Name] or [Your Name]. This you’ll want to replace with your name. Throughout the emails there will also be text that you should replace with information relevant to your company or that you can turn into a button.

In Email 2 there’s an entire section highlighted in an orange-ish color. This section is gives you an opportunity to tell others a bit about you. The existing text is an example and should be replaced with information about you and your company.
And that is it! Once the emails have been edited they are ready to be added into your CRM or email marketing tool. Be sure to double check for spelling errors and that all filler text has been replaced with the relevant info.
Instructions on how you can add the emails to
If you need any assistance, feel free to contact our support team.
