
If you have the Pro Plan and up, you’ll have access to a plugin called Hustle Pro. This plugin will allow you to create various types of optins for your website. In this article we’ll cover how to make a pop-up optin. However, the steps will be the same for all types of optins available for this plugin.
Step 1: Create An Integration
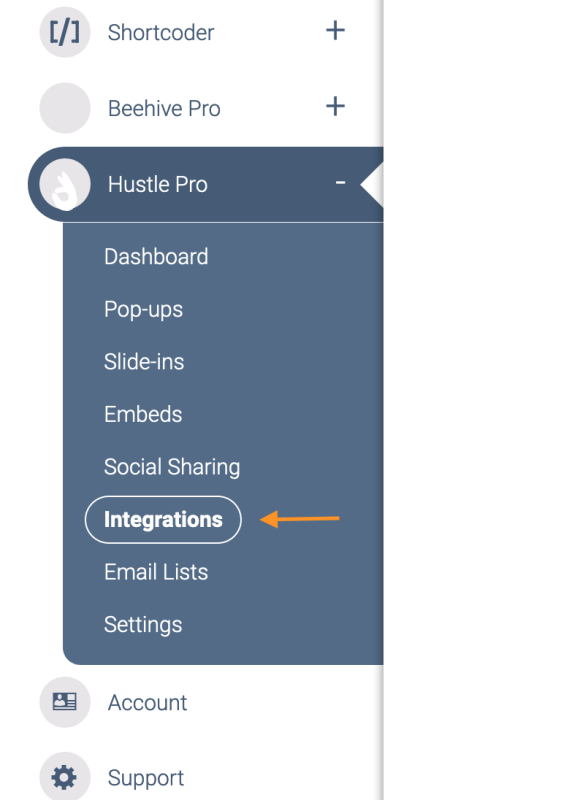
First what you’ll want to do is add an integration. To do this navigate to Hustle Pro and click Integration.
NOTE: Hustle Pro also allows you to store the information on your website. So if you do not have an account with a 3rd party services such as ActiveCampaign or MailChimp, you can still use the optin.
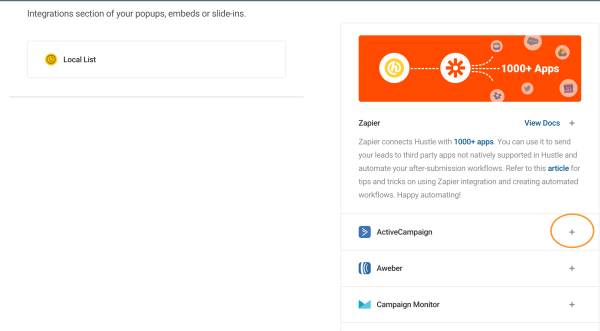
Once the page loads, you’ll need to scroll down a little bit and you’ll find a list on the right of all the 3rd party services you can connect to. Find the service you’re using and click the ‘+’ a pop-up will then appear where you’ll need to add the API Key and perhaps some other information.
NOTE: Because of the variety of 3rd party services available we can’t list out every detail that will be required to create the integration, nor do we have the information on where to find the needed info on your account. Please contact support of the service you’re using in order to find out where to find the API Key and other necessary information.
Step 2: Create The Optin
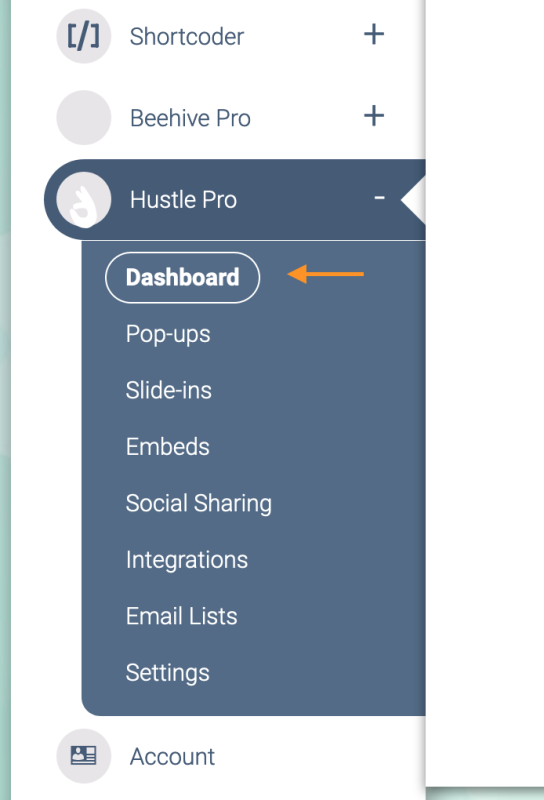
Once you have made the connection, then you can create an optin. Click Dashboard within Hustle Pro.
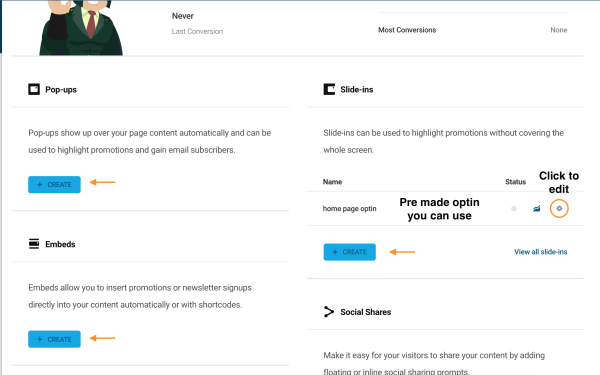
From here you’ll find a 3 different styles of optins you can make. There is already a pre-made optin you can use found under Slide-ins, but free to create a new one.
After you click create a pop-up will appear, you’ll need to give it a name and make sure you have Email Opt-in selected. Next step you’ll be given the choice to either select a template or build from scratch.
Step 3: Style The Optin
Once you select an option, you’ll be taken to the edit page where you’ll be able to edit every aspect of the optin. There will be a menu on the left where you can find the different settings to edit.
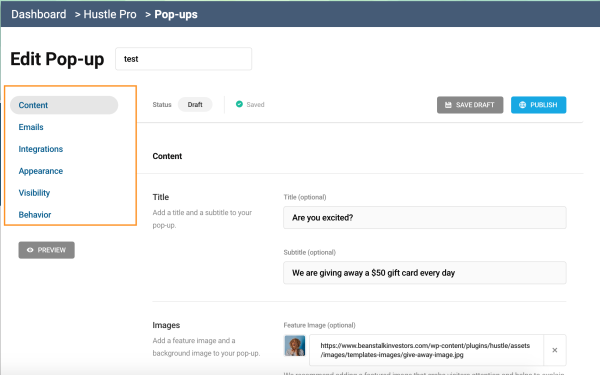
- Content – Add/edit the image you want to use along with the text for the optin.
- Emails – Add/edit the fields you want to use (i.e Email and Name) Option to show a success message to the visitors or redirect them to another URL on successful form submission.
- Integrations – Here you can send the pop-up’s data (i.e Email and Name) to a third party applications like ActiveCampaign or MailChimp.
- Appearance – Change the appearance of the elements in your optin such as Layout, typography, Form Fields, etc.
- Visibility – By default, your pop-up is set to appear everywhere on your website. Alternately, you can add more specific visibility rules to suit your needs.
- Behavior – The settings for where and how the optin will appear on the website.
Step 4: Save and Test
Once finished, click Publish and then check your website to make sure it’s working as intended. Try filling out the form as well to make sure the information is being sent to the right place.
IMPORTANT: If you run into any issues creating the optin or adding an integration, feel free to contact AIP Support for help. Please give as much detail as you can and if applicable a screenshot of the issue. This will help the Support team to provide you with the best possible support.