If you make a new page and want it to appear on the menu, or would like to change the order of items, this guide will show you how.
Adding Menu Items
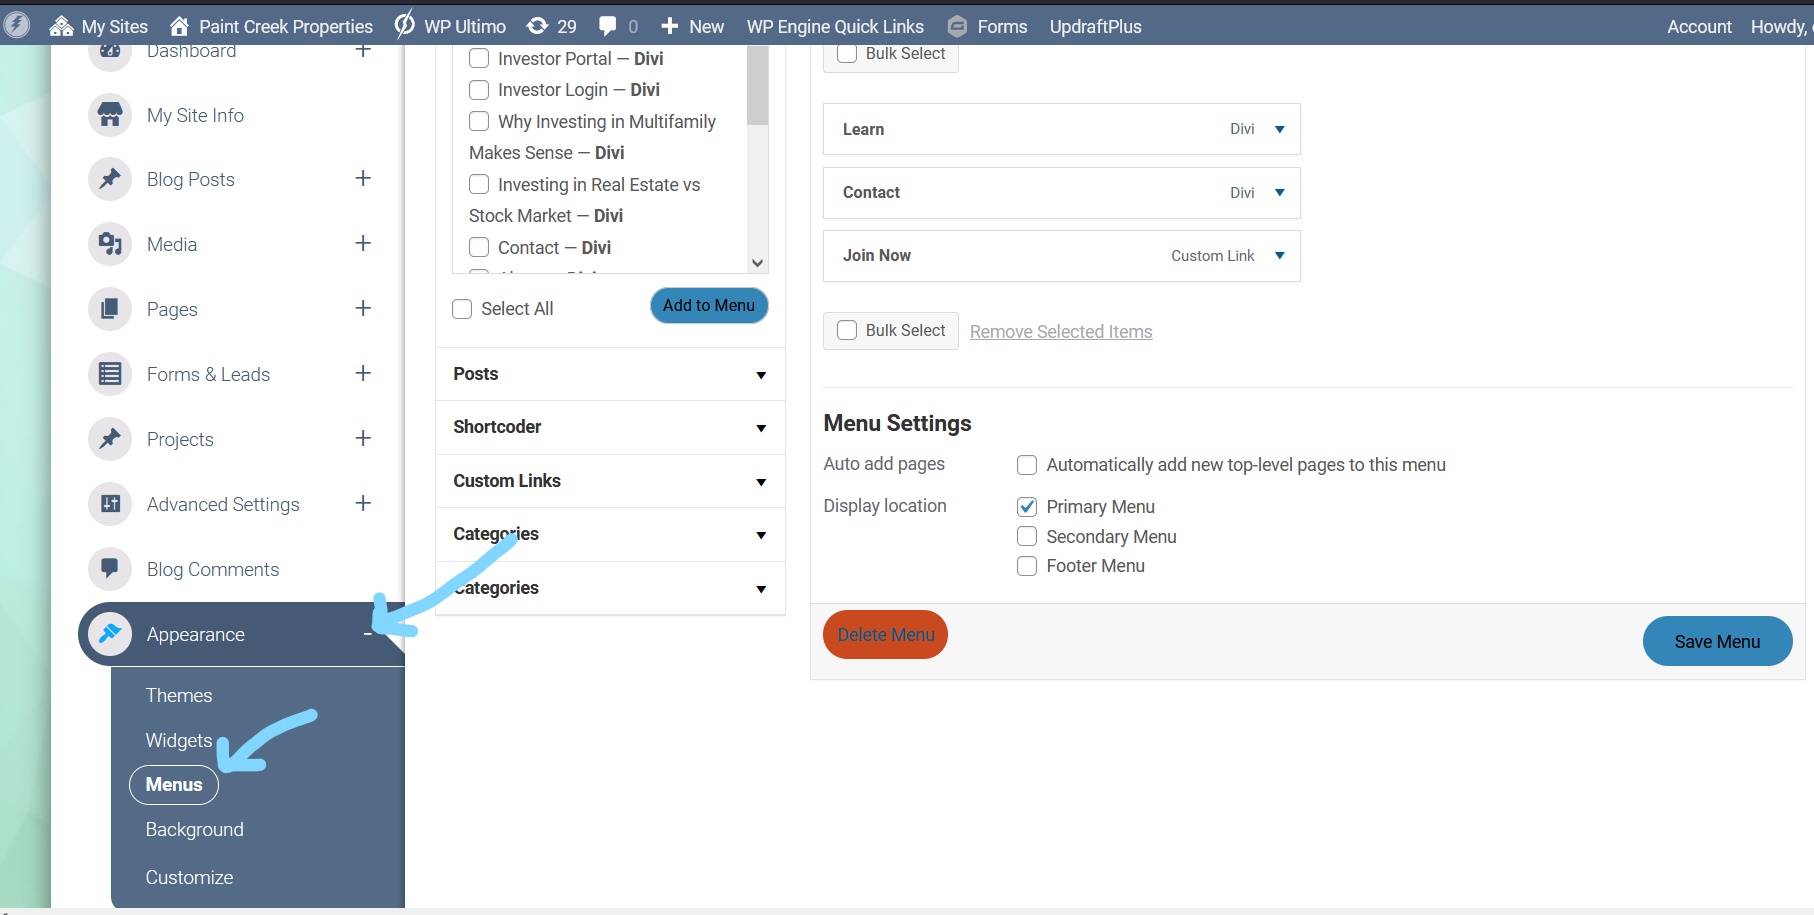
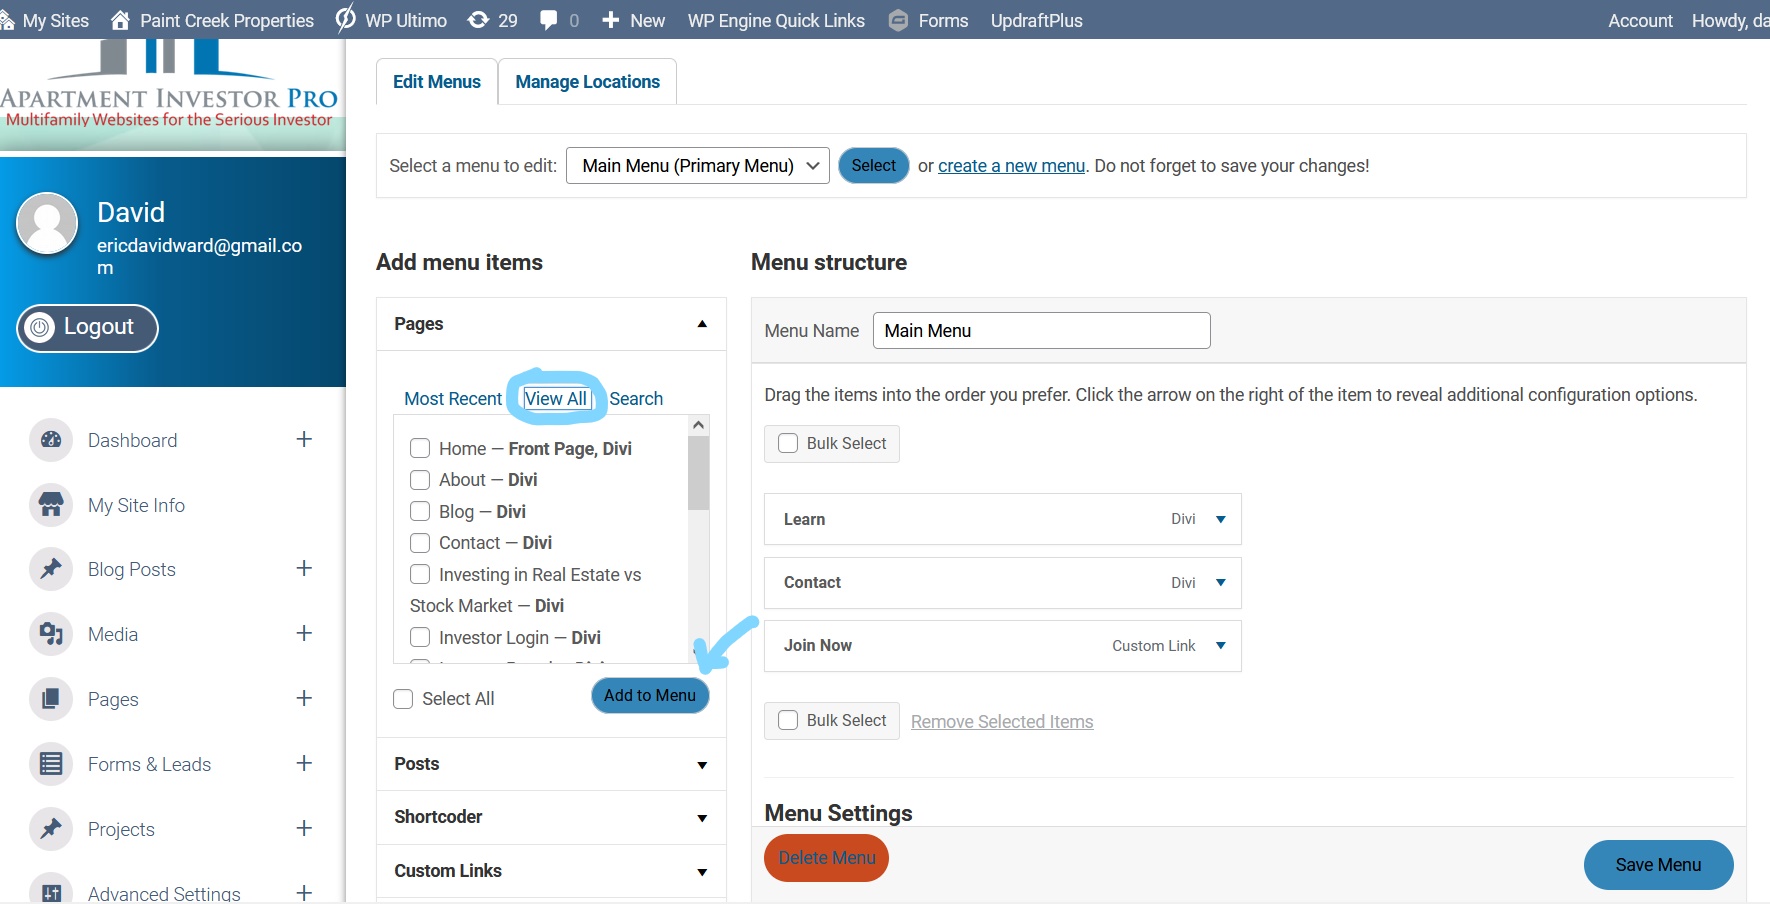
First thing you must do is log into your website. Then, on the left menu navigate to Appearances and select Menu. You’ll see and overview of the menu and on the left items you can add to your menu.


To add an item to your menu click the checkbox beside the item you want to add and then click Add to Menu.
NOTE: New items will be added to the bottom of the list.
Changing Menu Item Order
You’ll probably want to change the order of how your menu items are displayed when you add a new item. In order to do this simply click and drag the item you want to moved up or down.
Creating Sub-menu Items
Sometimes you may want sub-menu items in your menu. This again is also an easy process. Simply click and drag a menu item to the right, this will make it a sub-menu item of the menu item above it.
NOTE: You can make multi level sub-menus by continuously dragging multiple menu items to the right.
The last thing you’ll want to do is make sure you SAVE YOUR WORK. Then check the front-end of your website.
NOTE: If you have multiple browser windows open for your website you’ll need to reload the page to see changes to your website.
Adding a Custom Link
The edit menu page also gives you the option to add a custom link. This is useful if, for example, you have an investor portal with a 3rd party and want to add that link to your menu. Or if you have another website you own or an account with some 3rd party service and you would like to add a link to it in your menu.
To learn how to add a custom link to your menu, we have an article that talks in more detail about that very subject. The article also goes into explaining 4 ways you can add a custom link to different parts of your website.
If you have any issues adding a menu item or editing your menu, feel free to contact support.
